

AVAYA DOCUMENTATION CENTER
Find answers to your technical questions and learn how to use our products
Avaya Vantage Quick Start
Connecting a wireless handset
Use this procedure to connect or pair a wireless handset with your Avaya Vantage™ device. After pairing a wireless handset with your Avaya Vantage™ device, you cannot use the wired handset. You can pair only one wireless handset with a device at a time.
After you complete this procedure, you can use your wireless handset for calls as long as the handset is turned on. When the handset is turned off, you cannot use it for calls, but it is still paired with Avaya Vantage™.
Note:
When the wireless handset cradle is connected to your device, the device displays notifications that explain how to pair the handset and redirects you to the correct menu option.
Before you begin
-
Connect the handset cradle to your Avaya Vantage™ device.
-
Start up your Avaya Vantage™ device.
-
Charge the handset battery by placing the handset in the cradle.
-
Turn off the wireless handset.
- Lift the wireless handset from the cradle, and press and hold the top Power button for at least 15 seconds to enter the pairing mode.
ADDITIONAL INFORMATION:
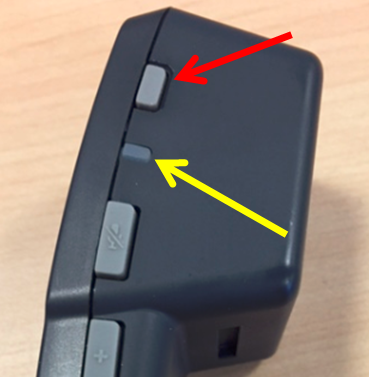 To indicate that the handset is in the pairing mode, the handset LED starts flashing 2 times every 1 second.
 - On the Home screen, swipe up to access all available applications on the device.
- Tap .
- Tap Pair new device.
STEP RESULT:Bluetooth® automatically turns on.
- In the list of available devices, tap the entry that matches the ID on the label on the bottom of the handset.
ADDITIONAL INFORMATION:The handset entry is displayed as Avaya-J100-XXXXXX, where the last 6 digits represent the unique ID of the handset.STEP RESULT:When pairing is successful, the list of currently connected devices indicates that the wireless handset is connected.The Connected devices menu displays tips related to pairing and connecting the wireless handset.