

AVAYA DOCUMENTATION CENTER
Find answers to your technical questions and learn how to use our products
Deploying Avaya Session Border Controller on Microsoft® Azure
Creating a managed disk from the VHD file
Use this procedure to create a managed disk from VHD file.
Note:
The screen examples shown in this procedure are shown to assist you using the Azure user interface. Your actual screens may differ than those shown here.
Before you begin
Create a resource group in the Azure Portal.
- Log on to the Azure Portal using your Azure logon credentials.
- In the Azure Portal search box, enter disks and press Enter.
ADDITIONAL INFORMATION:The system displays various results similar to the following example:
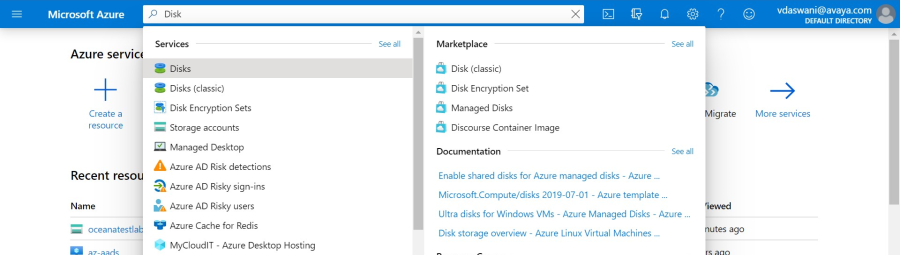
- Select Disks.
- Click Add.
ADDITIONAL INFORMATION:The system displays the Create managed disk windows similar to those shown in the following examples:
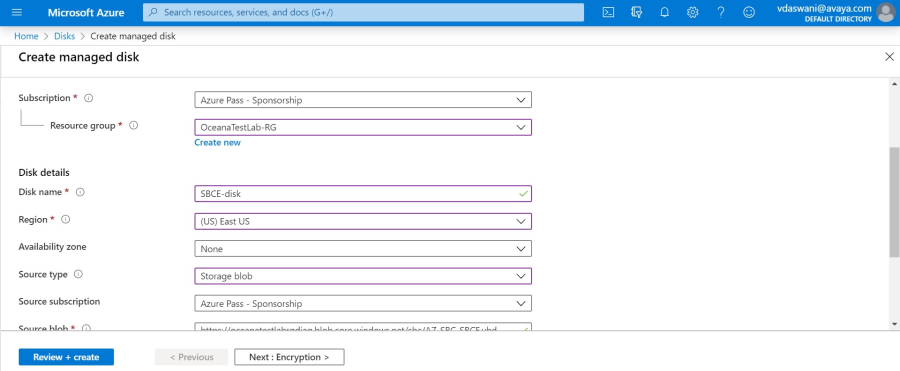
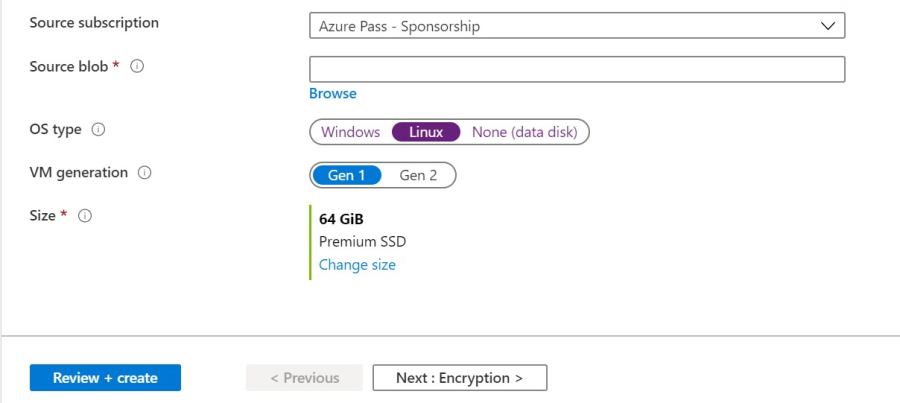
- On the Create managed disk window, configure the following options:
-
In the Resource group field, select a resource group you have configured.
-
In the Disk name field, enter the name of the disk you uploaded and converted.
-
In the Region field, select the region where the system is located. If you have an HA pair, you must have them located in the same region.
-
In the Availability zone field, an HA pair should be assigned to the same zone. Use None for all other configurations.
-
In the Source type field, select Storage blob.
-
In the Source subscription field, select the subscription you have purchased from Microsoft.
-
In the Source blob field, browse to where you stored the VHD file.
-
In the OS type field, select the operating system you want to use.Important:For disk0, you must select an operating system. Do not use None (data disk). The rest of the disk will be a data disk. When using a Generation 2 QCOW image, you must select Linux.
-
In the VM generation field, select Gen 2 for the Generation 2 QCOW image.
-
In the Size field, click the Change size link and select a size that is the same or larger than the size of the VHD file. Round up any values to the next highest round number value.
-
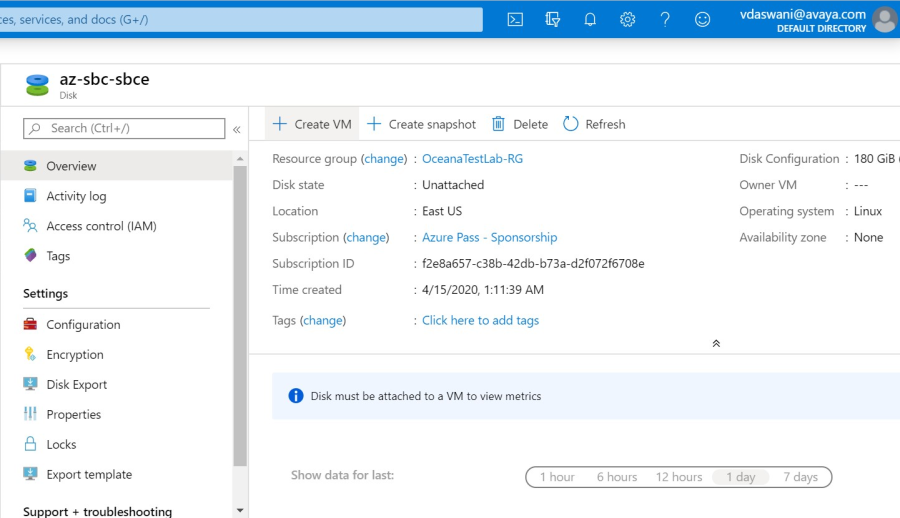
- Click Create.
ADDITIONAL INFORMATION:The system displays a screen similar to the following example:
 Note:For more information, see the following links: