

AVAYA DOCUMENTATION CENTER
Find answers to your technical questions and learn how to use our products
Installing, Maintaining, and Troubleshooting Avaya Solutions Platform S8300
Configuring ASP S8300 R6.0.x
Procedure
- Start an SSH session to 192.11.13.6. Login using the credentials: custadm/ACP130_pw. At your first login, you are prompted to change the default password and when successful the connection drops, and you need to connect and login again with the new password.
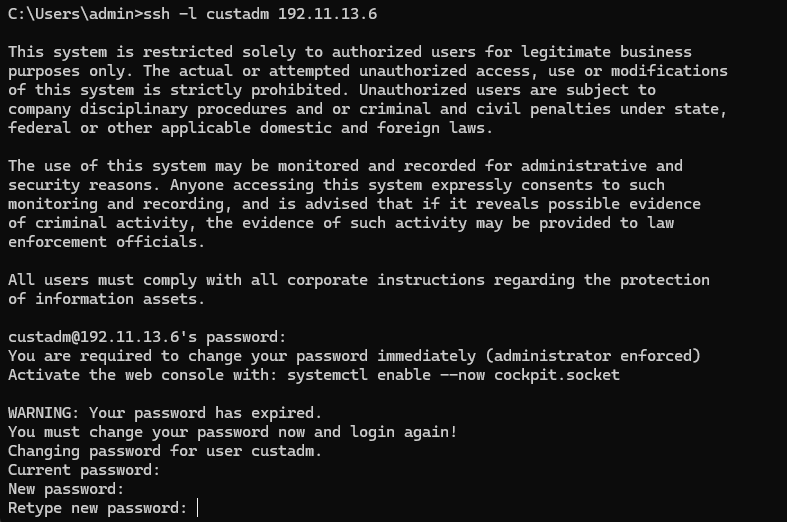
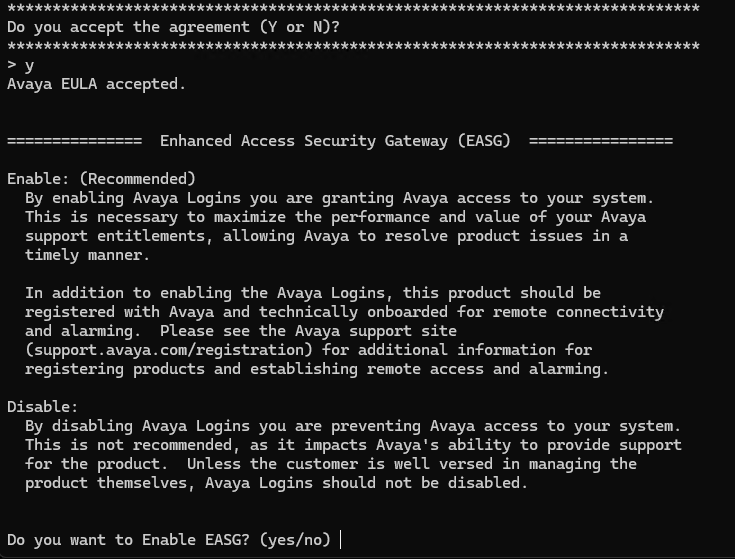
- After the new login as custadm with the new password, read and accept the EULA. (After the EULA is accepted, the Red Hat cockpit Web UI is accessible from the PC connected to the services port using the URL
https://192.11.13.6:9090). After the EULA is accepted, you are asked if you want to enable EASG. Avaya highly recommends that EASG be enabled to facilitate expedient troubleshooting.
- Configure a new password for the root account, followed by time zone.
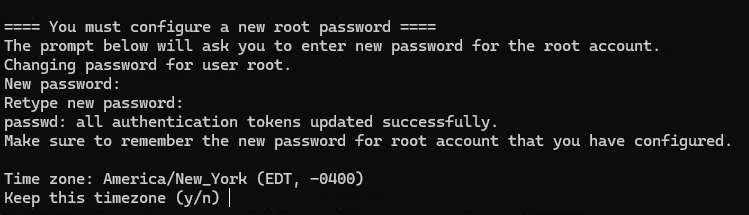
If the wrong time zone is selected, answer n to the question to keep this time zone and follow the prompts again.
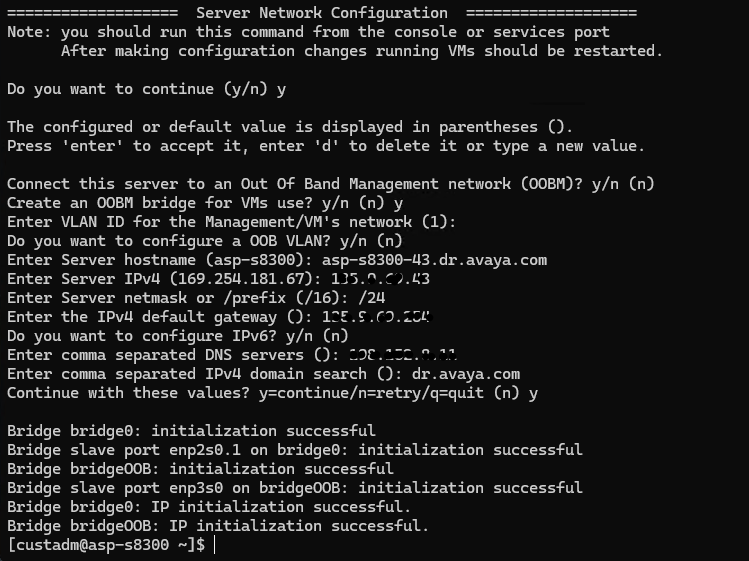
- Next you will be prompted to configure a hostname, IP address, default gateway, and DNS server. Later you can use the configNetwork command to change values. After an IP address is configured, the Cockpit Web UI is accessible from any other machine on the network using the IP address configured and port 9090. For example,
https://<KVM host IP Address>:9090Note:The default VLAN (1) is usually correct, but it can be configured on the gateway to any other value by entering a different vlan interface and issuing the icc-vlan or server-blade-vlan command on the Media Gateway (G4X0). Make sure the VLAN matches the gateway configuration by running show icc-vlan on the G430 or show server-blade-vlan on the G450.
- Run the command ip addr and verify your network information is correct. An active network link needs to be connected for IP information to display.
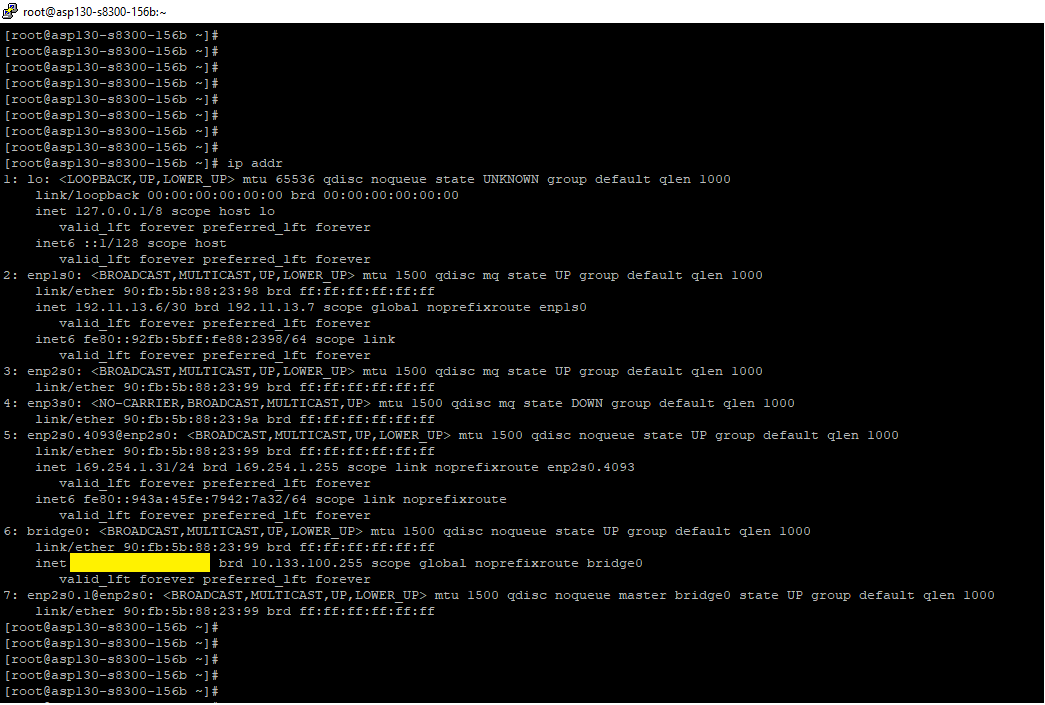
Note:Other CLI verification commands can be executed such as swversion, ifconfig, or netstat -nr.
- Login to the Cockpit Web UI by opening a browser and enter the IP address you assigned to as Server IPv4 and append port 9090 to it (
https://<KVM host IP Address>:9090). Login and verify system parameters. Login using credentials: custadm and your chosen password. The picture below is accessing the Cockpit Web UI using the services port (192.11.13.6:9090).
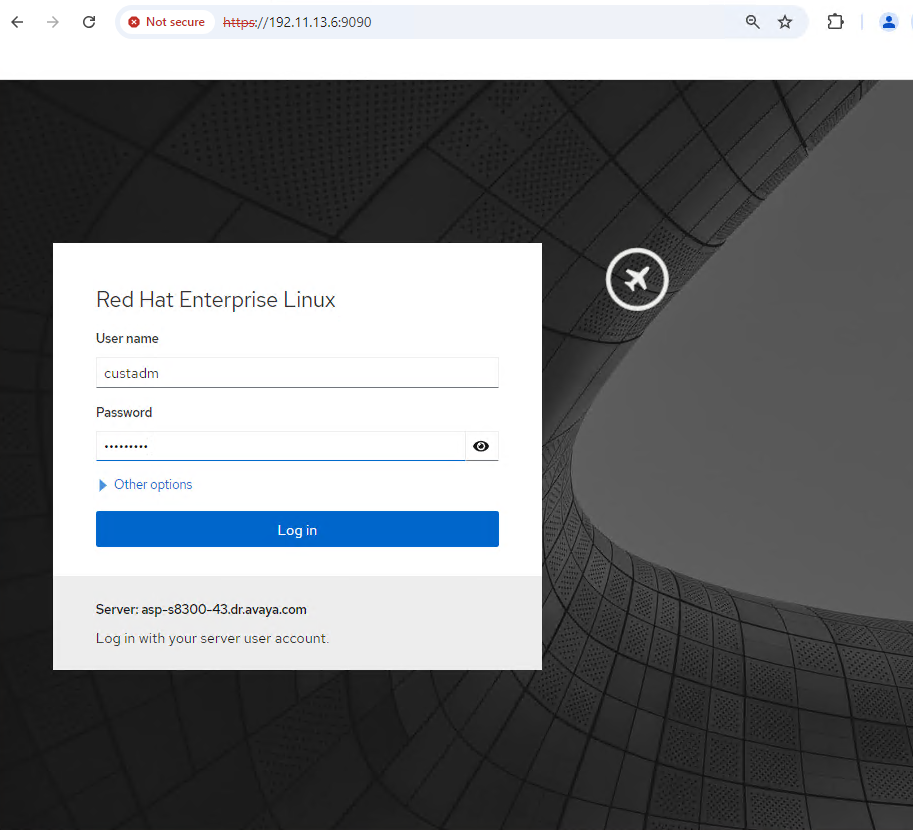
- For administration actions you need to click on the button labeled Limited access.

- Enter the password for custadm at the message box and click Authenticate.
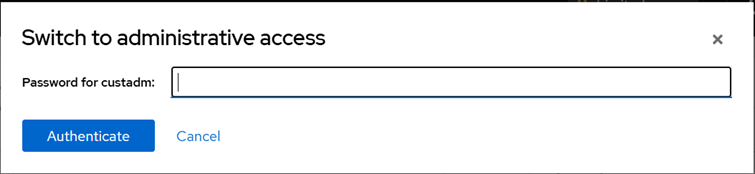
Note:Administrative access means root equivalent access. Be careful with what you do.
- Verify that the Performance profile and the Cryptographic policy matches the image below. This indicates that the installation completed successfully.
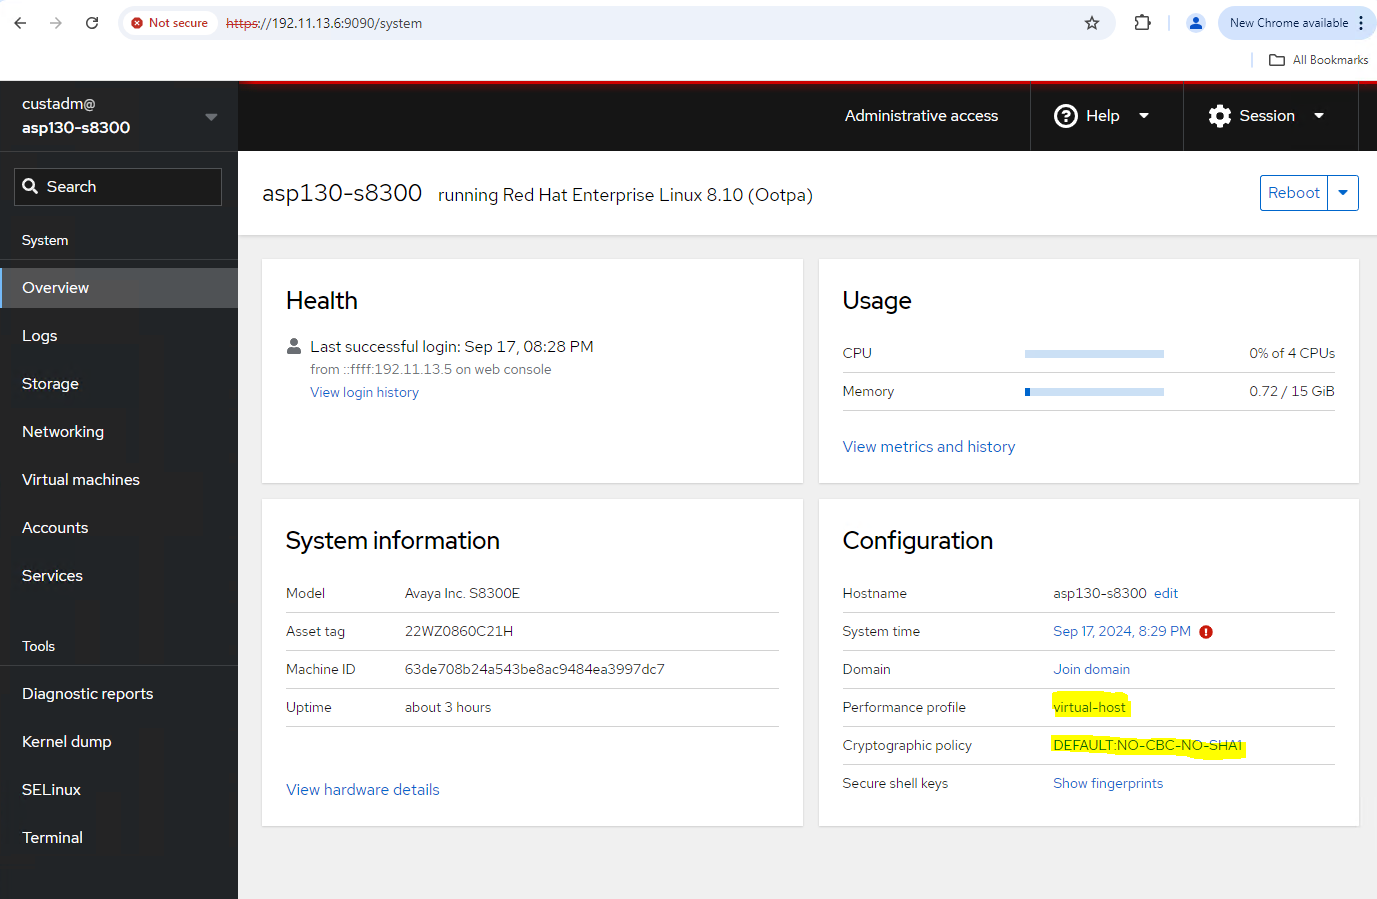
Cockpit is now available for additional configuration and deployment of VMs.
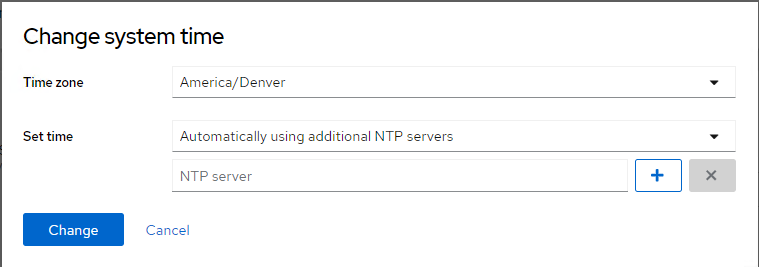
- Configure NTP server by clicking on the value of the System time field (Turn on administrative access). In the Set time field, change the combo box to “Automatically using additional NTP servers”. A new field for NTP server is shown.
The system defaults to the RHEL 8 default NTP pool configuration. But those often do not work from within customers’ networks and it is considered a best practice to have the hosts configured to an authoritative time (NTP) server. For security reasons, Avaya recommends synchronizing the clock with a time server that is located on the management network (Customer private network) rather than directly with a time server on a public network.
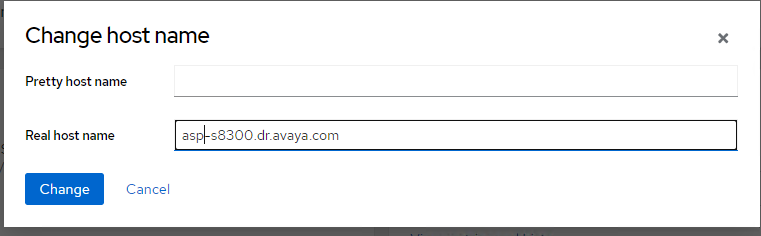
- The hostname (along with domain) can be also changed by clicking on Edit beside the Hostname field in the Overview page. Enter the hostname (along with domain) in the Real host name field and click Change. The Pretty host name field can be left blank.
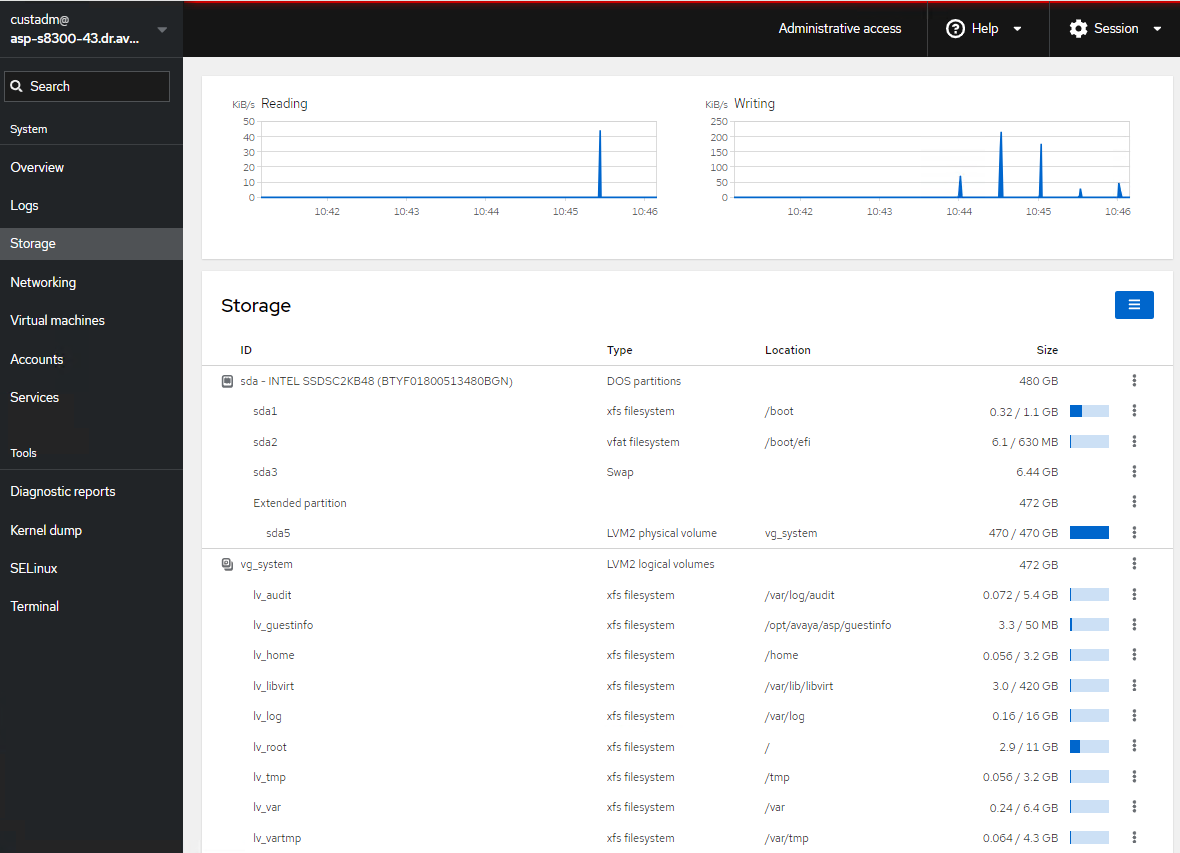
- The screen shot below shows the partition where virtual machines should be deployed (/var/lib/libvirt). Within this partition a directory, /var/lib/libvirt/images is created and is intended to store the VM disk images that will be used for VM deployment.
Note:
The sda5 LVM2 physical volume is fully allocated for volumes, the cockpit shows the allocated and not the used space so it is normal that it appears to be full.
- The following sda2 warning (yellow triangle) can be ignored if it matches the message shown below. Any other warnings MUST be investigated. Reach out to Avaya Services if necessary.
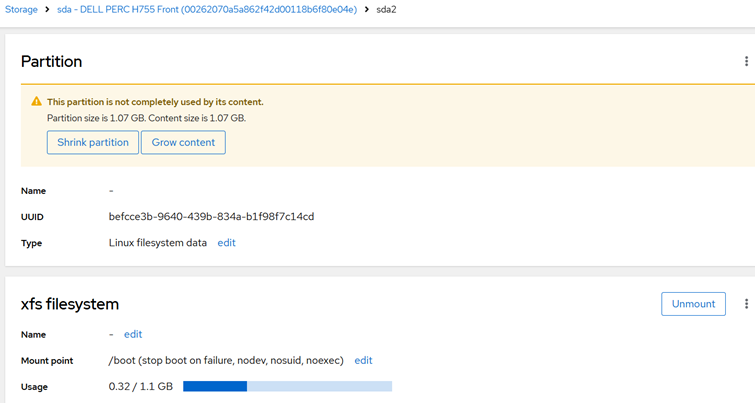
Note:Do not attempt to shrink or grow the disk volumes.