AVAYA DOCUMENTATION CENTER
Find answers to your technical questions and learn how to use our products
Administering Avaya Experience Platform for supervisors
Cert-based SSH Login
System Manager doesn’t provide user access to the command-line interface (CLI) by default. However, administrators can provide Base OS privileges so other users can get CLI access as well. In the default set of roles, only a System Administrator or Auditor have Base OS access. However, customers can create their own custom roles as well, in which case Base OS can be added as needed.
Once a user has been created and given Base OS access, that user must first setup a certificate-based web GUI login. See the “Cert-based Web GUI Login” chapter of this document for details about how this can be accomplished.
After these prerequisites are met, the user can get CLI access via the following steps:
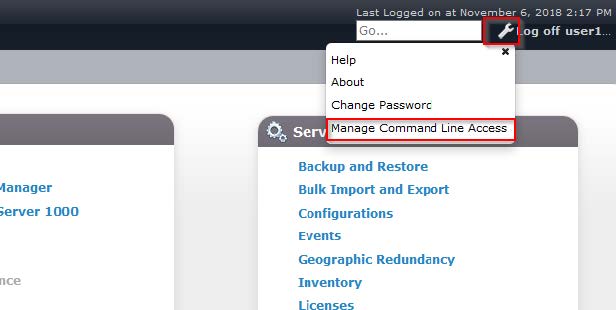
Login to the SMGR Web GUI using certificate-based access.
Click on the Tool icon in the top-right corner of the SMGR dashboard, and then select Manage Command Line Access:
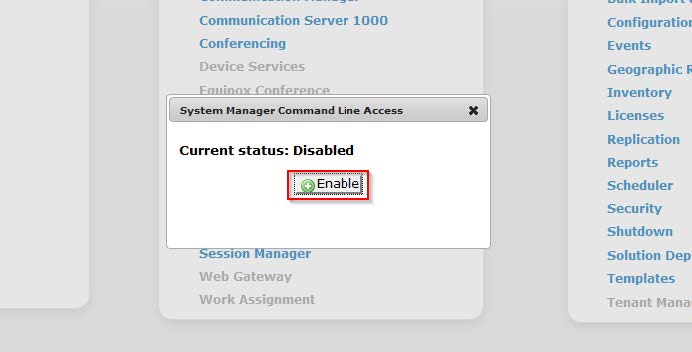
Click on the Enable button to enable CLI access. Behind the scenes, SMGR will create a user in the SMGR OS that matches the username of the current user:
-
Next, ensure that the user’s certificate is loaded in the Windows trust store. If the user logged-into SMGR with a certificate while using Internet Explorer, the rest of this step can likely be skipped. However, if the user logged-in with a cert-based login on Firefox, these steps will need to be considered. Firefox currently has its own certificate trust store, while Internet Explorer and Google Chrome use the Windows system trust store.
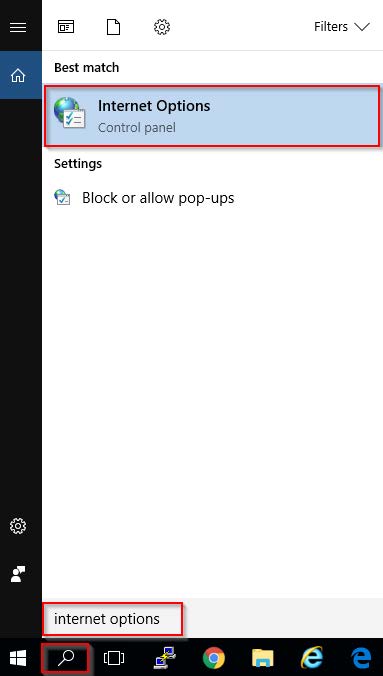
First, open the Internet Options window. For Windows 7 and later, this can be done by searching for Internet Options, as in the screenshot below. Alternatively, a user can also find Internet Options in the Control Panel.
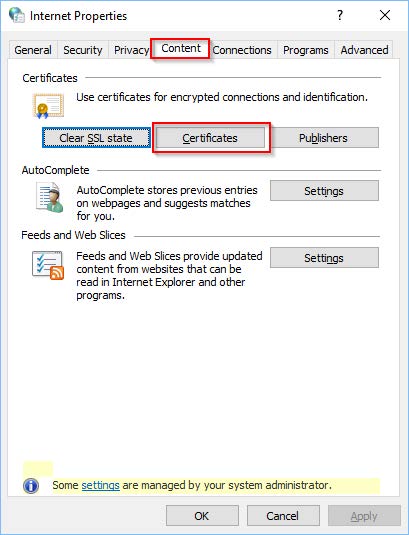
In the Internet Properties window that opens, select the Content tab and then click on the Certificates button:
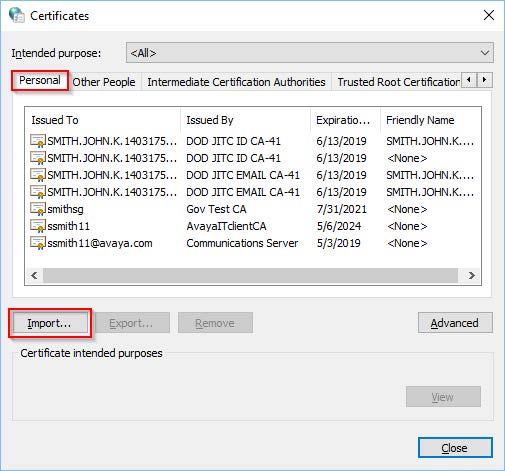
A Certificates window will open. Click on the Personal tab and look for the certificate for this user. If the certificate is already present, skip the remaining sub-steps in this step and continue to the next step for downloading the Putty-CAC program.
If the user’s certificate is not present, click on Import:
The Certificate Import Wizard will open. Click Next to continue to the File Import page. Browse for your PKCS12 certificate and then click Next:

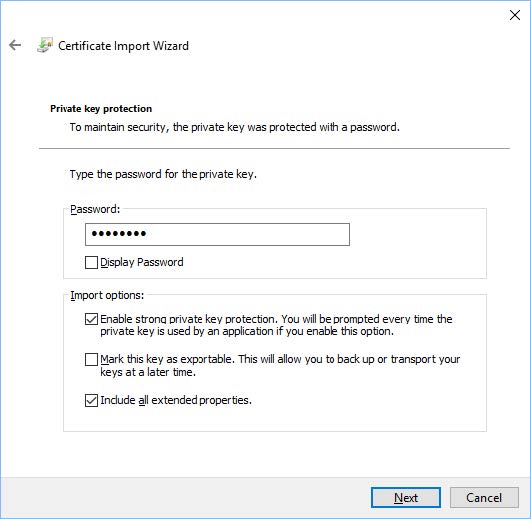
Enter the password for the PKCS12 archive and click Next:
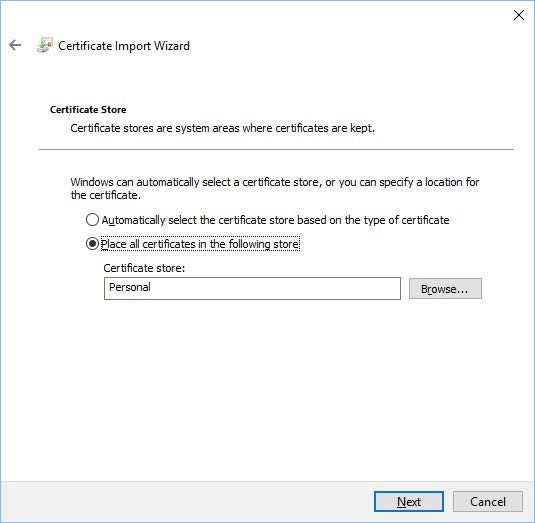
Select the certificate store to use – typically Personal will work well:
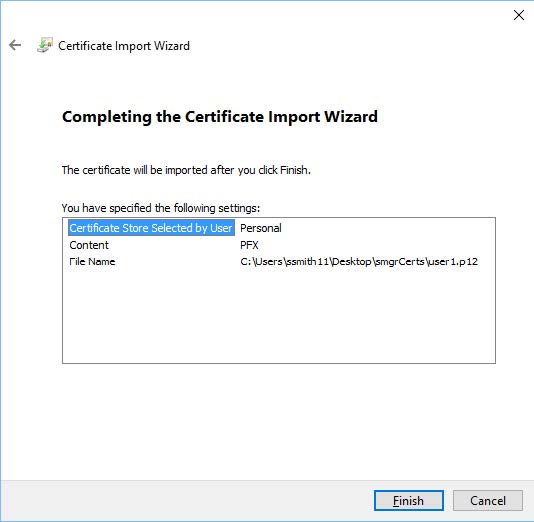
Review the information on the final page and click Finish:
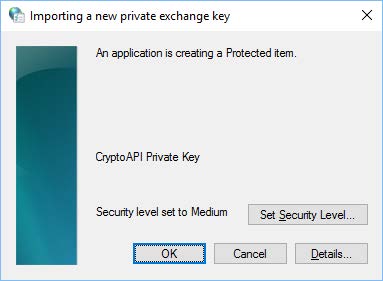
In the resulting pop-up window, click OK to complete the import process:
Click OK to close the Internet Properties window.
At this point, the user’s certificate is loaded in the Windows trust store and SMGR is configured to allow the user to login on the CLI. The next step is to download the Putty-CAC program to facilitate certificate-based CLI logins.
Download the latest Putty-CAC from here: https://github.com/NoMoreFood/putty-cac/releases
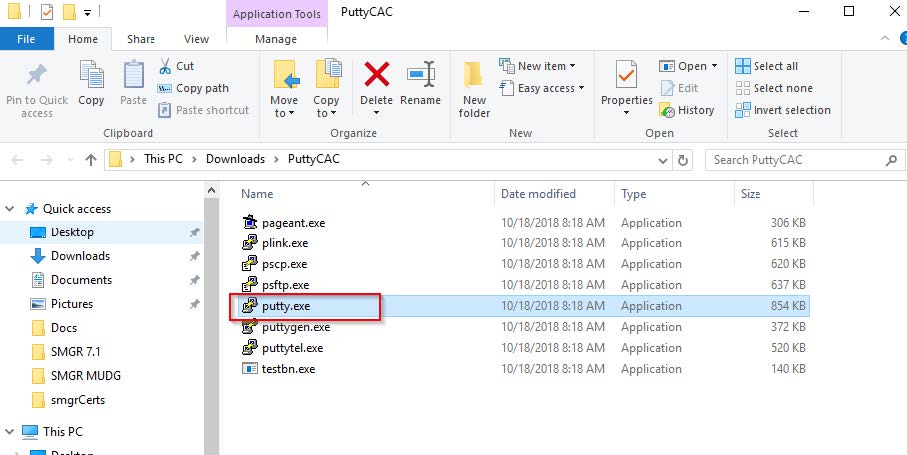
Find the latest release and download the 32-bit or 64-bit ZIP file that contains all the executables. If unsure of which bit-depth to use, 32-bit should work on any platform without much of a performance impact. Extract the ZIP file to a new folder to see the list of executables, and double-click on putty.exe to setup a connection:
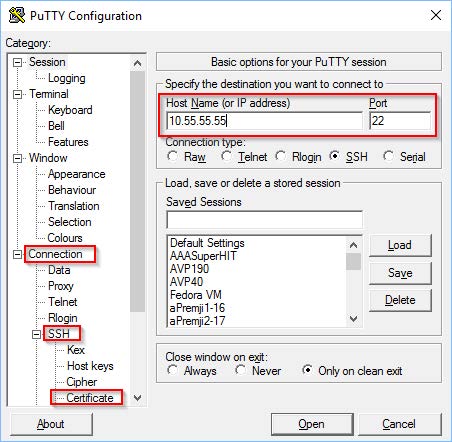
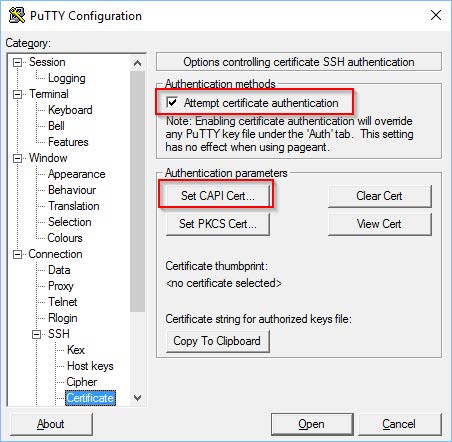
When the putty executable opens, type in the hostname or IP address of the SMGR, and use SSH over port 22. Next, in the left menu, expand Connection and then expand SSH. Finally, click on Certificate.
In the next screen that opens, select the checkbox for Attempt certificate authentication and then click on Set CAPI Cert.
-
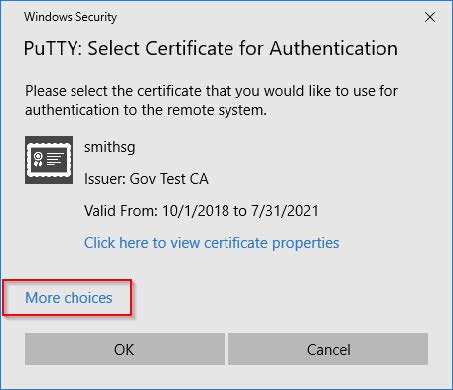
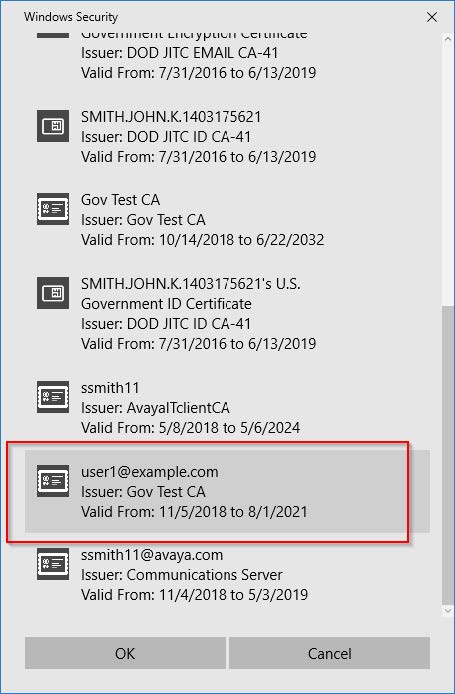
The next screen prompts for the certificate that will be used for the connection. Click OK to select the default certificate that is being displayed or click on More choices to find a different certificate.Note:
Only certificates that have been loaded into the Windows Certificate Store will be available for selection – see the certificate loading steps earlier in this section, if needed.
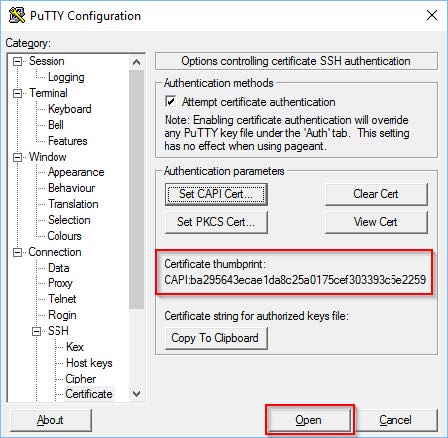
Once the certificate is selected, the PuTTY window will show the certificate’s thumbprint to indicate which certificate will be used. Click Open to start the connection.
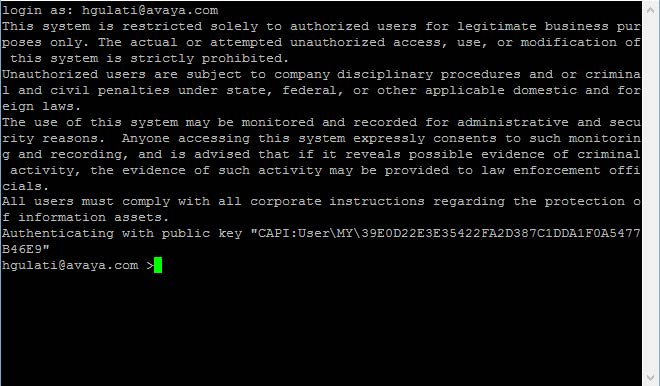
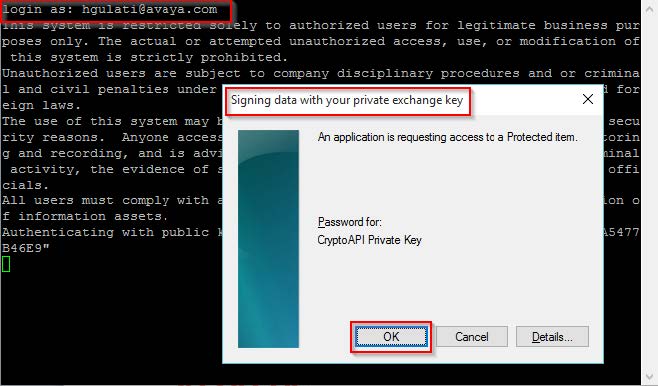
When prompted, use the username that corresponds to the selected certificate – in the example below, the user is hgulati@avaya.com. A Signing data with your private exchange key window will open – click OK to continue.
Once the key is accepted by the system, the user will be logged in: