AVAYA DOCUMENTATION CENTER
Find answers to your technical questions and learn how to use our products
Installing and Administering Avaya J100 Series SIP IP Phones in Avaya Aura®
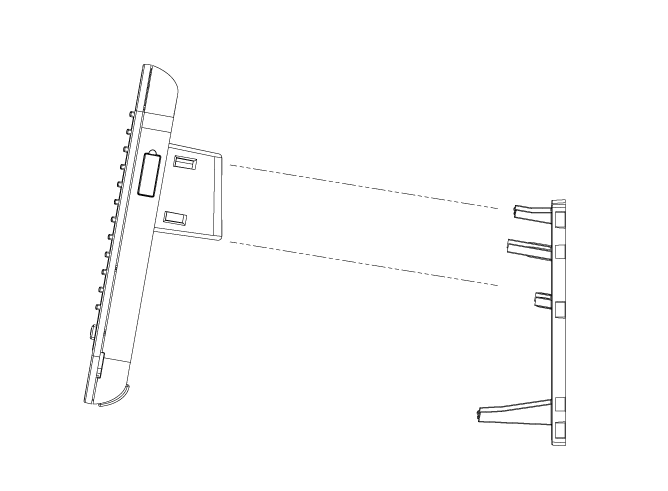
Wall mounting Avaya J100 Expansion Module
About this task
If you have mounted your phone on the wall, you must additionally install the wall mount for the Avaya J100 Expansion Module. You must separately purchase the wall mount for the expansion module. The part number of the wall mount kit is 700514338.
Before you begin
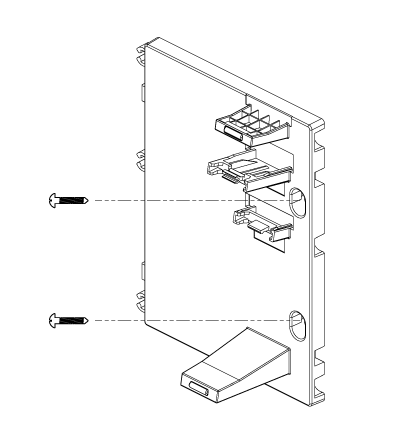
Obtain the following items:
Wall mount kit, containing a wall mount bracket.
Two #8 screws. The screws are not provided with the wall mounting kit.
Link for connecting expansion module for Avaya J189 IP Phone that comes along with the kit.
Procedure
- Place the expansion module bracket to the right of the phone bracket, mark and drill holes, and then affix the #8 screws.
Note:
Use the link for installing wall mounting kit of Avaya J189 IP Phone.
- To attach the Avaya J100 Expansion Module to the wall mount bracket, insert the upper tab of the bracket into the slot on the back panel of the expansion module.