AVAYA DOCUMENTATION CENTER
Find answers to your technical questions and learn how to use our products
Installing the Avaya Solutions Platform 130 Series
Configuring SNMP v2c using iDRAC9
About this task
You can configure SNMP v2c traps for Dell R640 Avaya Solutions Platform 130 Appliance servers using the iDRAC9 interface.
Note:
Avaya recommends the more secure SNMPv3 protocol be implemented. Use of SNMPv2 may result in security scans reporting vulnerabilities.
Before you begin
Log into the iDRAC9 web interface using the IP address and login details that were specified while configuring the iDRAC. See the Avaya Solutions Platform 130 Series iDRAC9 Best Practices document for configuring the iDRAC.
Procedure
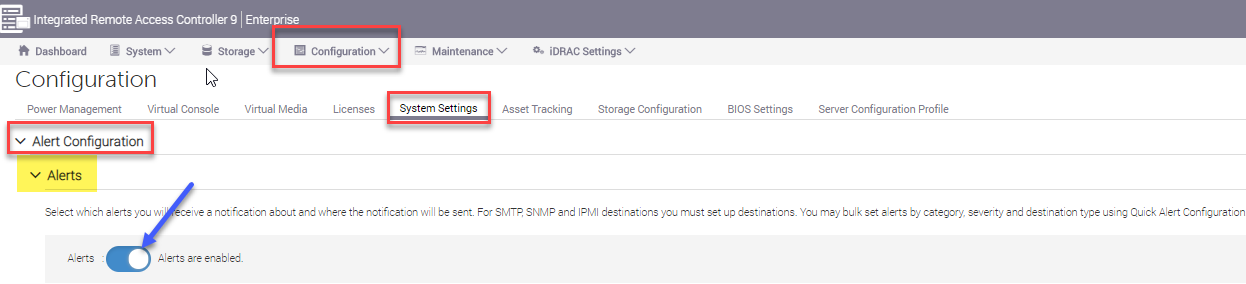
- Navigate to .
Under the Alerts options, enable Alerts by clicking on the round icon switch. It will move to the right, turning the area blue.
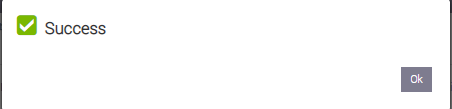
A Success message will display. Click OK.
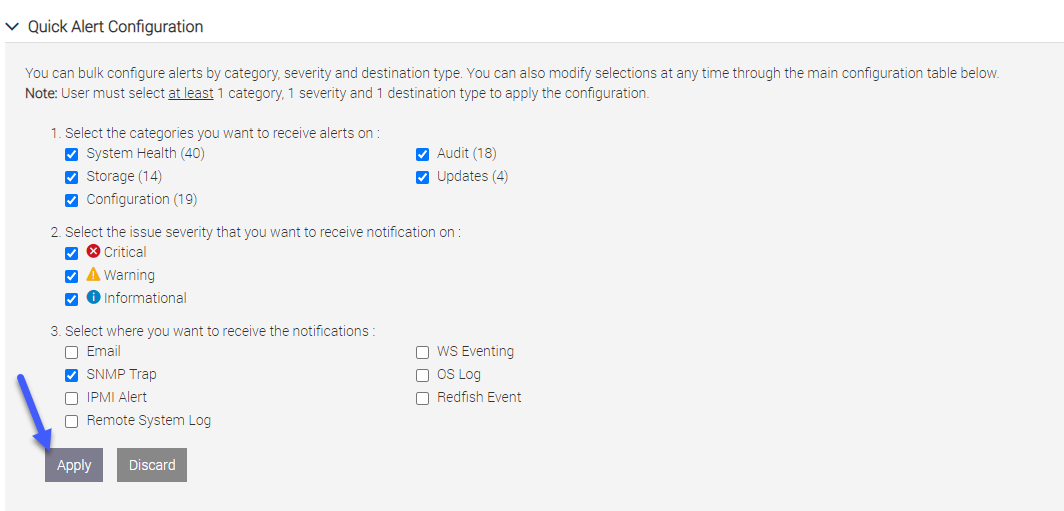
- Under Quick Alert Configuration, select the notification options shown below. Add in other options where customers require additional SNMP output or access to/from other monitoring devices. Click Apply to save changes.
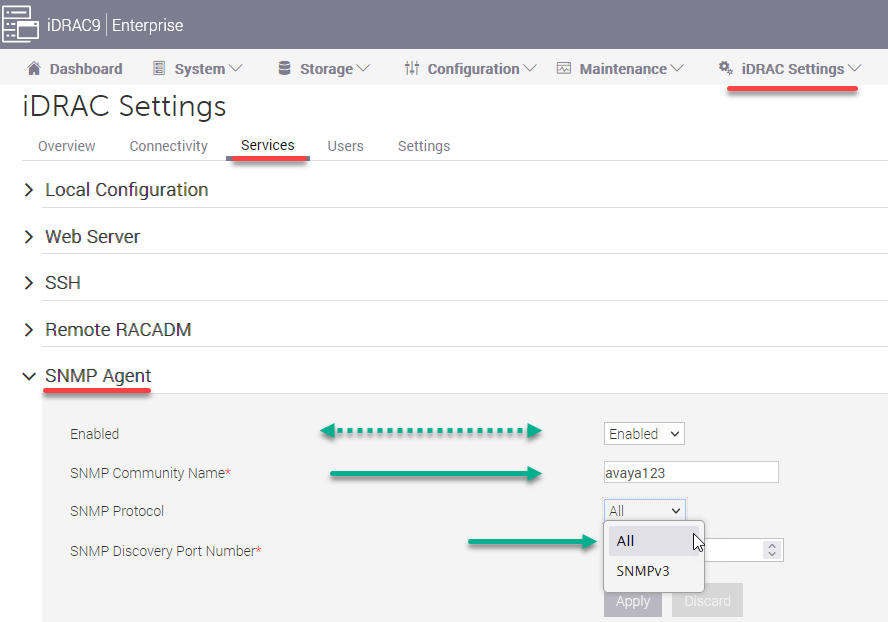
- Redirect to .
From the Enabled drop-down menu, select Enabled.
Enter the SNMP Community Name. The name Public is an indication of read-only access permitted by SNMP agents. Beginning with the release of ASP 130 5.0 Avaya's integrator changes the Community Name to Avaya123.
Note:Avaya strongly recommends changing the SNMP community name to a non-standand name for security purposes.
From the SNMP Protocol drop-down menu, select All to enable SNMP v2C.
Click Apply to submit changes.
Figure : 1. Configuring SNMP v2c using iDRAC9
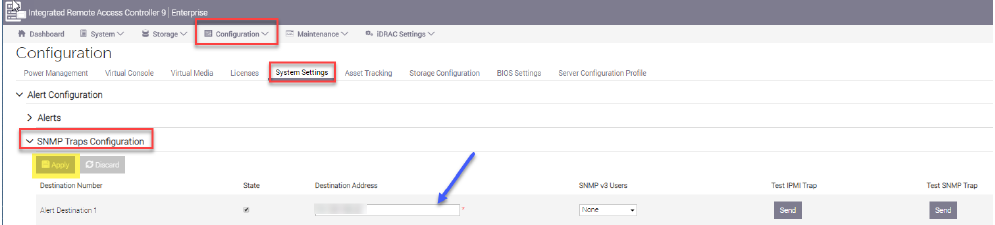
- Return to .
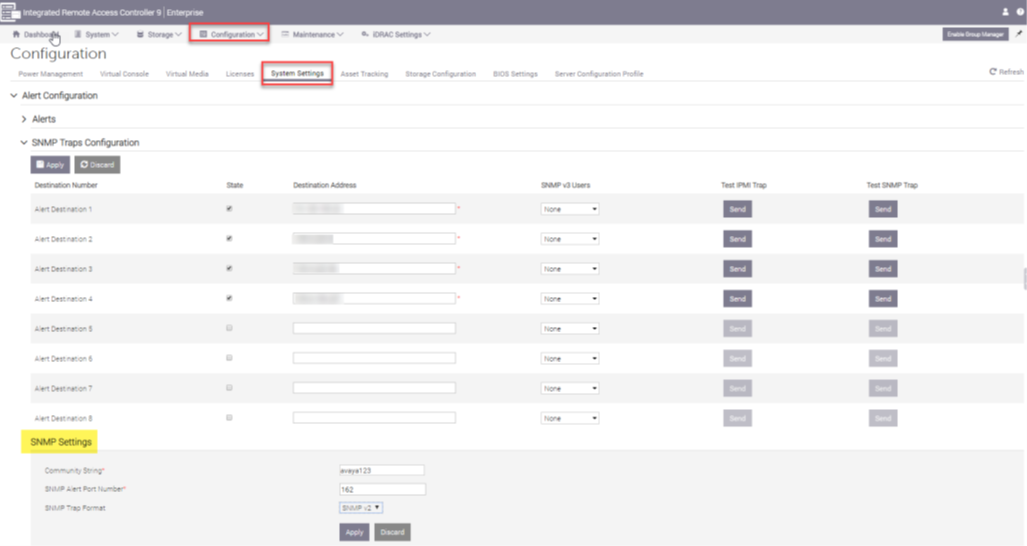
Enter the IP address of the trap receiver in the Destination Address field. If there is more than 1 trap receiver destination, enter those addresses too.
Click the State box to enable SNMP traps to be sent to the administered location.
Click Apply to submit the new administration.
Figure : 2. Configuring SNMP Traps
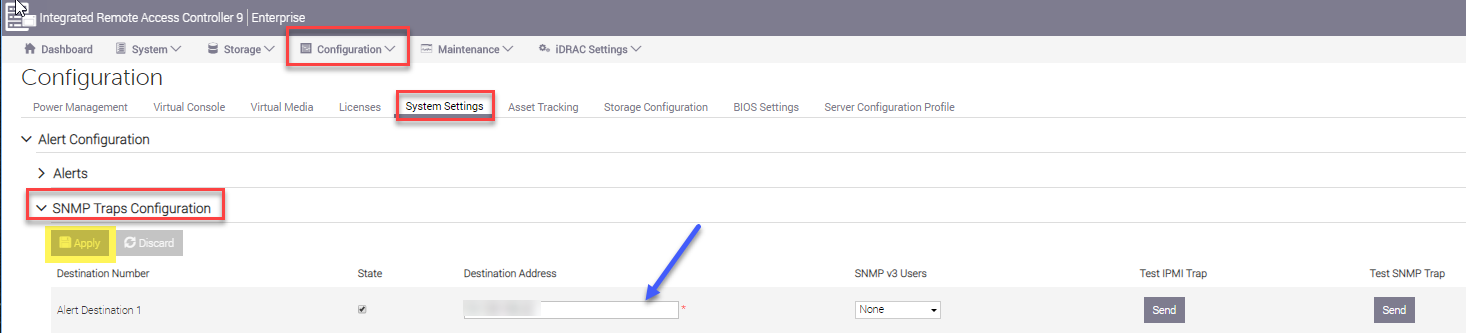
Enter the IP address of the trap receiver in the Destination Address field. If there is more than 1 trap receiver destination, enter those addresses, too.
Click the State box to enable SNMP traps to be sent to the administered location.
Click Apply to submit the new administration.
- Under the SNMP Settings area:
Note:
Avaya strongly recommends changing the SNMP community name to a non-standard name for security purposes.
You may leave the default of alert port 162; this is the standard SNMP receiving port. You may also enter a different port number, but remember to match this port in both the sending and receiving devices.
From the drop-down menu for SNMP Trap Format, select SNMPv2.
Select Apply when settings are complete.
Figure : 3. Configuration