AVAYA DOCUMENTATION CENTER
Find answers to your technical questions and learn how to use our products
Maintaining and Troubleshooting Avaya Solutions Platform 130 Series
Importing HDDs from a failed server
About this task
If the user is attempting an HDD import from the failed server’s HDDs follow these steps below. If a RAID configuration is required and an import is not possible, continue to the RAID configuration chapter.
This procedure applies to both the R640 and R660xs. Import allows for a faster recovery of a server. The assumption is that the HDDs from the failed server are good. If the HDDs are good, then an import is possible.
Note:
Screenshots used in this procedure are for illustration purposes only.
Procedure
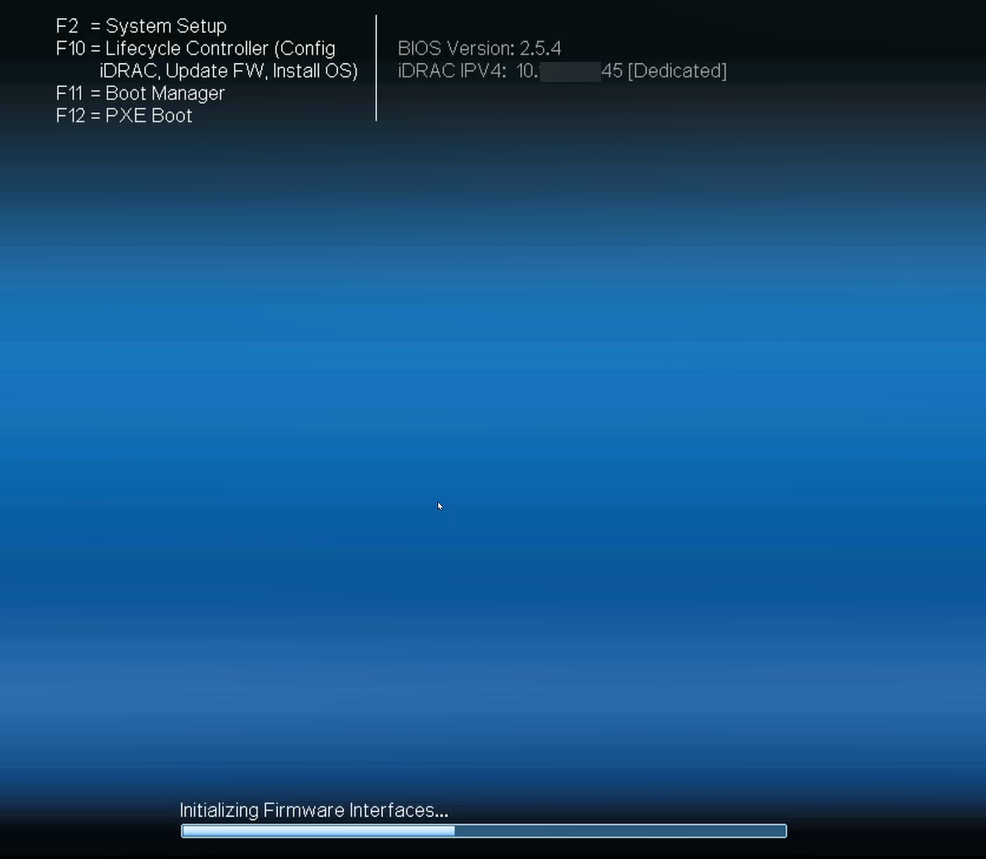
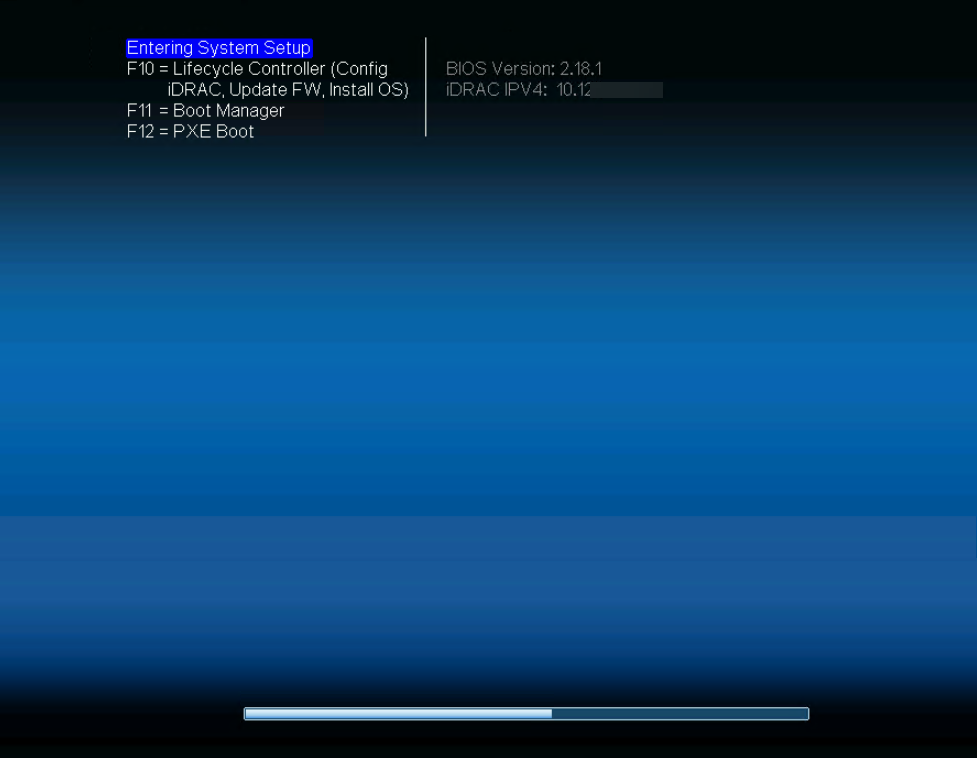
- When the server powers up the hardware boot screen displays (below). It does not indicate that the import was successful. Continue watching the monitor as the server attempts to boot from the newly inserted HDDs.
Note:
The BIOS version varies depending on the server hardware type (for example, R660xs vs. R640).
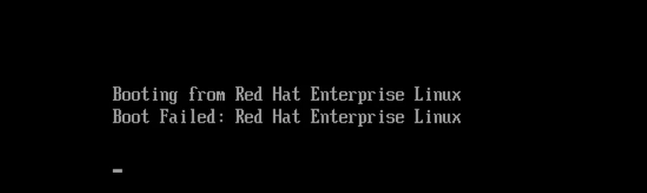
- The following screen appears as the server attempts to boot from Red Hat Enterprise Linux for the first time. It is possible that the message Boot Failed may be displayed. The server will continue to attempt to boot. This message may appear again. No manual intervention is required. Allow the server to continue to boot. During this period, the system may pause for several seconds. This behavior is expected, as the server is in the process of importing the RAID configuration and associated data from the foreign hard drives (HDDs).
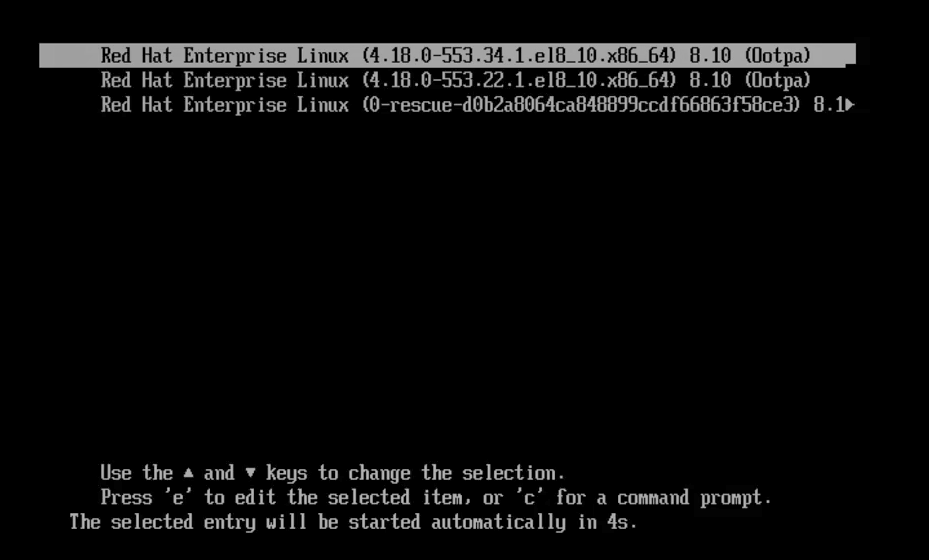
- Once the import process is complete, seeing the following screen is a good indication that the RAID configuration, along with all its data, was successfully imported. At this point, the RAID controller has assumed the RAID configuration from the failed server. Continue to allow the system to boot from its default highlighted OS selection.
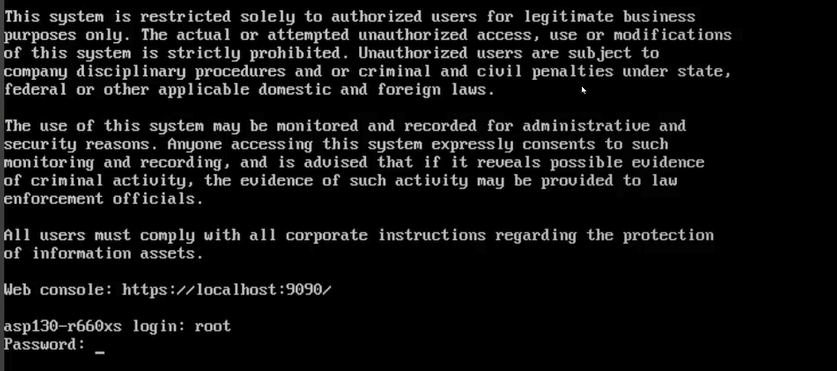
- If the screen shown below appears, it indicates that KVM on Red Hat Enterprise Linux 8.10 has successfully booted on the server. This indicates that the RAID import was successful and that the data on the hard drives (HDDs) remains intact. At this stage, the RAID controller has correctly adopted the RAID configuration from the failed server.
The next step is for the user to log in to the Cockpit host interface and verify the following:
Host networking configuration was not altered during the import process.
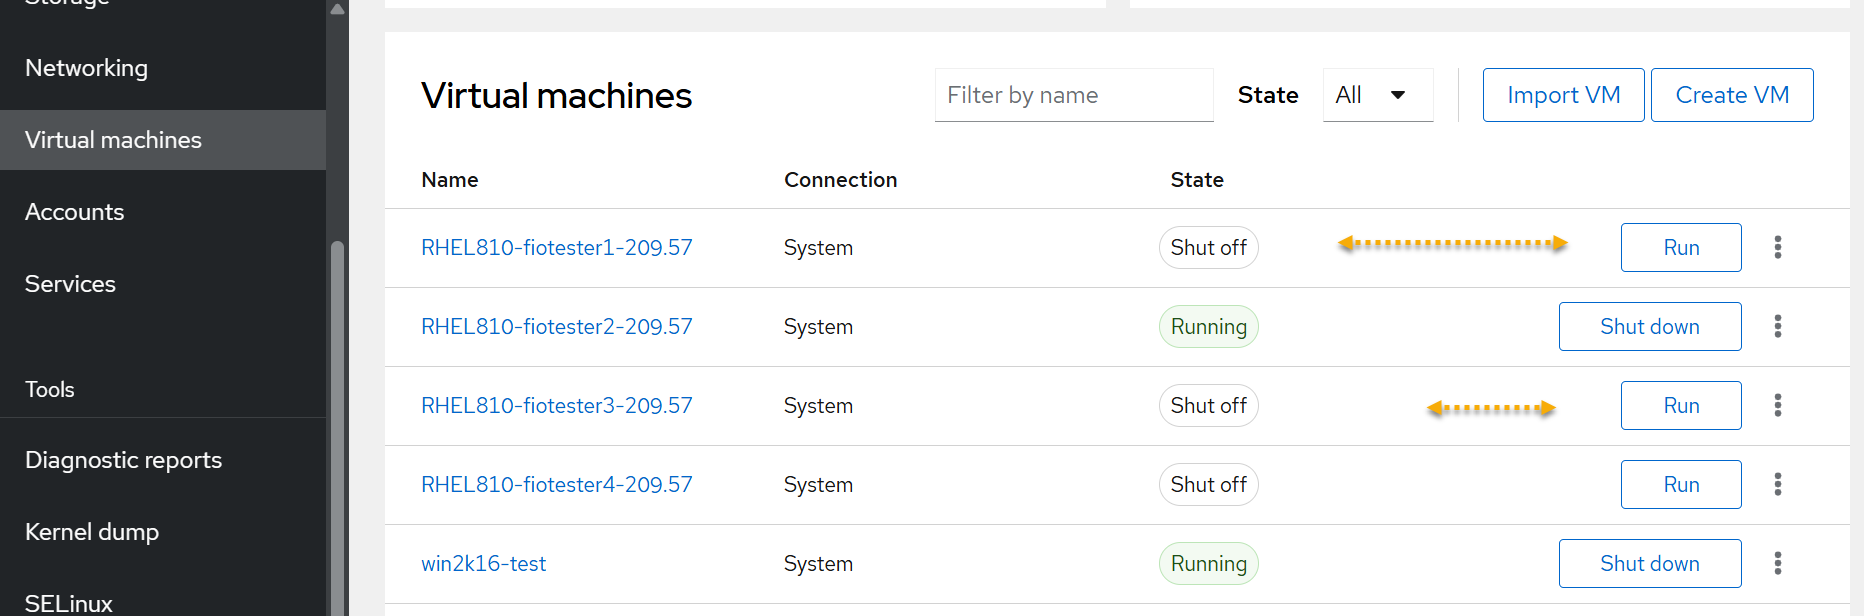
Validate virtual machines are present. Power on VMs as required if the AutoStart feature has not been set.
Move on to step 13 below. If the screen below does not appear, proceed to Step 14 to retry the import procedure.
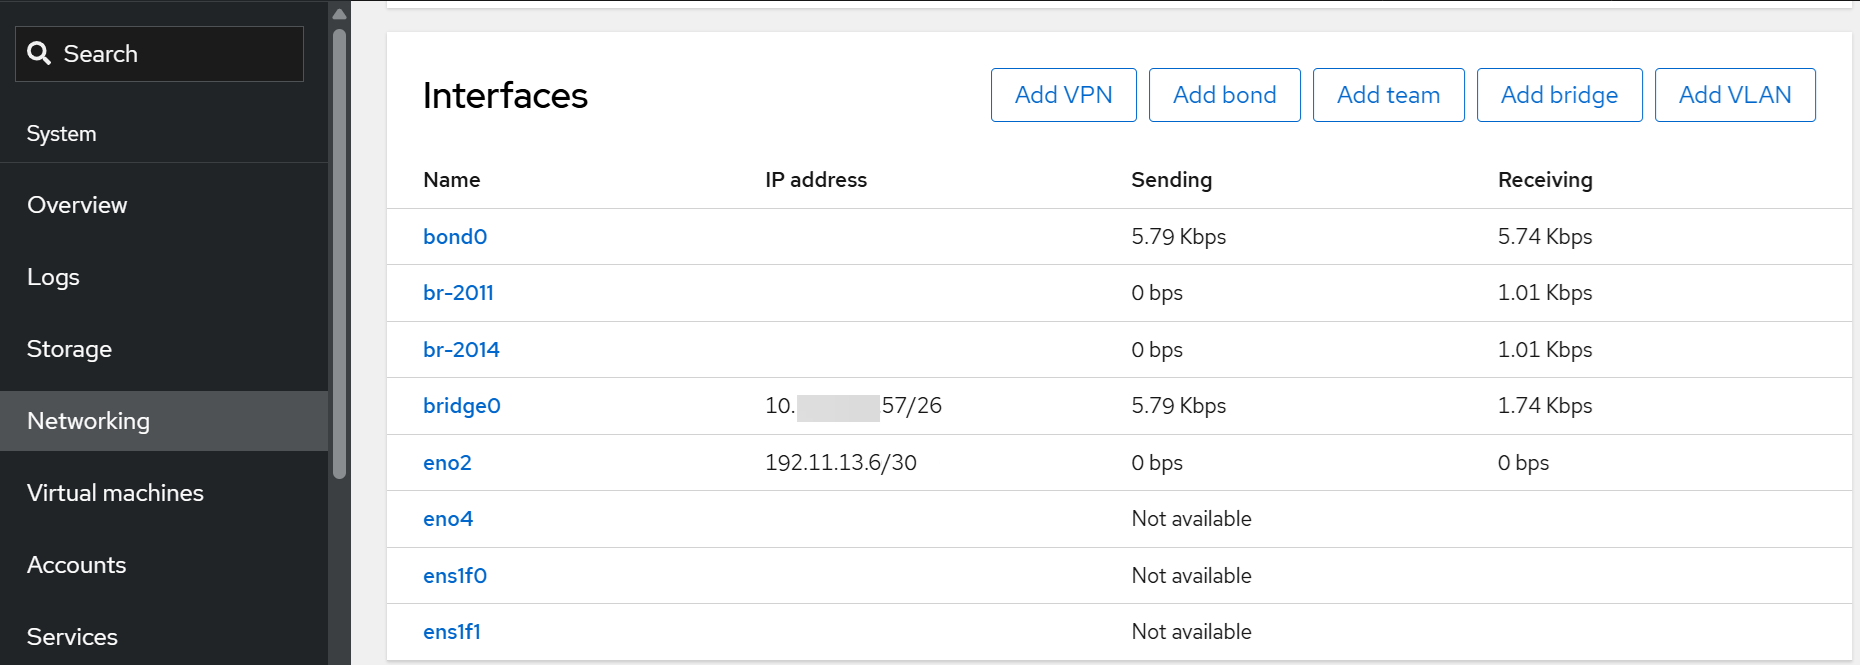
- Verify Host configuration was not altered during import of the HDDs.
- Navigate to the Networking page and validate every expected interface is being displayed, such as bridge, bond, and VLAN tags.
- Navigate to the Virtual machines page, and validate that you can see all expected virtual machines. Power on virtual machines on demand as required if AutoStart feature has not been set.
- Navigate to the Networking page and validate every expected interface is being displayed, such as bridge, bond, and VLAN tags.
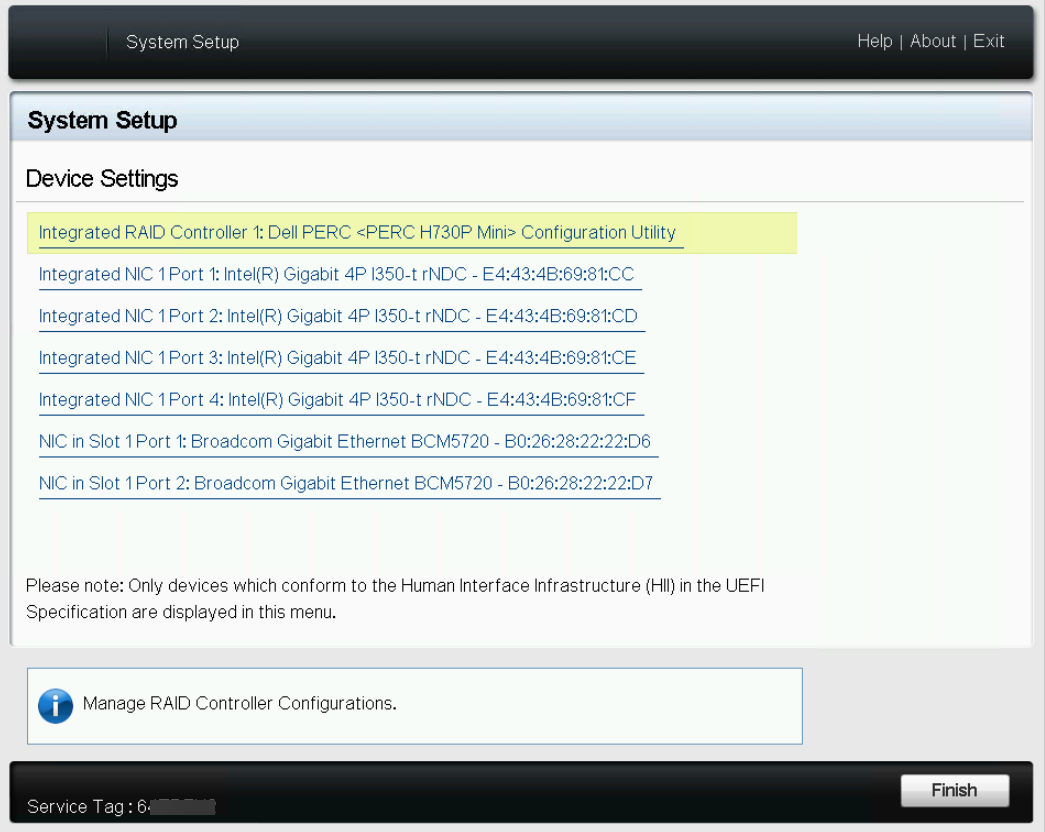
- If the screen below appears then ASP 130 R6.0.x (KVM on RHEL 8.10) did not load, a RAID configuration setting should be verified. Select F2 to enter System Setup.

RAID Import Verification Setting
The HDD import may have failed because the RAID Controller’s Auto Import Foreign Configuration setting was not enabled. It is prudent to check if this setting is enabled before creating a new RAID array which implies existing data will be lost. Go to the next step below if the screen above is displayed.
- If the following screen is not displayed, push the power button to power OFF and then power ON the server. Select F2 when prompted and to enter the System Setup menu.
- From the System Setup menu, for H730P, select . For H755/H750 RAID Controller, select .

- If the following screen reappears, it indicates that the system failed to import the foreign configuration, which includes the operating system (hypervisor), virtual machines, and other persistent data. This failure typically points to corruption within the drive metadata. A new RAID array must be manually configured, followed by re-imaging of the server. Move to HDD import failure.
- If ASP 130 R6.0.x (KVM on RHEL 8.10) has loaded as demonstrated in the screen below, go back to step 13 of this procedure and verify that the Host network configuration was not altered during the import process.