AVAYA DOCUMENTATION CENTER
Find answers to your technical questions and learn how to use our products
Maintaining and Troubleshooting Avaya Solutions Platform 130 Series
Using iDRAC9 for debugging
Procedure
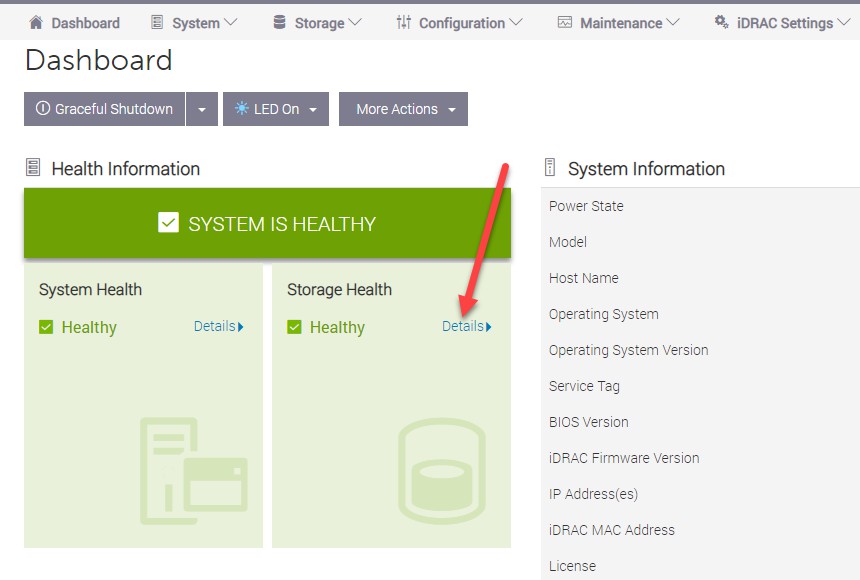
- Once logged into the iDRAC, view the dashboard and its Storage Health. Select Details. If Storage Health Details are not available, then that is an indication that there could be RAID controller problems. Proceed to section Physical Assessment of RAID controller components and System set-up menus if the Details option is not available for selection.
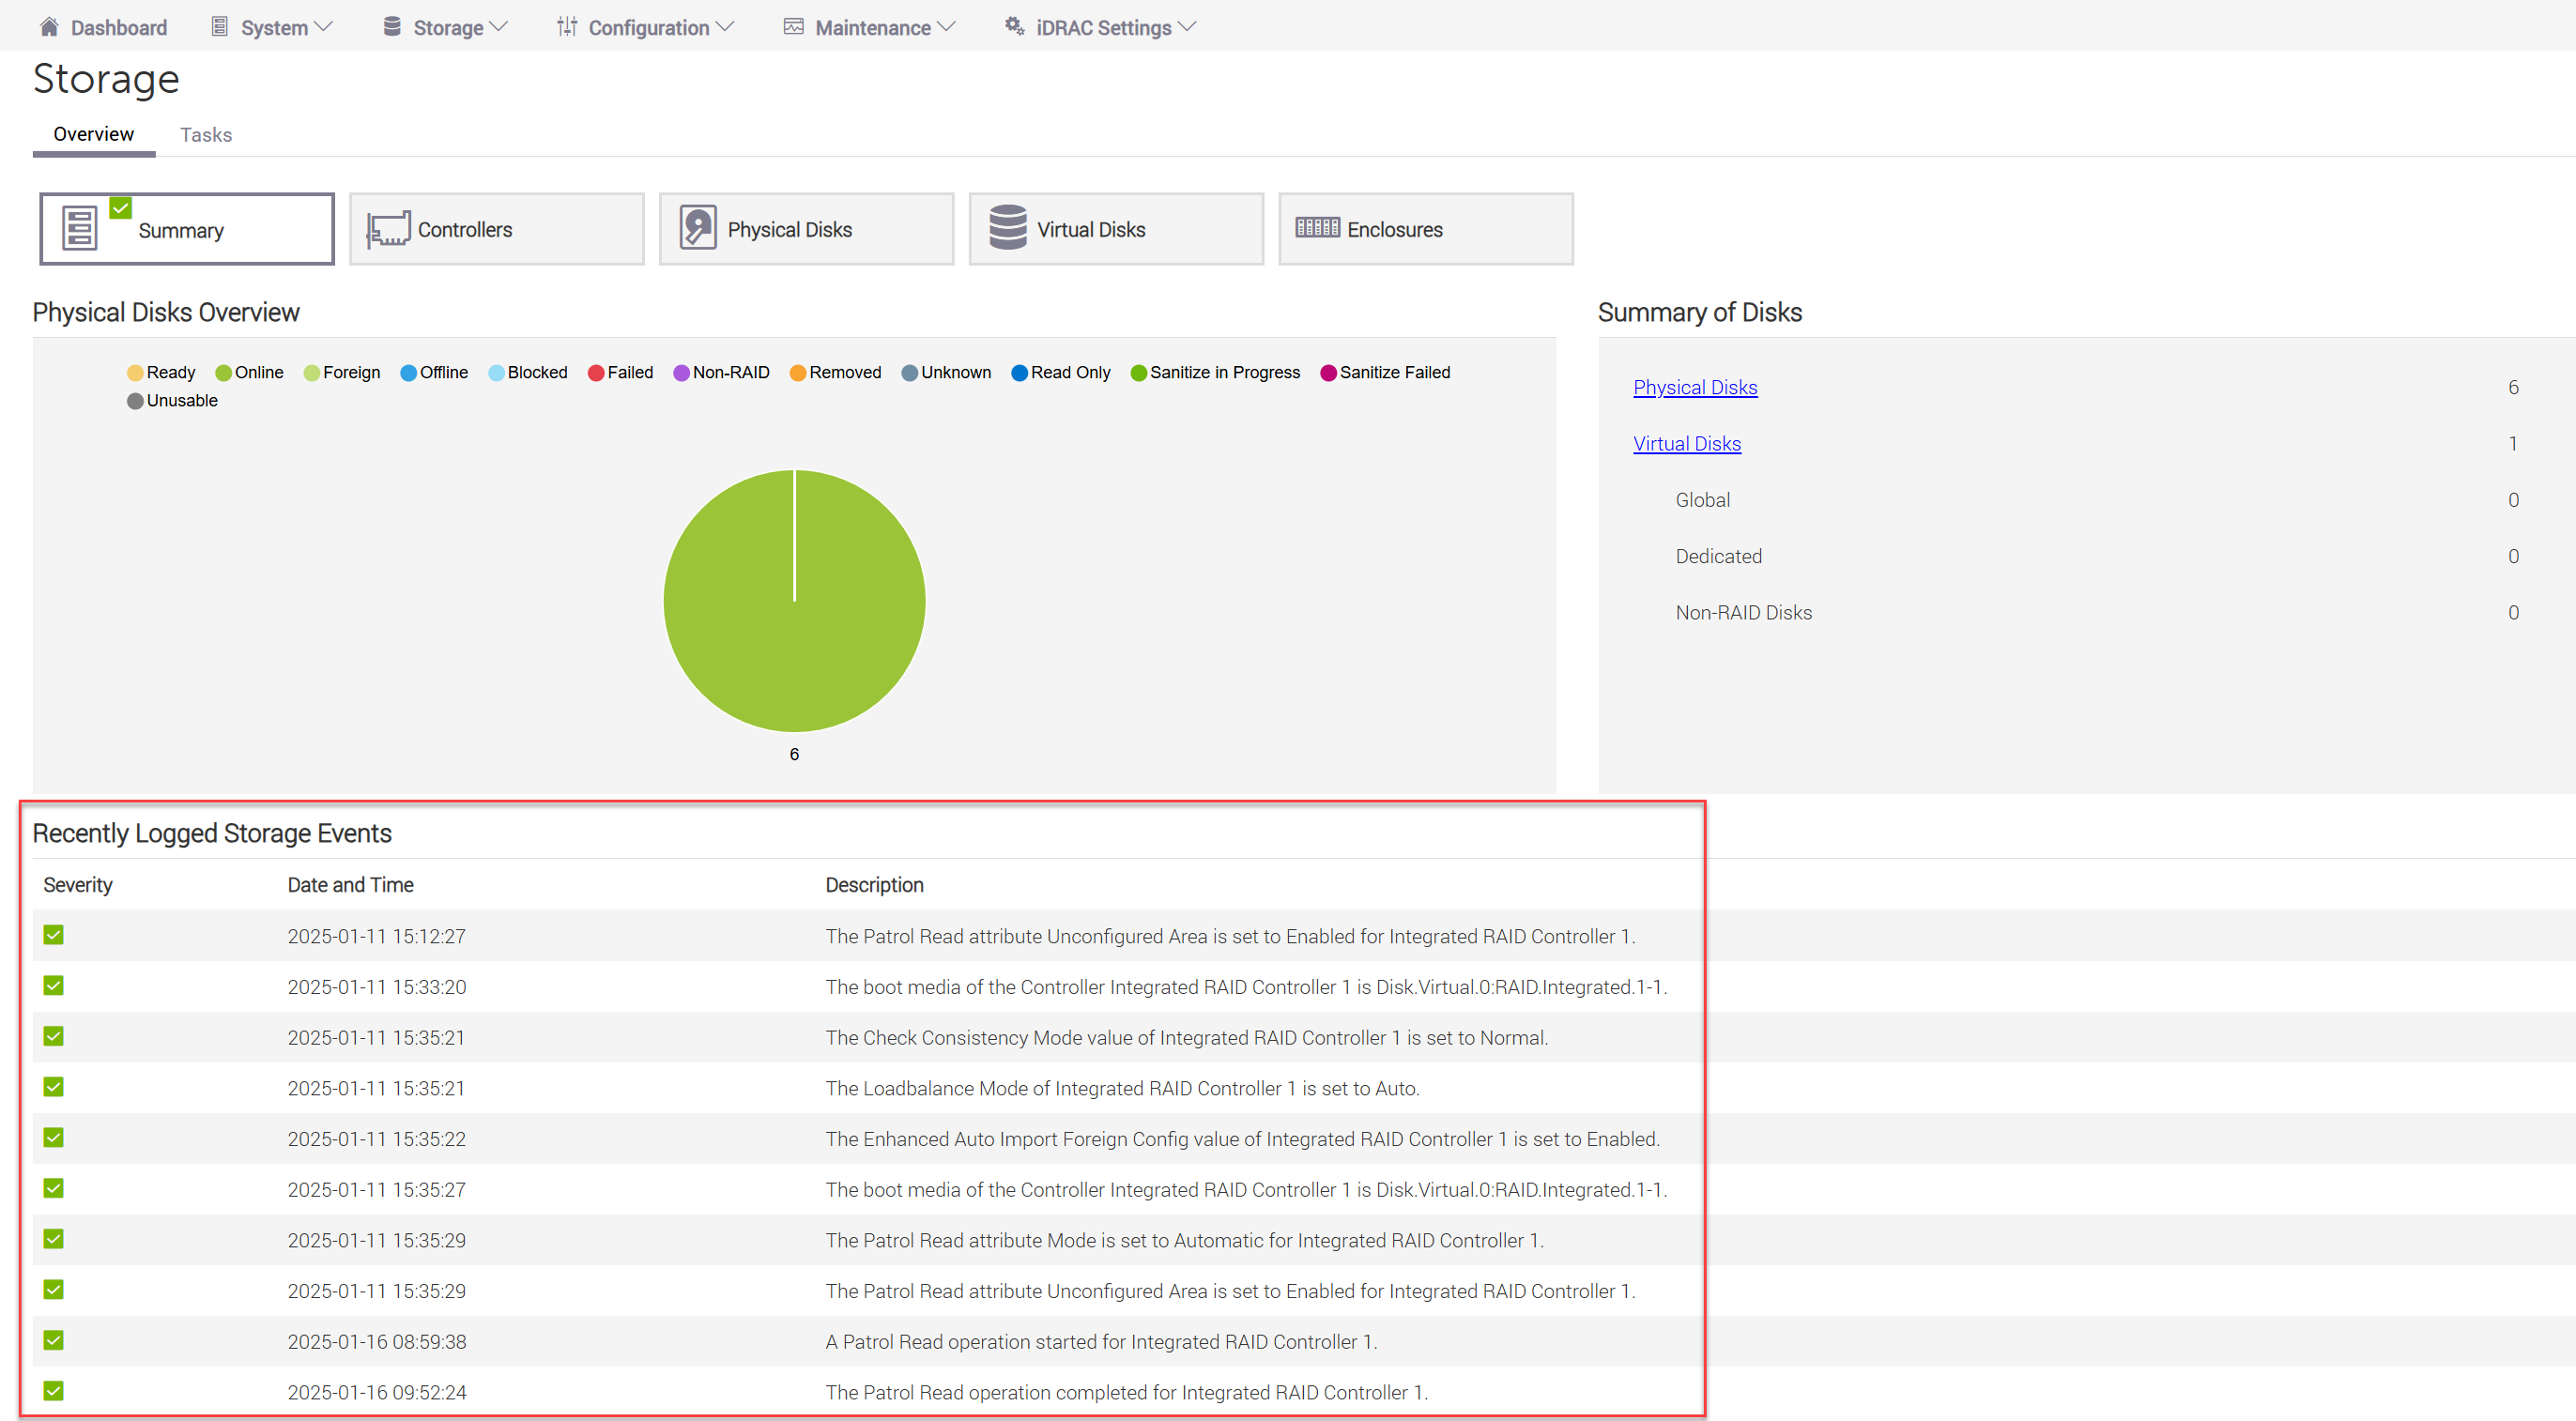
- View the Logged Storage Events for any errors reported. Green check marks indicate healthy status. If no Controllers or Enclosures are displayed, then the H755 is not seen in the Device menus. This could indicate RAID controller problems. Proceed to section Physical Assessment of RAID controller components and System set-up menus if no Controllers or Enclosures tab is available for selection. If the 5 Overview tabs such as Summary, Controllers, Physical Disks, Virtual Disks and Enclosures are available on the Storage page, proceed to the next step.
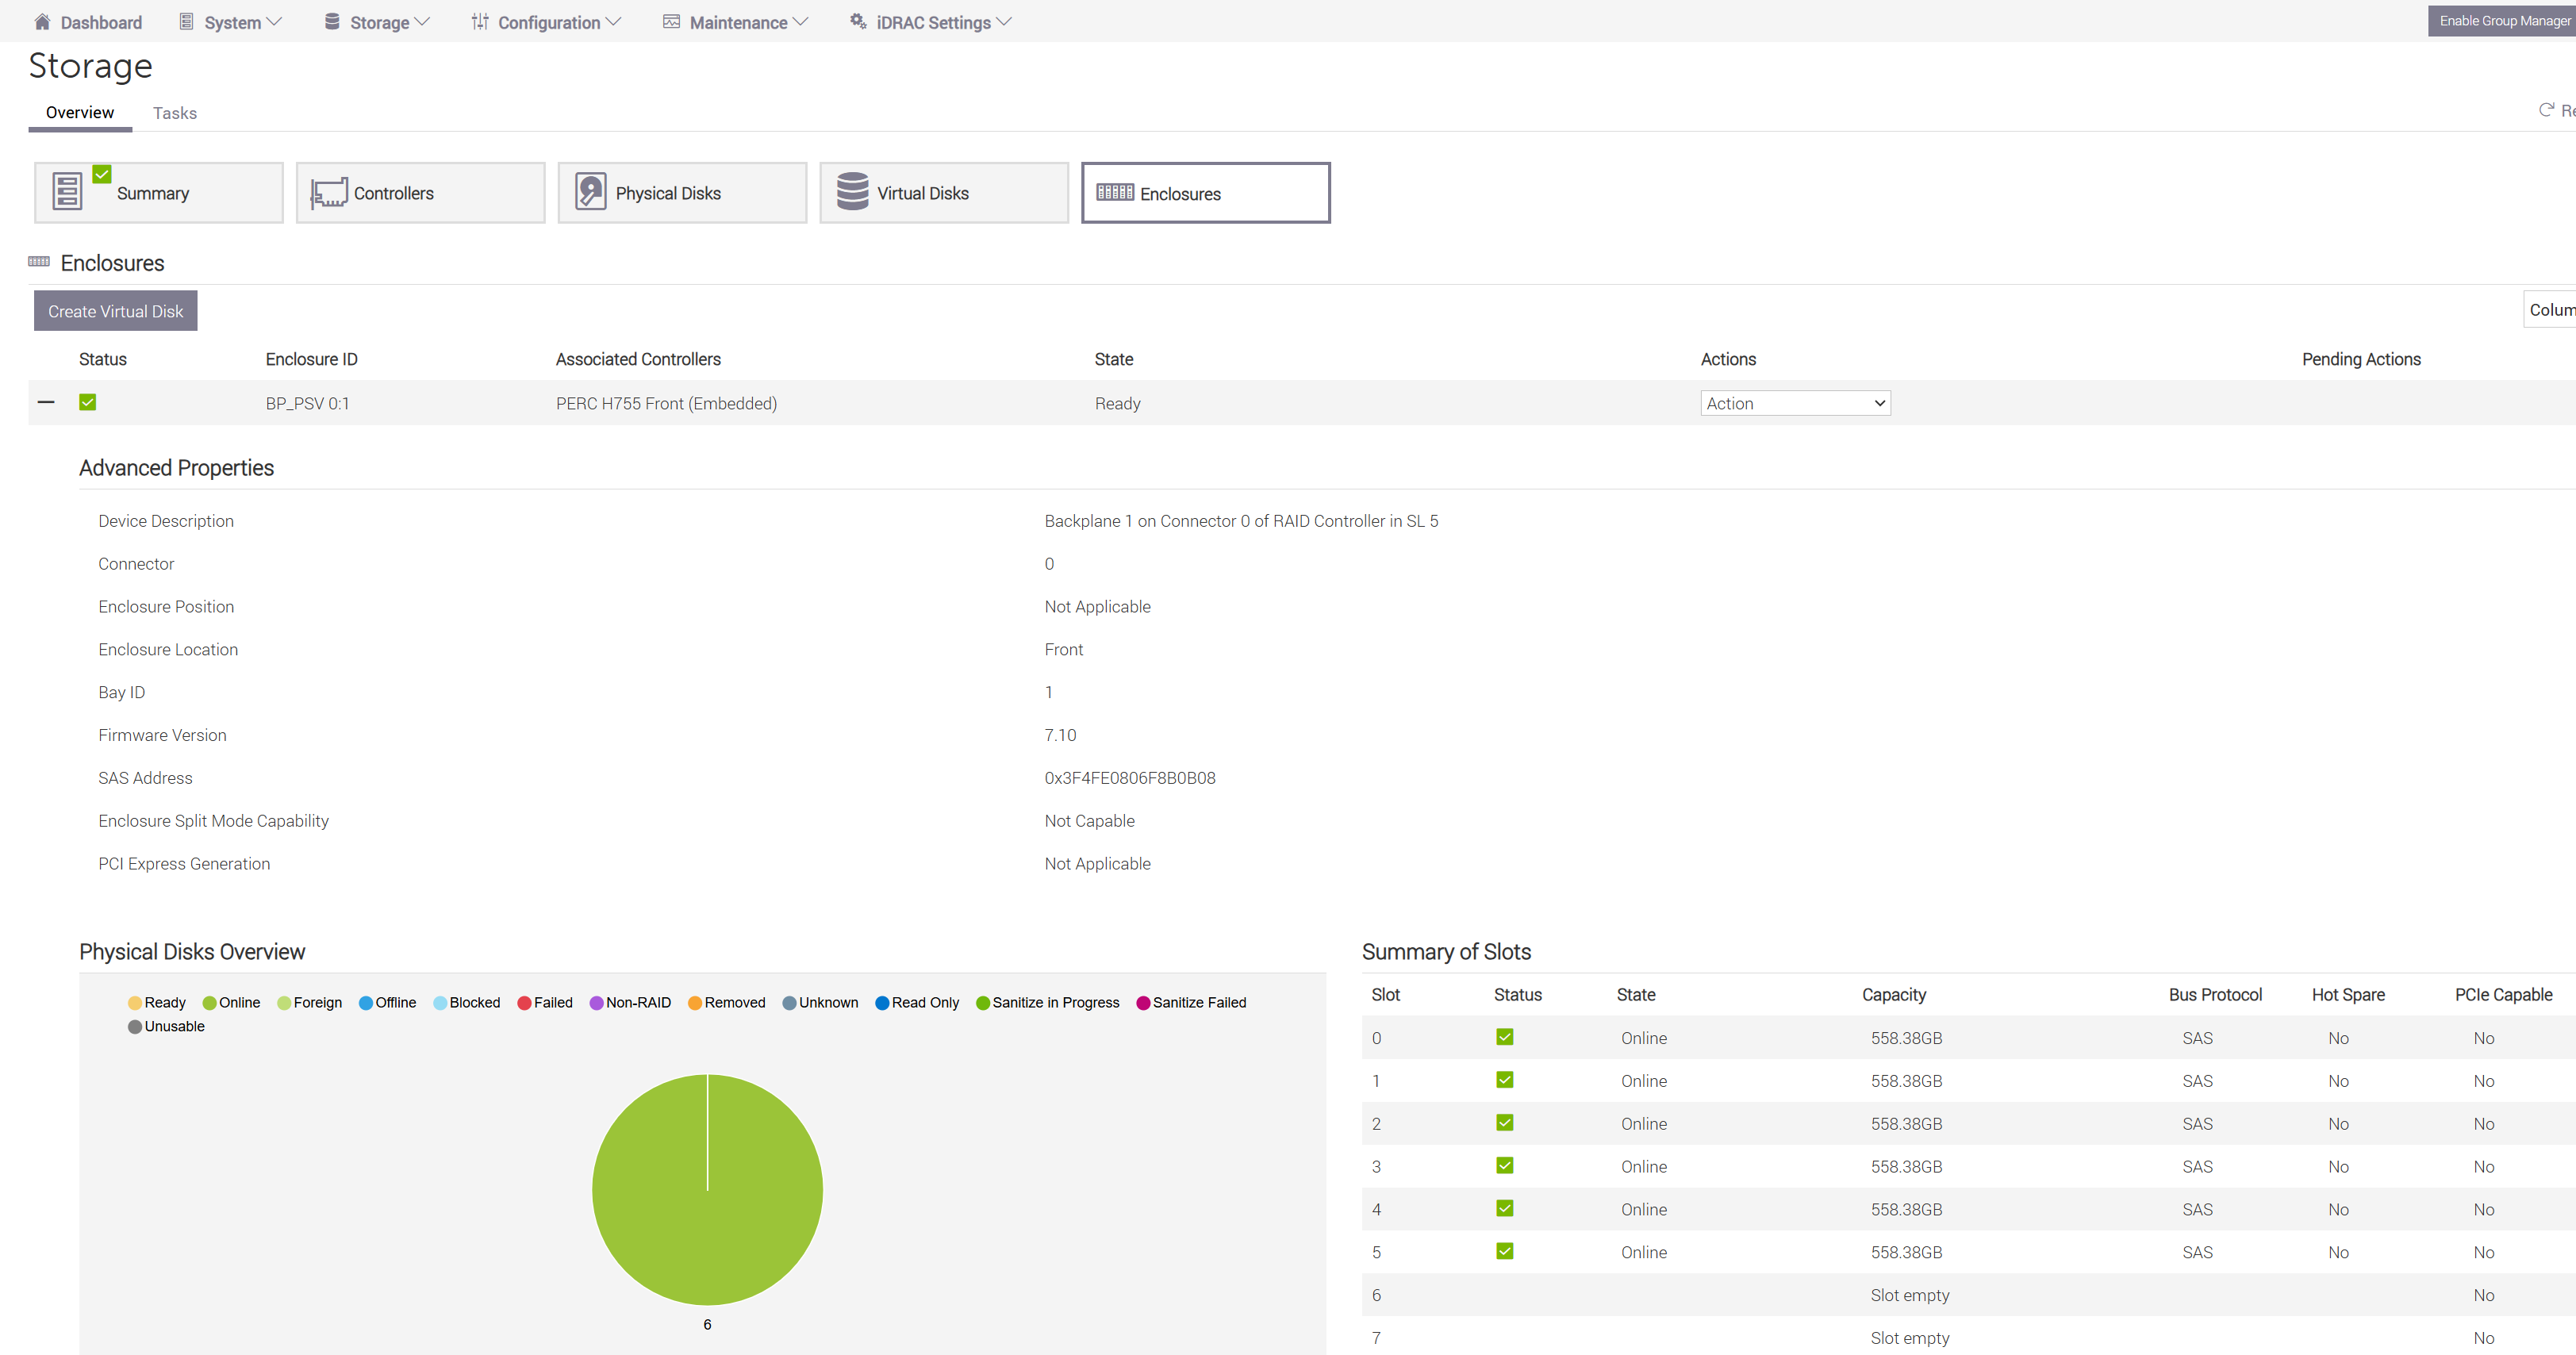
- Select each tab across the top of this page reviewing information about the Summary, Controller, Physical Disks, Virtual Disks and Enclosures. If the H755 Controller is suspected, pay special attention to the Controllers and Enclosures tab information. Selecting the + symbol provides detailed information about a component. If the Controller and Enclosures tab show no errors, but there are errors reported under the Physical Disks or Virtual Disks then go to those appropriate sections of this document to repair a Physical Disk(s) (refer to the Hard Disk Drive chapter) or to create a new Virtual Disk (refer to the RAID configuration chapter in the Installing the Avaya Solutions Platform 130 Series R6.0.x guide). If errors are reported under the Controller or Enclosures tab address the errors if enough information is provided. If errors are reported, but more debugging is required go to step 6.
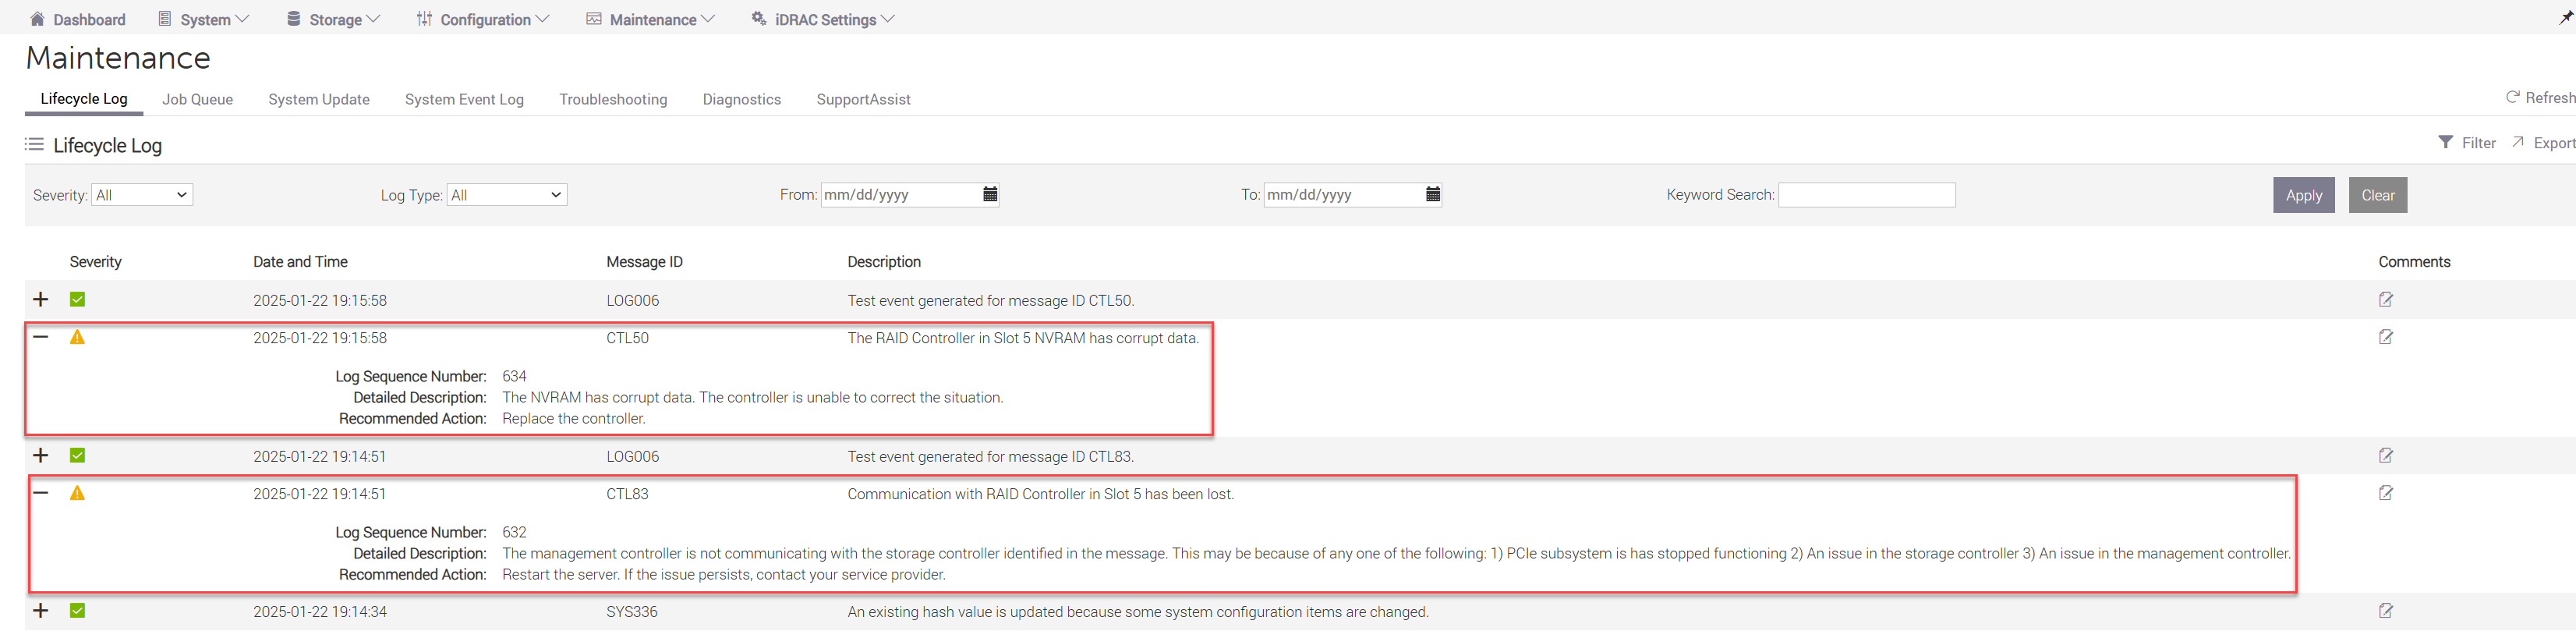
- Go to the tabs for information about possible logged storage issues. Select the + next to the Severity symbol to get additional detail about an error. Below are examples of errors that may be reported about the RAID controller. If errors are reported follow the Recommended Action. If no errors are reported go to the Dell Embedded System Diagnostics chapter and run applicable Dell system diagnostics or move to section Physical Assessment of RAID controller components and System set-up menus to verify PERC card installation and virtual/physical disk configuration. When in the Diagnostics menu, press escape to stop the initial start up tests and run the Advanced Options PCIe Bus, PERC Battery, Hard Drive and Backplane Tests. The server will need to be shutdown according to application instructions and then restarted before entering diagnostics mode.