AVAYA DOCUMENTATION CENTER
Find answers to your technical questions and learn how to use our products
Maintaining and Troubleshooting Avaya Solutions Platform 130 Series
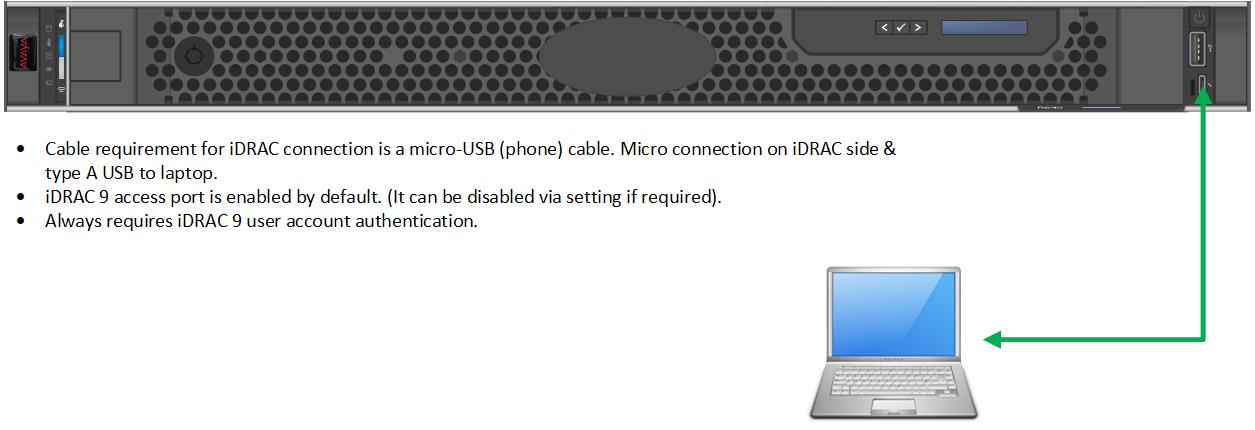
iDRAC 9 Direct Connect
The iDRAC 9 interface available on the Dell R640 can now be accessed using a micro USB 2.0 port located on the front right corner of the server. Diagnosing and troubleshooting the server can be improved by utilizing this port. The iDRAC 9 will be referenced in the following sections for troubleshooting components of the R640 server.
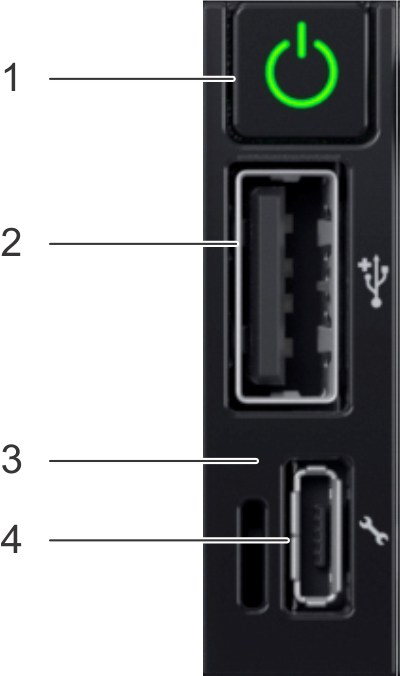
Item |
Indicator button |
Description |
|---|---|---|
1 |
Power button |
Indicates if system is turned on or off. Press the power button to manually turn on or off the system |
2 |
USB Port |
Select the menu item highlighted by the cursor |
3 |
iDRAC Direct LED |
The iDRAC Direct LED indicator lights up to indicate that the iDRAC Direct port is actively connected to a device |
4 |
iDRAC Direct port |
iDRAC Direct port is micro USB 2.0 compliant. This port enables access to the iDRAC Direct features |
Direct Connect iDRAC9 Access Details:
Connect a micro-USB cable between the iDRAC micro-USB port located on the right front corner of the server to a USB type A port of a laptop (See figure below). Launch a web browser session from the connected laptop using IP address 169.254.0.3. The iDRAC GUI console will be displayed.
iDRAC login:
If the iDRAC interface has already been configured, then the username and password will need to be used for logging into the iDRAC interface. If the account has not been set up then the login details will be username=root and the password will be located on the pull-out toe tag next to the iDRAC micro usb port. Avaya Solutions Platform 130 servers ship with the iDRAC9 IPV4 service disabled for security purposes, but the local USB port is still accessible so only the password is required for logging into the iDRAC. Refer to the Avaya Solutions Platform 130 Series iDRAC9 Best Practices document or Integrated Dell Remote Access Controller 9 User's Guide available on the vendor's website for more information.