AVAYA DOCUMENTATION CENTER
Find answers to your technical questions and learn how to use our products
Deploying Avaya IP Office™ Platform SSL VPN Services
Appendix C: Configuring RADIUS authentication (with screens)
The key benefit of RADIUS authentication is that the SSL VPN service is always assigned the same tunnel IP address.
To configure RADIUS authentication, you must install a RADIUS server. Avaya recommends the Avaya Identity Engine for a Radius Server. For information and software download, go to http://support.avaya.com.
RADIUS protocol authentication information such as user account information as well as SSL VPN tunnel information such as IP address and netmask need to be stored in a database. There are two possible options:
Use Identity Engine’s local database to store the user information and provide both lookup and authentication and authorization services. This option can be used for a small number of users. Identity Engine has a hard limit of users. Consult the documentation for the exact value.
Use an LDAP server to store user credentials and SSL VPN tunnel information for both lookup and authentication services. This option fits deployment scenarios for a large number of users.
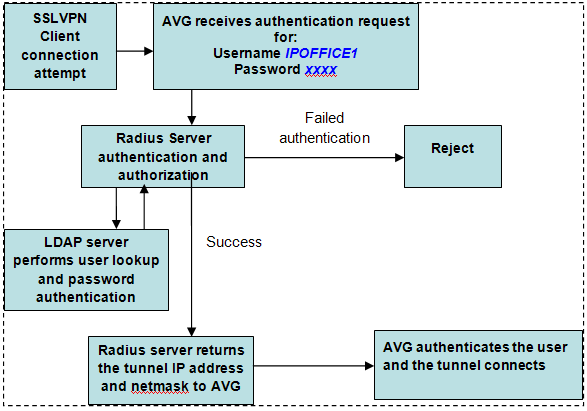
For LDAP server installation, Avaya Identity Engine Radius Server documentation contains configuration options for LDAP servers from different vendors. RADIUS authentication using an LDAP server is illustrated in the figure below. Note that this RADIUS server configuration in this procedure does not require an LDAP server.
This procedure covers the manual steps to configure RADIUS authentication. Alternatively, you can configure authentication using the AVG authentication wizard.
Procedure
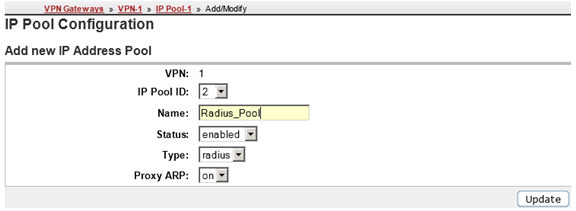
- On the IP Pool Configuration page, add a new IP Address Pool for RADIUS authentication.
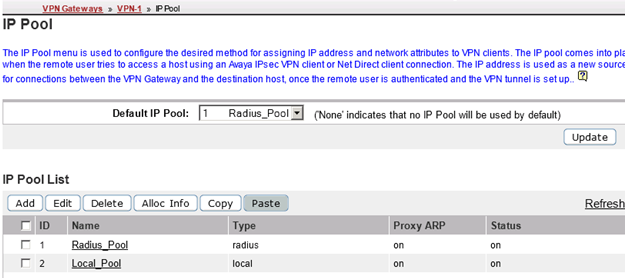
- On the IP Pool page, set the Default IP Pool to the RADIUS authentication IP address pool you created in step 2.
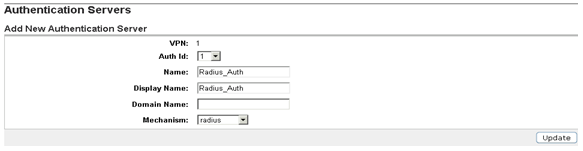
- Modify the VPN. On the page, complete the fields for the RADIUS server.
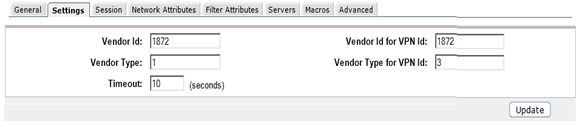
- Configure the RADIUS authentication server settings. Note that Vendor Id 1872 is associated to vendor Alteon and identifies AVG. Select the Settings tab and complete the following fields.
Vendor ID: 1872
Vendor Type: 1
Timeout: 10
Vendor Id for VPN Id: 1872
Vendor Type for VPN Id: 3
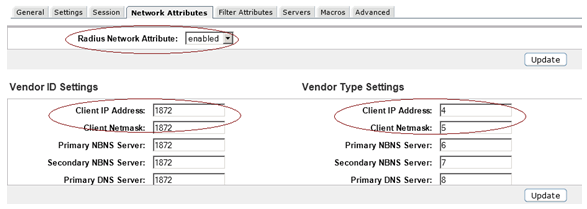
- Configure RADIUS network attributes. Select the Network Attributes tab and complete the following fields.
Vendor ID Settings
Vendor Type Settings
Client IP Address: 1872
Client IP Address: 4
Client Netmask: 1872
Client Netmask: 5
Primary NBNS Server: 1872
Primary NBNS Server: 6
Secondary NBNS Server: 1872
Secondary NBNS Server: 7
Primary DNS Server: 1872
Primary DNS Server: 8
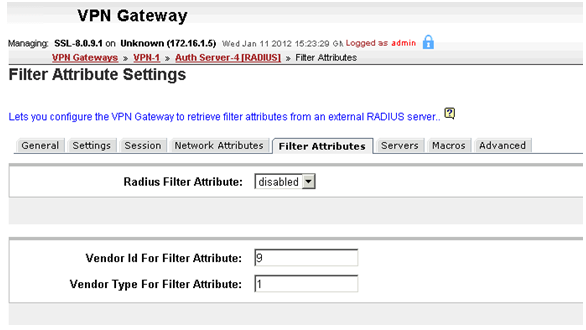
- Configure filter attributes. Select the Filter Attributes tab and complete the following fields>.
Radius filter attribute: disabled
Vendor Id for Filter Attribute: 9
Vendor Type for Filter Attribute: 1
- Specify the Radius server address. Select the Servers tab on the RADIUS Servers page.
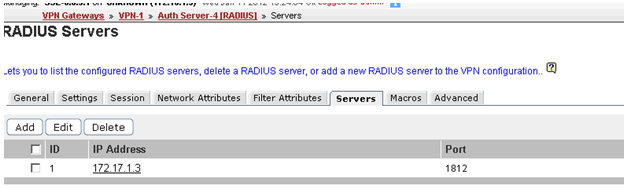
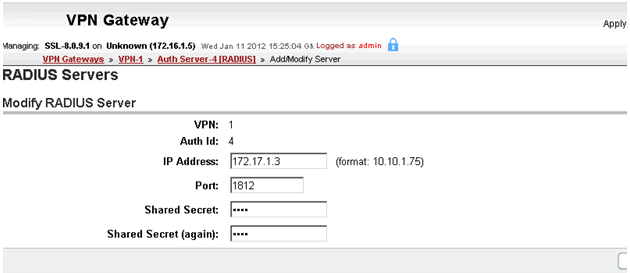
- Click Add and on the Modify RADIUS Server page, enter the RADIUS server IP address and shared secret.
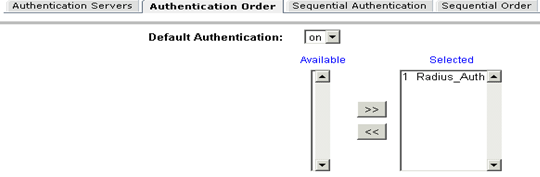
- Select the Authentication Order tab and specify the preferred order for authentication methods.