AVAYA DOCUMENTATION CENTER
Find answers to your technical questions and learn how to use our products
Deploying Avaya IP Office™ Platform SSL VPN Services
Configuring local authentication
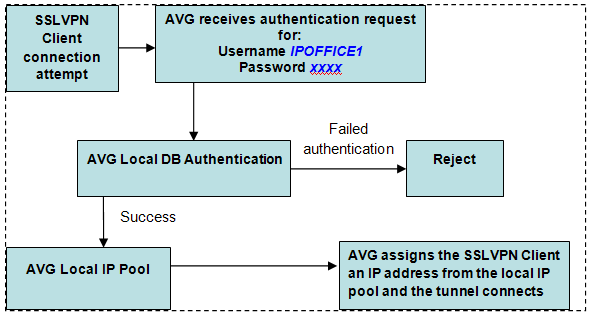
For a small number of IP Office systems, you can use the Avaya VPN Gateway (AVG) local database to create user data needed for authentication. This is a quick way to set up authentication when no external RADIUS authentication servers are available. Configure an IP Pool to dynamically assign IP addresses to the local users. The figure below shows the SSL VPN Client authentication flow and how the IP pool address allocation is done.
This procedure covers the manual steps to configure local authentication. Alternatively, you can configure authentication using the AVG authentication wizard.
Procedure
- For VPN1, go to the IP Pool Configuration page and add a local IP pool.
- Go to . Set the IP pool dynamic range by entering values in the Lower IP and Upper IP fields.
- Go to . Set the Client Netmask.
- On the Add a Group page, add a new group to VPN1.
- Go to . Select the General tab and assign a local pool to the group by selecting it in the IP Pool field.
- Select the Access Lists tab and specify the access list for the local users group.
- Select the Linksets tab and assign the linksets.
- Edit the VPN authentication settings. On the Authentication Servers page, add a new authentication server.
- Go to and add users to the group.
- Edit the authentication server and specify the Authentication Order.