

AVAYA DOCUMENTATION CENTER
Find answers to your technical questions and learn how to use our products
Deploying MS Teams Direct Routing with IP Office
Create a SIP Server for the IP Office
The ASBCE needs a SIP server for each server to which it connects.
Before you begin
- Select Services and then SIP Server.
- Click Add and add a SIP server profile for the IP Office.
- Enter a Profile Name. Click Next.
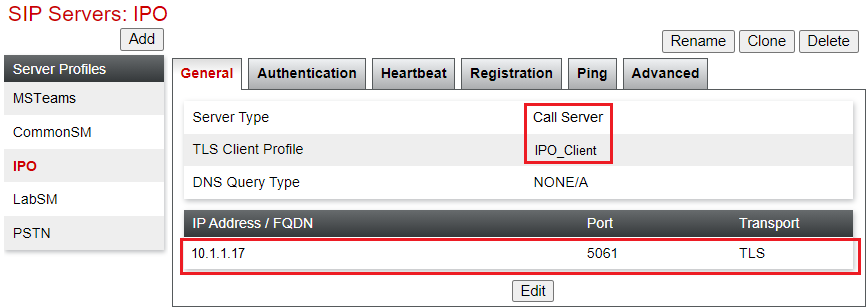
- In the General Settings menu:
- Set the Server Type to Call Server.
- Set the TLS Client Profile to the one previously created for the IP Office connection.
- Set the address, port and transport details to match the IP Office setting.
- Click Next.
- There are no changes to the default Authentication settings. Click Next.
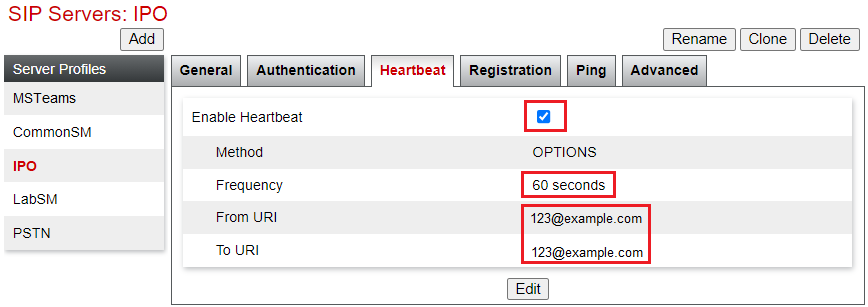
- In the Heartbeat settings:
- Select Enable heartbeat.
- Set the Frequency to 60.
- For the From URI and To URI values, enter a dummy value.
- Click Next.
- There are no changes to the default Registration and Ping settings. Click Next to skip each.
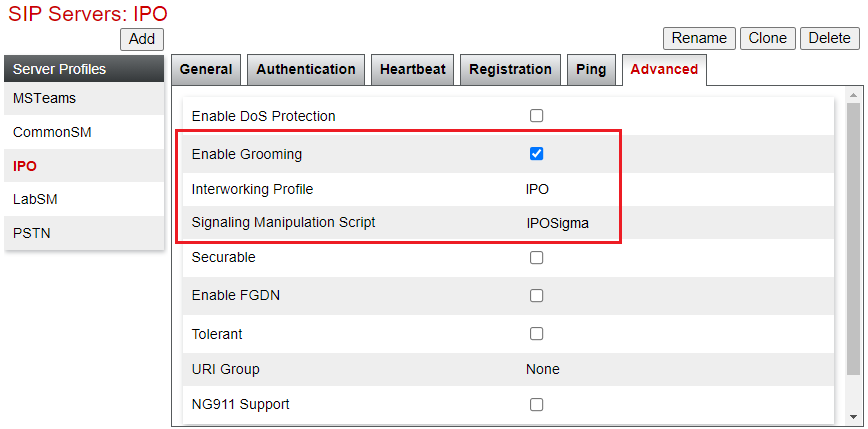
- In the Advance settings:
- Enable Grooming - Enable this setting.
ADDITIONAL INFORMATION:
-
Note: This SIP Server connection with the IP Office has grooming enabled. For a SIP Server for endpoints such as remote extension, any similar connection to the IP Office should have grooming disabled because the IP Office does not support TCP connection sharing between endpoints.
-
- Interworking Profile - Select the interworking profile previously created for the IP Office.
- Signaling Manipulation Script - Select the SIGMA script uploaded for the IP Office.
- Click Finish.
- Enable Grooming - Enable this setting.
- The settings will look like the following example:
ADDITIONAL INFORMATION:
Next steps
-
Proceed to Create a SIP Server for MS Teams.