

AVAYA DOCUMENTATION CENTER
Find answers to your technical questions and learn how to use our products
Deploying MS Teams Direct Routing with IP Office
Extracting the ASBCE Private Key and Identity Certificate
The identity certificate created for the ASBCE from the IP Office is a single file. For ASBCE configuration, you must split it into two files; a certificate file and a private key for the certificate.
- Using SFTP, connect to the ASBCE management IP address using port 222 and the
ipcslogin. - Copy the IP Office identity certificate created for the ASBCE (SBCE_ID.p12) to the /home/ipcs directory.
- Using SSH, login to the ASBCE management IP using port 222 and
ipcslogin. - Enter the command
su rootorsu -rootand enter the ASBCE root password. - Enter the following commands:
ADDITIONAL INFORMATION:
-
When prompted for a password or PEM pass phrase, enter the password specified when generating the certificate file.
-
To enter special characters in the password, you must prefix the character with a
\. For example, to enter a@you must type\@in the command line. -
IP Office Web Control/Platform View Certificate: Use the following steps for a certificate generated using IP Office Web Control/Platform View:
-
openssl pkcs12 -in SBCE_ID.p12 -out SBCE_ID.crt -nokeys -clcerts -
openssl pkcs12 -in SBCE_ID.p12 -out SBCE_ID.key -nocerts
-
-
IP Office Web Manager Certificate: Use the following steps for a certificate generated using IP Office Web Manager.
-
openssl enc -base64 -d -in SBCE_ID.p12 -out SBCE_ID_BIN.p12 -A -
openssl pkcs12 -in SBCE_ID_BIN.p12 -out SBCE_ID.crt -nokeys -clcerts -
openssl pkcs12 -in SBCE_ID_BIN.p12 -out SBCE_ID.key -nocerts
-
-
- Copy the SBCE_ID.crt and SBCE_ID.key files from the ASBCE to your PC.
- Open SBCE_ID.crt in WordPad on your PC.
- Remove all lines except those which are between and including the first
BEGIN CERTIFICATEandEND CERTIFICATElines. The resulting file will look like the following:ADDITIONAL INFORMATION: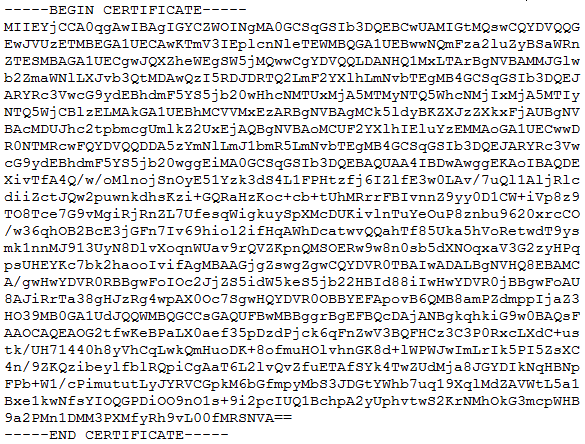
Next steps
-
Proceed to Adding the Root Certificates to the ASBCE.