AVAYA DOCUMENTATION CENTER
Find answers to your technical questions and learn how to use our products
Using Avaya Cloud Office Mobile App
User profile management
Important:
This article is based on the Android version of Avaya Cloud Office Mobile App. The navigation and user interface elements may differ for iOS users.
The user profile page contains information about you and enables you to make changes to your account. When you tap your profile icon at the top-left corner of the screen, Avaya Cloud Office Mobile App displays the profile page where you can view and edit your profile badge, presence indicator, and status message. Your presence and status message are synchronized across all Avaya Cloud Office™ applications, helping your coworkers see your availability.
From the same section, you can quickly adjust your call handling rules and manage your additional Avaya Cloud Office™ accounts.
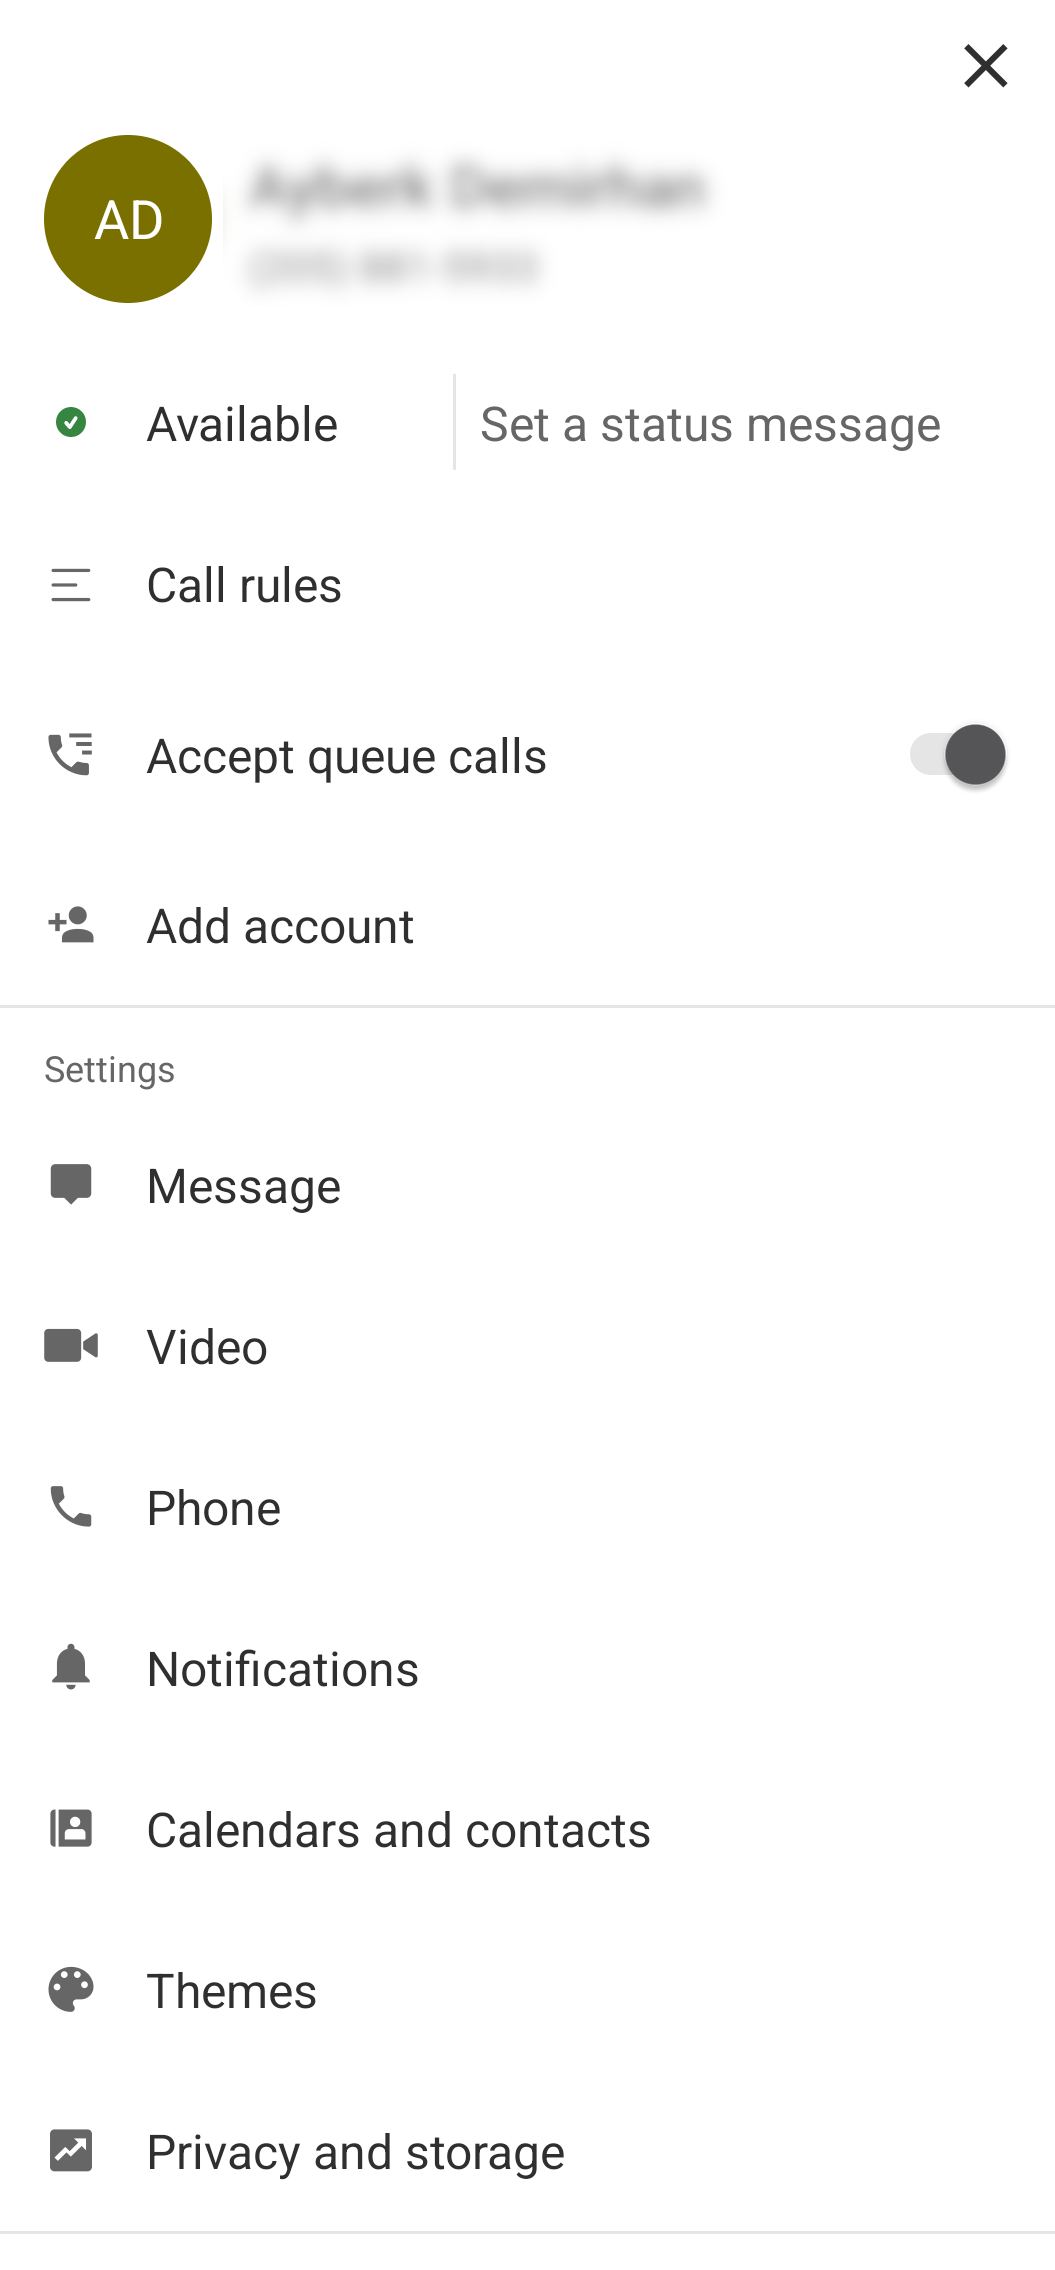
Below the profile section, you can also access the application settings and the help center. While the most settings only affect the mobile application, some settings, such as the call handling and connected account settings, apply across all Avaya Cloud Office™ applications.
Account synchronization
After you set up your profile, you might want to connect your other company accounts, such as Microsoft 365, Exchange, or Google, to Avaya Cloud Office™. This enables you to view and join events from your calendars and make calls with contacts across these accounts through Avaya Cloud Office Mobile App. You can also connect the calendar and the contacts from your mobile device for the same effect.
Notification customization
Avaya Cloud Office Mobile App also provides various notification settings for customization. You can disable notifications for unimportant items or adjust notification behaviors to prevent receiving duplicate notifications across Avaya Cloud Office™ applications. By default, Avaya Cloud Office Mobile App sends notifications only after 15 minutes of inactivity.
Modifying your profile information
About this task
To keep your personal information current, update your personal information, such as your name, profile picture, and contact details. You can also view your extension, primary number, email, and company information. You can update the following information:
First name
Last name
Job title
Email
Department
Procedure
Resetting your password
About this task
Reset your password if you forget your credentials or need to update them. After resetting your password, you are logged out of Avaya Cloud Office Mobile App.
Procedure
Changing your presence status
About this task
Change your presence status to inform your coworkers. You can select from one of the following presence options:
Available: To inform other users that you are active and available for calls. When you are on a call, Avaya Cloud Office Mobile App changes your presence to Busy to inform other users that you are unavailable for calls.
Do not disturb: To inform other users that you are unavailable for calls. When you select this option, Avaya Cloud Office Mobile App turns off the notifications and forwards incoming calls according to your call handling settings.
Invisible: To appear as Offline to other users. When you select this option, you continue receiving notifications.
Note:
When you sign out of the application, Avaya Cloud Office Mobile App changes your presence to Offline.
Procedure
Setting a status message
About this task
Set a status message to share your current status with your coworkers. Avaya Cloud Office™ displays your status message in your profile badge, in the calendar, and all the past and present messages you send in the message threads.
When setting a status message, you can select from a set of default status messages. However, you can also create a custom status message. The default status messages you can set are as follows:
In a meeting
Out of office
Out sick
Working remotely
Vacationing
Traveling
When you create a custom status message, Avaya Cloud Office Mobile App adds this custom message to the list of default messages so that you can use it again later.
Note:
You can use emojis on your custom status messages.
Procedure
- Do one of the following:
Select one from the default status messages.
To create a custom status message, tap Enter a custom status, type your message, and tap
 .
.
Avaya Cloud Office Mobile App displays the Status updated message.
Removing your status message
About this task
Remove the status message from your profile badge.
Procedure
- Next to your status message, tap
 .
. - Tap .
Avaya Cloud Office Mobile App displays the Status updated message.
Connecting your Google account
About this task
Synchronize your Google account with Avaya Cloud Office™ to connect your calendar and contacts. The components you can synchronize are as follows:
Calendars: Connects your calendar so that you can view and join your Google meetings through Avaya Cloud Office Mobile App.
Personal contacts: Connects your personal contacts so that you can send messages and make video or phone calls to Google contacts.
Directory: Connects the directory so that you can send messages and make video or phone calls to your coworkers in the Google corporate directory.
Shared contacts: Connects your personal contacts so that you can send messages and make video or phone calls to shared Google contacts.
Important:
When synchronizing your accounts, you must grant Avaya Cloud Office™ the permission to modify your Google calendar and contacts to use all the features without limitations.
Procedure
Synchronizing your presence status with your calendar
About this task
After synchronizing your Google account with Avaya Cloud Office™ to connect your calendar, enable your calendar presence to update your presence status on the Avaya Cloud Office Mobile App with your availability on your calendar.
Before you begin
Ensure that your Google account is synchronized with Avaya Cloud Office™.
Procedure
- Tap your profile picture.
- In the Settings section, tap Contacts and calendars.
- On the Contacts and calendars page, enable Enable calendar presence.
Configuring your work hours
About this task
Configure your work hours to customize how the incoming calls during work hours are handled.
Procedure
Changing the mobile notifications
About this task
Change the settings for the Avaya Cloud Office™ notifications you receive on your mobile device. You can change the following parameters:
Receive notifications: Governs whether you receive notifications. By default, you receive notifications on your mobile device after 15 minutes of inactivity on the desktop or web applications.
Direct messages: Governs whether you receive direct message notifications on your mobile device. Direct message notifications are enabled by default.
Mentions: Governs whether you receive mention notifications on your mobile device. Mention notifications are enabled by default.
Teams: Governs whether you receive team notifications on your mobile device. Team notifications are disabled by default.
Missed calls, VMs, faxes and texts: Governs whether you receive notifications for missed calls, voicemails, faxes, and text messages on your mobile device. These notifications are enabled by default.
Upcoming meeting reminder: Governs whether you receive a reminder on your mobile device before a meeting. By default, Avaya Cloud Office Mobile App sends a reminder 2 minutes before a meeting starts.
Procedure
- Tap your profile picture.
- In the Settings section, tap Notifications.
- To change the mobile notification behavior, tap Receive notifications and select from the following options:
When inactive
Always
Never
- To turn off direct message notifications, disable the Direct messages switch.
- To turn off mention notifications, disable the Mentions switch.
- To change the team notification behavior, tap Teams and select from the following options:
Every message
First new message only
Off
- To turn off the missed call, voicemail, fax, and text notifications, disable the Missed calls, VMs, faxes and texts switch.
- To change the meeting reminder behavior, tap Upcoming meeting reminder and select from the following options:
None
30 seconds before
1 minute before
2 minutes before
5 minutes before
10 minutes before
15 minutes before
Changing the unread message badge counts
About this task
Configure the unread message badge counter to specify which types of new messages increment the counter. By default, the counter displays the total number of unread messages for all message types next to your conversations. You can adjust the setting to count only direct messages and mentions.
Procedure
- At the top corner of the screen, tap your profile picture.
- In the Settings section, tap Message.
- Tap New message badge count.
- To count only the direct messages and mentions, tap Direct messages and @mentions.