AVAYA DOCUMENTATION CENTER
Find answers to your technical questions and learn how to use our products
Installing the Avaya Solutions Platform 130 Series
Creating USB flash media drives for an ASP R7.x software installation image
Before you begin
-
Obtain 1 USB Flash drive (installation USB drive must be minimum 4 GB).
-
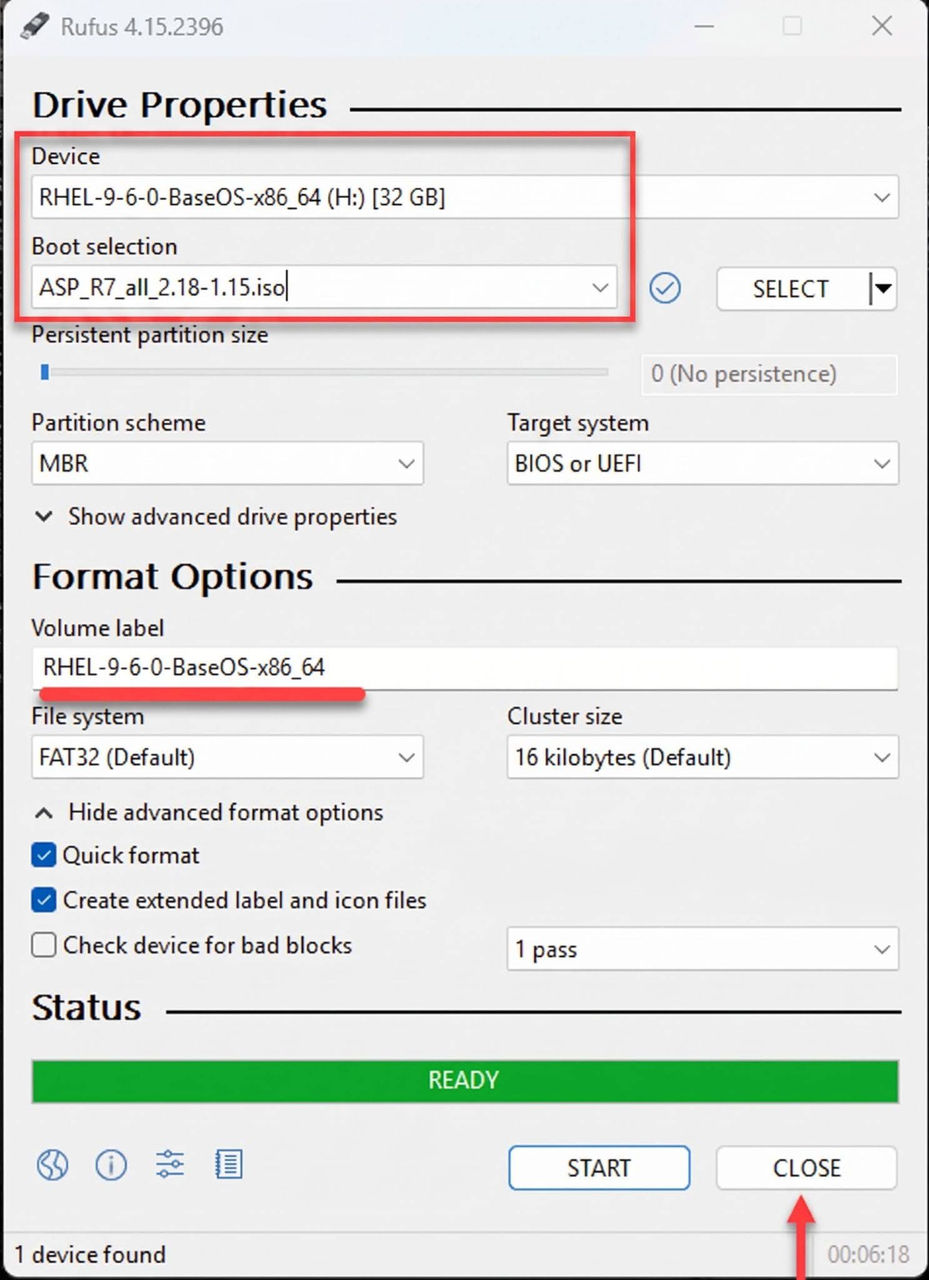
Download latest Rufus tool onto a local Windows PC if not already installed. Do not use the Portable version of Rufus.Note:The below image is an example only and shows a previous version of Rufus.
-
Download the corresponding ASP R7.x R660xs ISO installer file (reference PCN2182 and ASP 7.x Release Notes for the latest available downloads) from PLDS to the local Windows PC to be used for creating USB installation media.
Important:
Starting with ASP R7.0, there are two distinct ISO images available—with and without LUKS encryption. Choose carefully before proceeding. Once the software is installed, you cannot enable or disable encryption. Switching between states requires a complete fresh installation.
- Insert the 4GB or larger USB flash drive into your Windows PC where the ISO installer file was downloaded.
- Open Rufus.
ADDITIONAL INFORMATION:
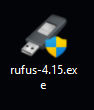
- Select your flash drive as Device if not already selected.
ADDITIONAL INFORMATION:
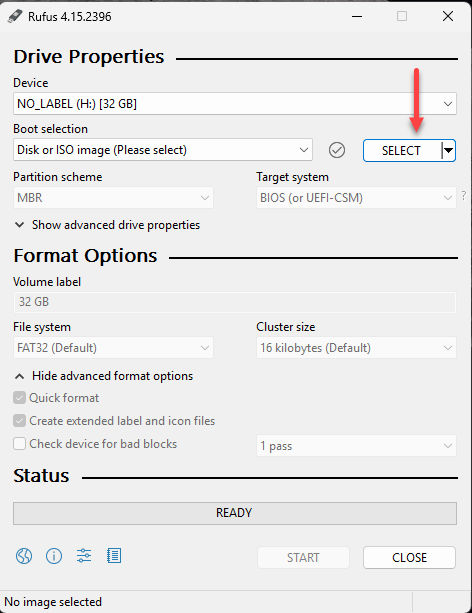
- Press SELECT and browse to the location of the ASP R7.x R660xs ISO installer file (reference file previously downloaded (see prerequisites above)).
- Select the ISO file and select Open.
-
For Encrypted select the encrypted file.Note:The example below corresponds to the ASP R7 encrypted ISO image. For software image information refer to the Release Notes.
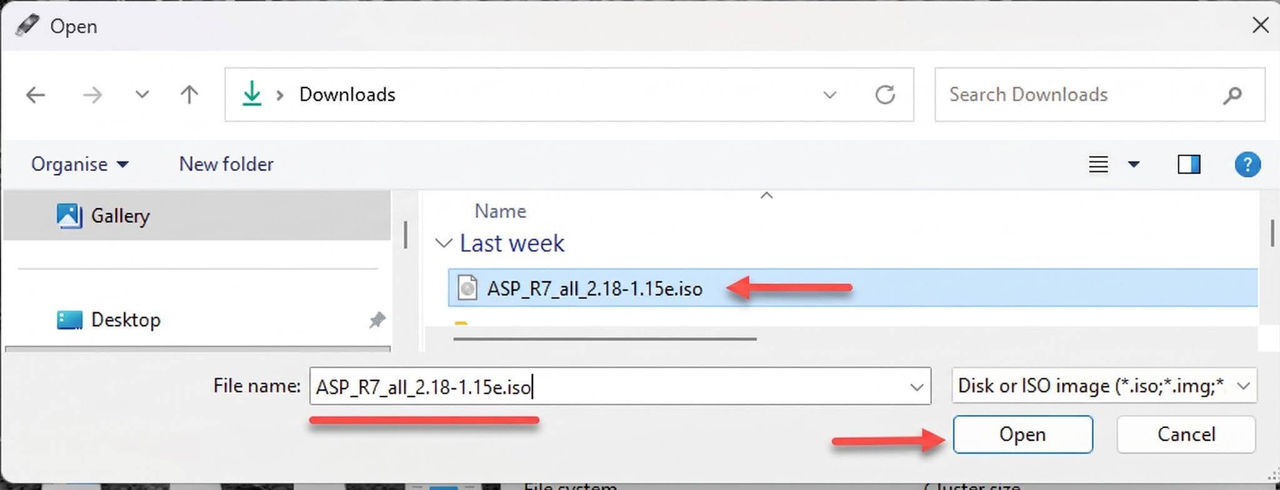
-
Select the Standard file if encryption is not required.Note:The example below corresponds to the non-encrypted ASP R7 ISO image. For software image information refer to the Release Notes.
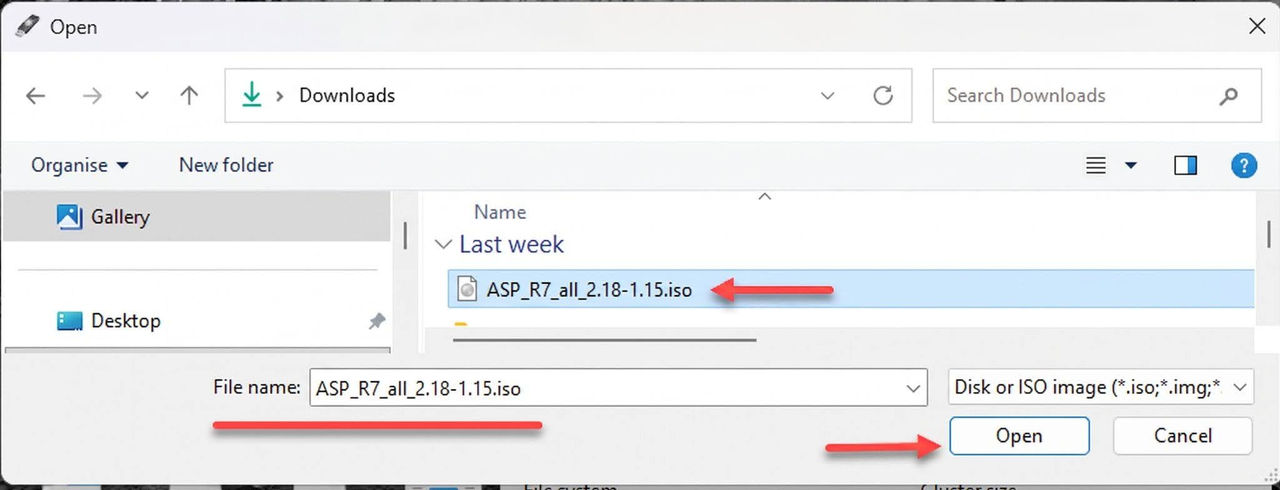
-
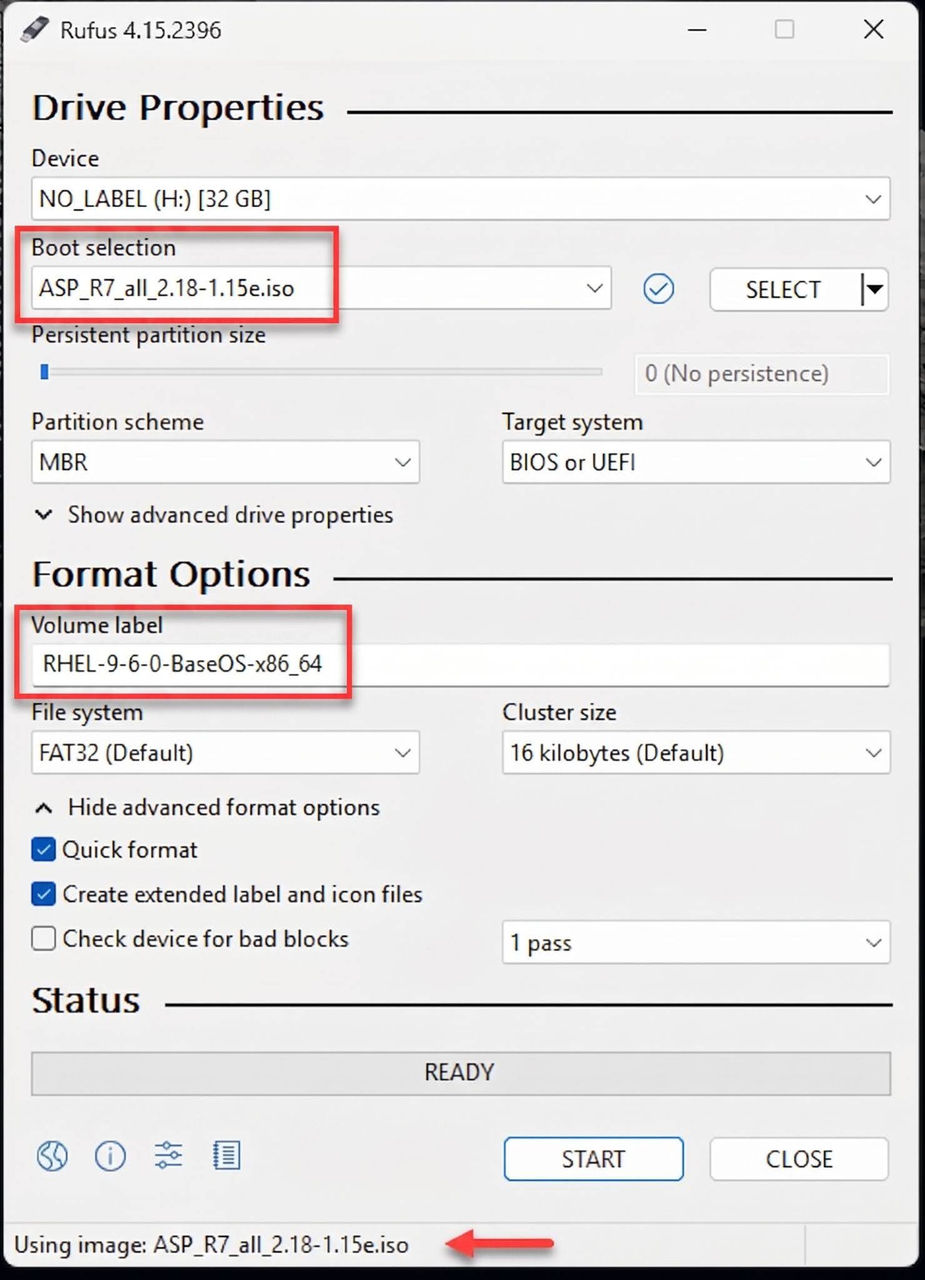
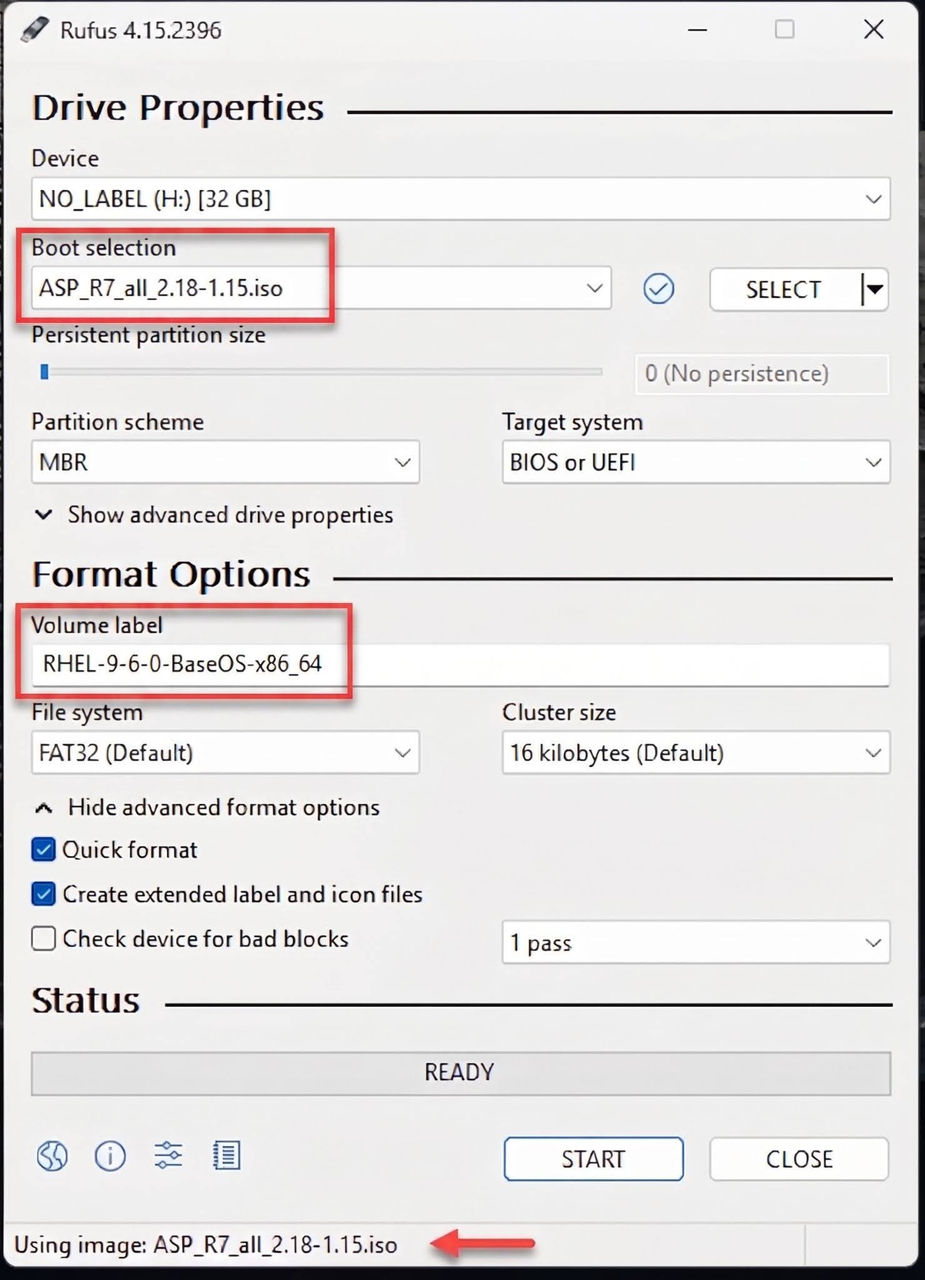
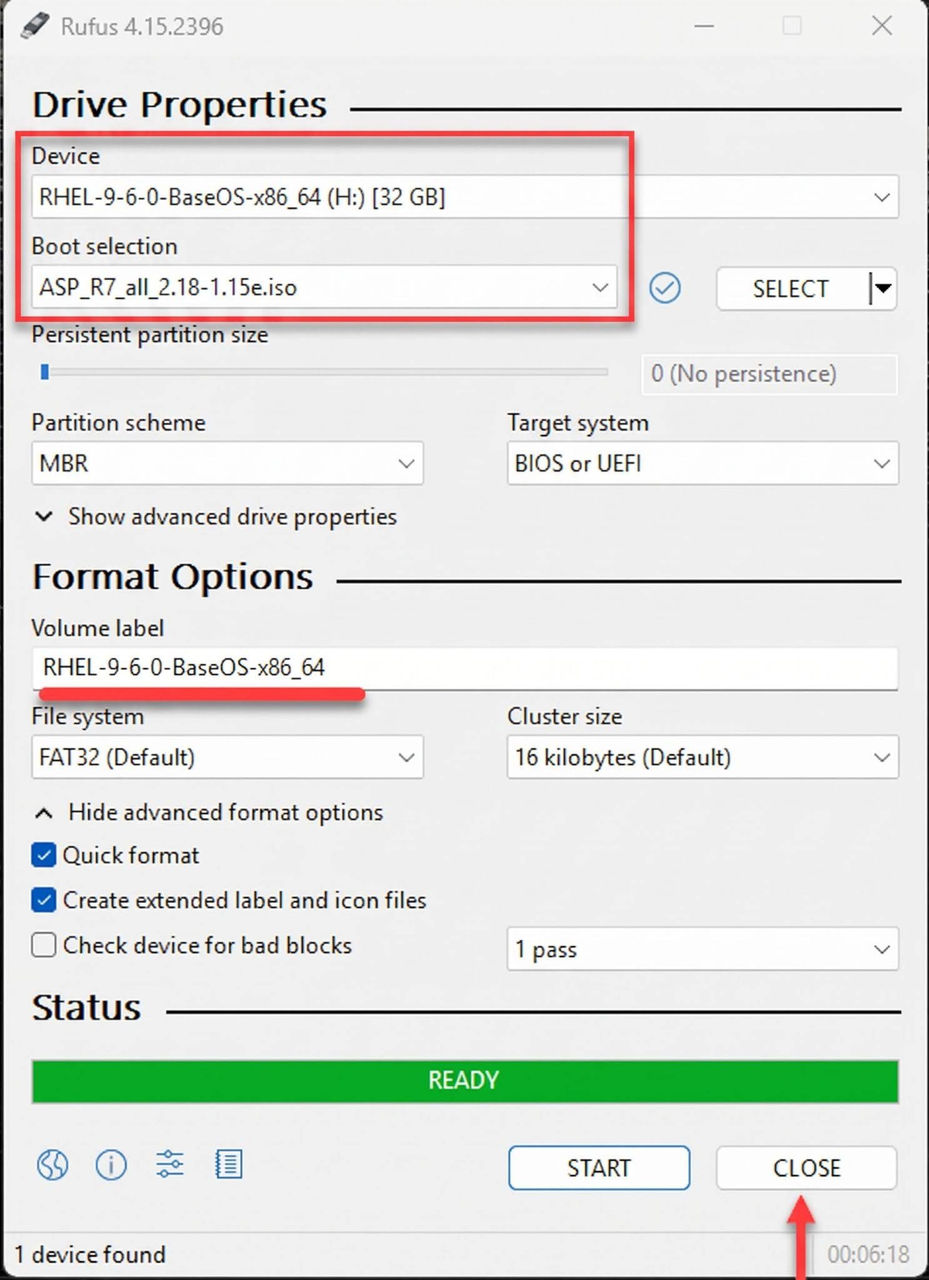
- The Rufus screen should look similar to screen shot below depending on USB drive size. Press START to initiate the process. If the message box below appears after START selection, keep the default (Write in ISO Image mode) and press OK. Allow to overwrite USB jump drive if prompted.
ADDITIONAL INFORMATION:Note:The example below corresponds to the ASP R7 encrypted ISO image.
 Note:The example below corresponds to the non-encrypted ASP R7 ISO image.
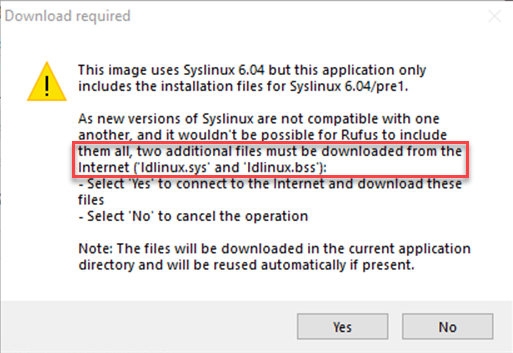
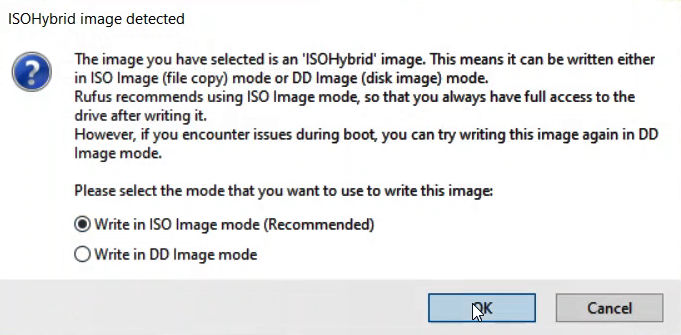 Note:If a message (see below) is displayed that Rufus is going to download files (ldlinux.sys and ldlinux.bss) from the internet, the user should update their version of Rufus to the latest available version. If the message is still displayed, the files referenced must be downloaded. The picture below is an example showing a USB device that previously was utilized to create an image.
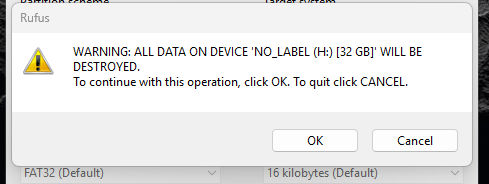
- Press OK on the WARNING dialog box.
ADDITIONAL INFORMATION:
- When the process has completed and Status shows READY, Rufus should be closed, and the Flash drive ejected from the computer. This jump drive now has the ASP R7 Software installation media copied to it. Place a label on the drive designating it as ASP R7 Software Installation Media.
ADDITIONAL INFORMATION:Note:The example below corresponds to the ASP R7 encrypted ISO image.
 Note:The example below corresponds to the non-encrypted ASP R7 ISO image.