This procedure outlines the steps required to configure the Dell R660xs RAID controller (H755). As a prerequisite, all existing configurations must be cleared from the controller.
Important:
This operation permanently erases all existing data on the hard disk drives. Proceed with this procedure only when it is necessary to delete and re-initialize a previously configured RAID array or virtual disk.
While mixed configurations of 600GB and 1.2TB drives are supported, the virtual disk capacity will be constrained by the 600GB limit, as all drives in the array will operate at the capacity of the smallest installed drive.
Avaya Dell R660xs Server ASP 130 RAID Configurations
ASP130 with 600GB HDD
ASP130 with 1.2TB HDDs
Profile A1 = 5x600GB-> RAID 5
Profile A1 = 5x1.2TB-> RAID 5
Profile A2 = 6x600GB-> RAID 6
Profile A2 = 6x1.2TB-> RAID 6
Profile A3 = 6x600GB-> RAID 6
Profile A3 = 6x1.2TB-> RAID 6
Profile A31 = 8x600GB-> RAID 6
Profile A31 = 8x1.2TB-> RAID 6
Caution:
When performing this procedure, all data on the HDDs is destroyed.
Reference the R660xs server figure below.
Figure: Avaya Dell R660xs Server
Front view of Dell PowerEdge R660xs Server
No.
Item
Icon
Description
1
Left control panel
NA
Displays the system health, system ID, and status LED indicators.
Status LED: Enables you to identify failed hardware components. There are up to five status LEDs and an overall system health LED (chassis health and system ID) bar.
2
Drive slots
N/A
Enables installation of hard disk drives (HDDs) that are supported on your system.
3
Right control panel
NA
Contains the power button, USB port, iDRAC Direct micro port, and the iDRAC Direct status LED.
4
Power button
Indicates if the system is powered on or off. Press the power button to manually power on or off the system.
Note:
Press the power button to gracefully shut down an ACPI-compliant operating system.
5
USB 2.0 port
The USB is a 4-pin connector and 2.0-compliant. This port enables you to connect USB devices to the system.
6
iDRAC Direct micro port
The iDRAC Direct port (Micro-AB USB) enables you to access the iDRAC direct features.
7
VGA port
Enables connection to the display device (console) of the system. If the user connects to the front VGA port, the rear VGA port does not function.
8
Express service tag
NA
The Express Service Tag is a slide-out label panel that contains system information such as Service Tag, NIC, MAC address, and so on. If you have opted for the secure default access to iDRAC, the Information tag will also contain the iDRAC secure default password.
Verify that all essential data has been backed up from the server. Power off the system by pushing and holding the power button (4) until the shutdown sequence initiates.
Ensure all HDDs are correctly seated, then push the power button to initiate the system boot sequence.
When hardware boot screen appears, select <F2> System Setup.
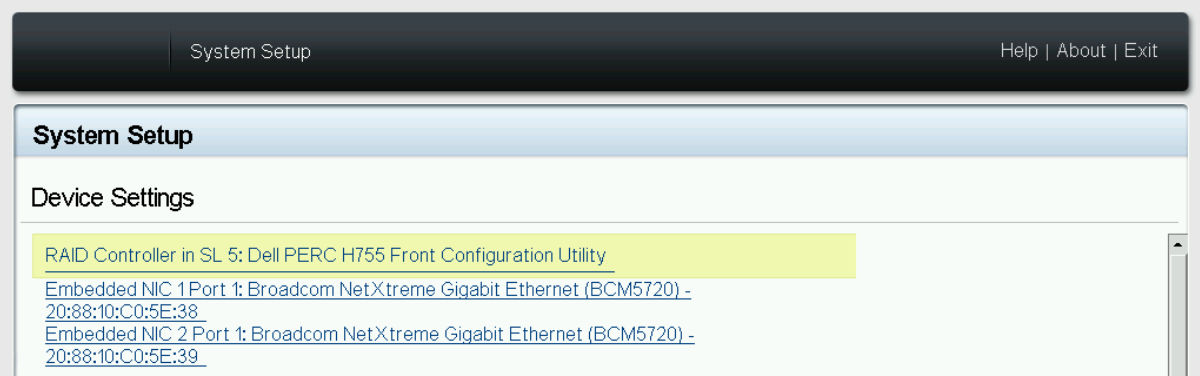
From the System Setup Main Menu, select Device Settings.
ADDITIONAL INFORMATION: Figure: R660xs with H755 RAID controller
Select the RAID Controller listed at the top of the menu to access its configuration.
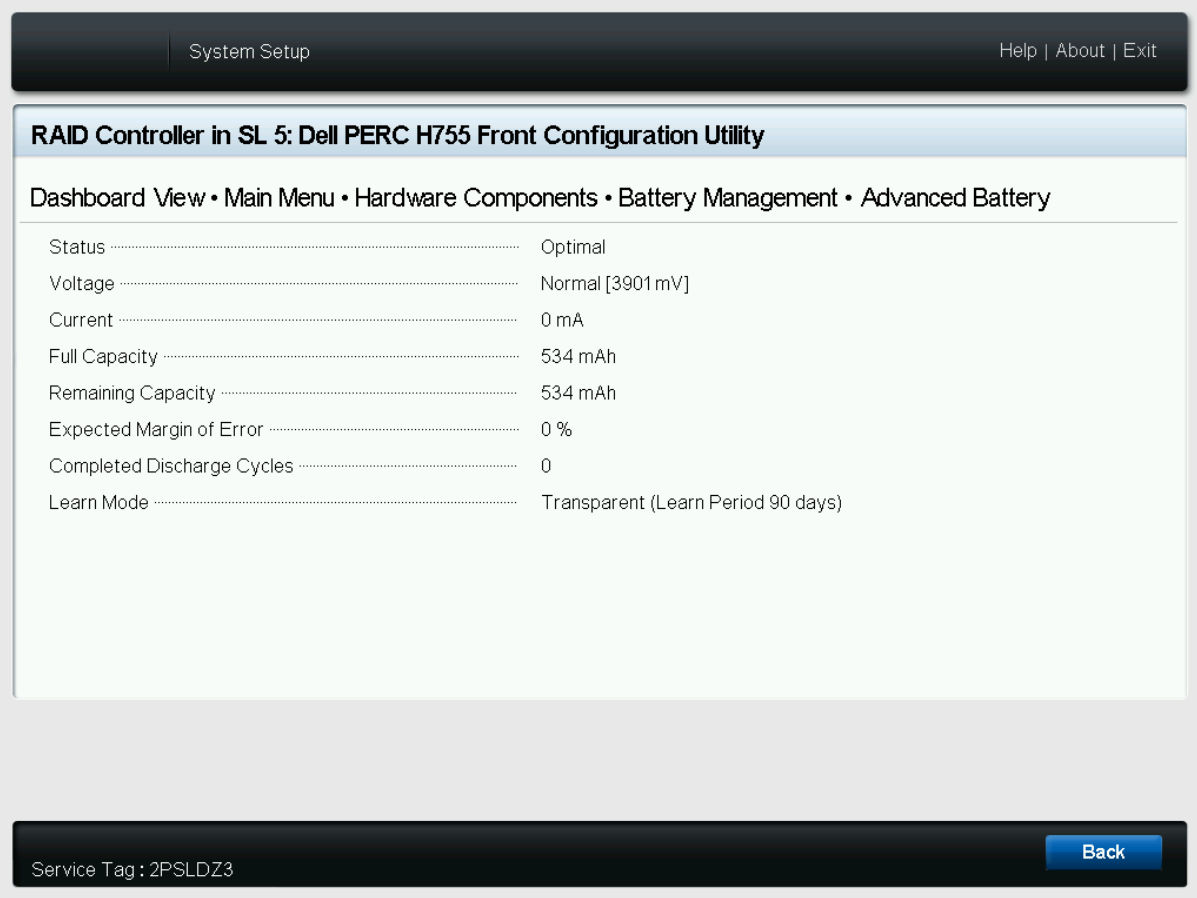
On the next screen, to view the RAID battery status of the RAID controller, select Main MenuHardware ComponentsBattery ManagementAdvanced.
Verify that the RAID battery's Full Capacity exceeds 250 mAh and that the Remaining Capacity remains within 30 mAh of the Full Capacity value. The Status should report as Optimal.
If the Full Capacity falls below 250 mAh, initiate a request to procure a replacement RAID battery for immediate installation. While operations may continue temporarily, the battery will likely require replacement within the coming year.
ADDITIONAL INFORMATION:
Note:
A RAID battery is considered failed when the Full Capacity value is 135 mAh or less. If the battery has failed, do not proceed with the installation until a replacement has been installed.
Select Back three times to return to the RAID Controller Main Menu and select Configuration Management.
Select Clear Configuration.
ADDITIONAL INFORMATION:
Caution:
Ensure all required customer data is backed up before proceeding with this next step. If data still requires backup, then select No and select Back/Exit to get out of these menus to perform appropriate backup of data.
To clear the current RAID array, check ConfirmYesOK.
ADDITIONAL INFORMATION:
By pressing OK, all data on the HDDs is cleared/destroyed.
If after clearing the RAID controller configuration a Manage Foreign Configuration option is shown, then one or more of the HDDs inserted was from another RAID array and was not a new HDD. Select Manage Foreign Configuration. If there is no Manage Foreign Configuration option, then the user can move onto step 15 below.
Select Clear Foreign Configuration.
To clear the current RAID array, check ConfirmYesOK.
Select Back to move back to the higher-level RAID Controller menu.
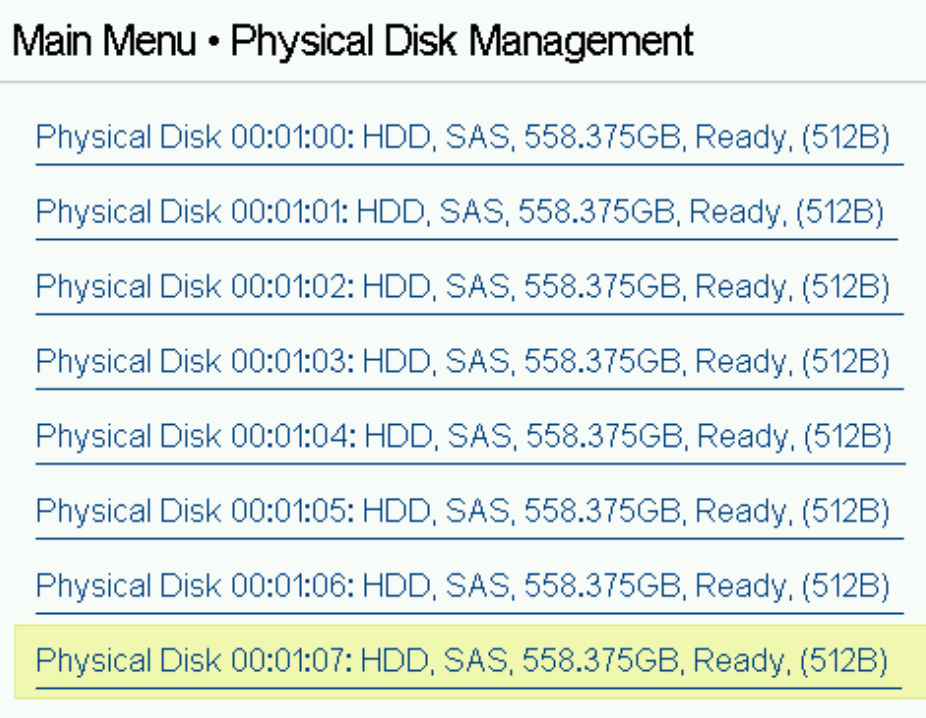
Select Physical Disk Management.
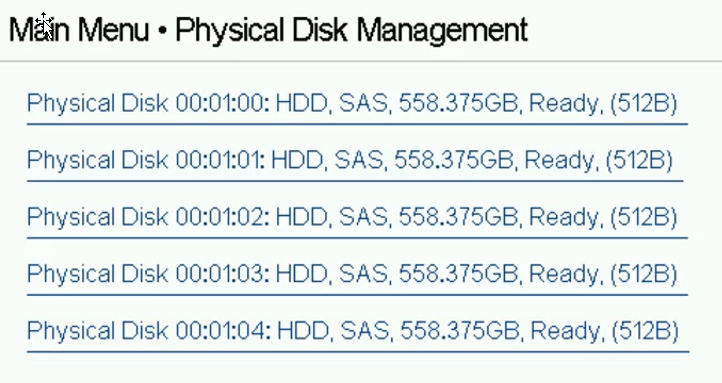
ADDITIONAL INFORMATION: Figure: 5 HDDs required for R660xs Profile A1
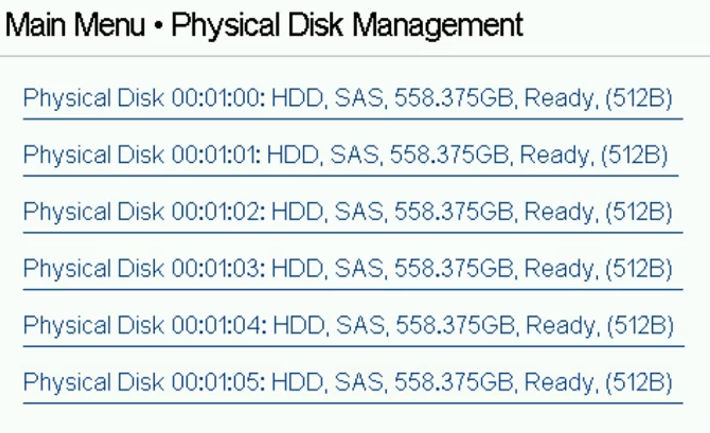
Figure: 6 HDDs required for R660xs Profiles A2 and A3
Figure: 8 HDDs required for R660xs Profile A31
Verify that the number of Physical Disks displayed aligns with the requirements for the target ASP 130 profile. Ensure all disks are in a Ready state before proceeding with RAID array creation. If any disks are not in a Ready state, return to step 10 to execute the Clear Configuration process again, then navigate back to Main MenuPhysical Disk Management to re-verify the state of the disks.