

AVAYA DOCUMENTATION CENTER
Find answers to your technical questions and learn how to use our products
Installing the Avaya Solutions Platform 130 Series
Installing the ASP R7.x (KVM on RHEL 9.6) on the Dell R660xs
The following pictures are just a representation and should only be used as an example.
Before you begin
-
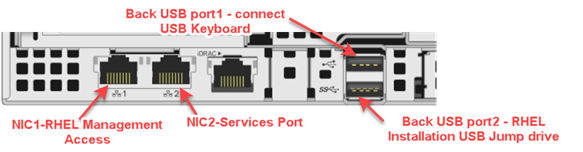
Ensure the R660xs server’s NIC 1 port is properly connected to a data switch port which provides network connectivity to Avaya’s network. This access is not required during installation. It is required after the installation.
-
One available routable IP address. This is the same IP address that will used later in the installation.
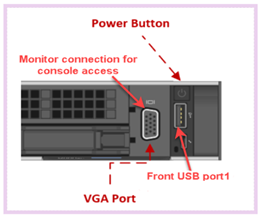
- Connect a monitor to the front VGA port of the R660xs.
- Connect a keyboard to the front USB port of the R660xs.
ADDITIONAL INFORMATION:
- Insert the USB ASP R7.x Software Installation Media in the back, bottom USB Port2 (USB 3.0) of the server.
ADDITIONAL INFORMATION:
- Power on or reboot the server.
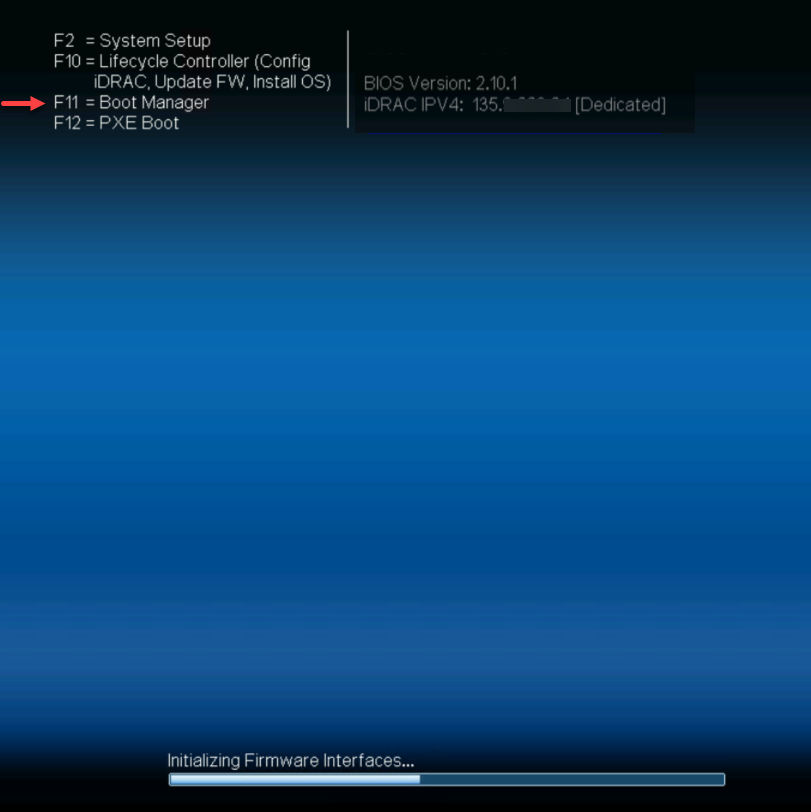
- During server POST, press F11 when prompted to enter the Boot Manager.
ADDITIONAL INFORMATION:
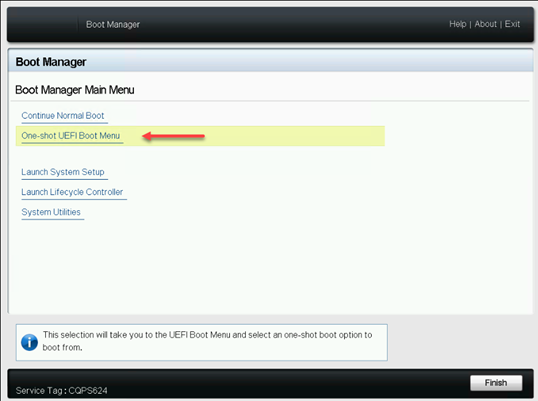
- From keyboard, arrow down to highlight One-shot UEFI Boot Menu and press Enter.
ADDITIONAL INFORMATION:
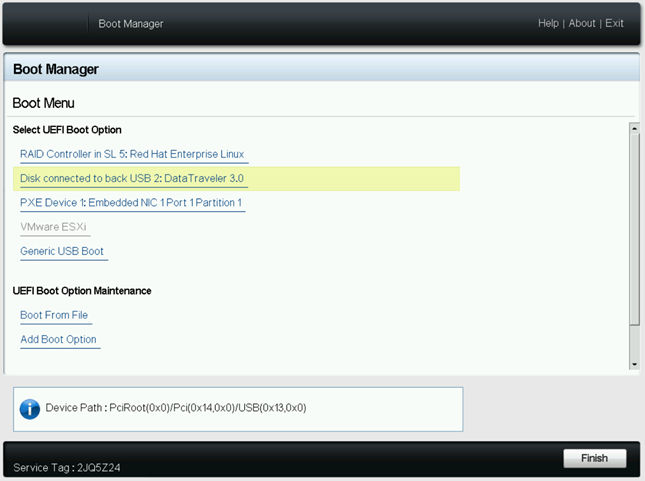
- From the keyboard, arrow down and highlight Disk connected to back USB 2: and press Enter. The server will now boot from the ASP R7.x R660xs Install USB Media installed in the back USB port2 after POST completion.
ADDITIONAL INFORMATION:
- The server should start booting from the back USB ASP R7.x Software Installation Media. When the screen below appears, you will find the entry Install Red Hat Enterprise Linux 9.6 already highlighted. After 7 seconds, selected entry will be started automatically or you can press Enter. No more user interaction is required until software is installed and server reboots. Monitoring of installation progress is advised.
ADDITIONAL INFORMATION:

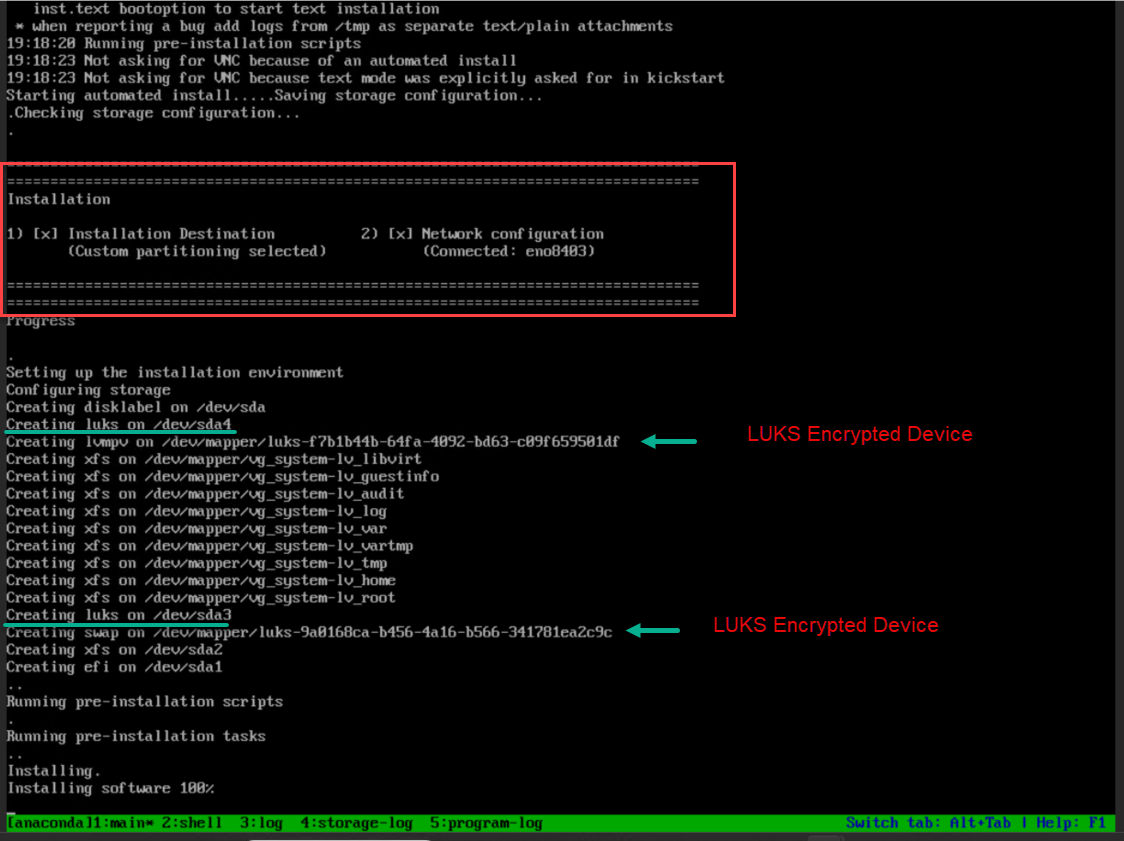
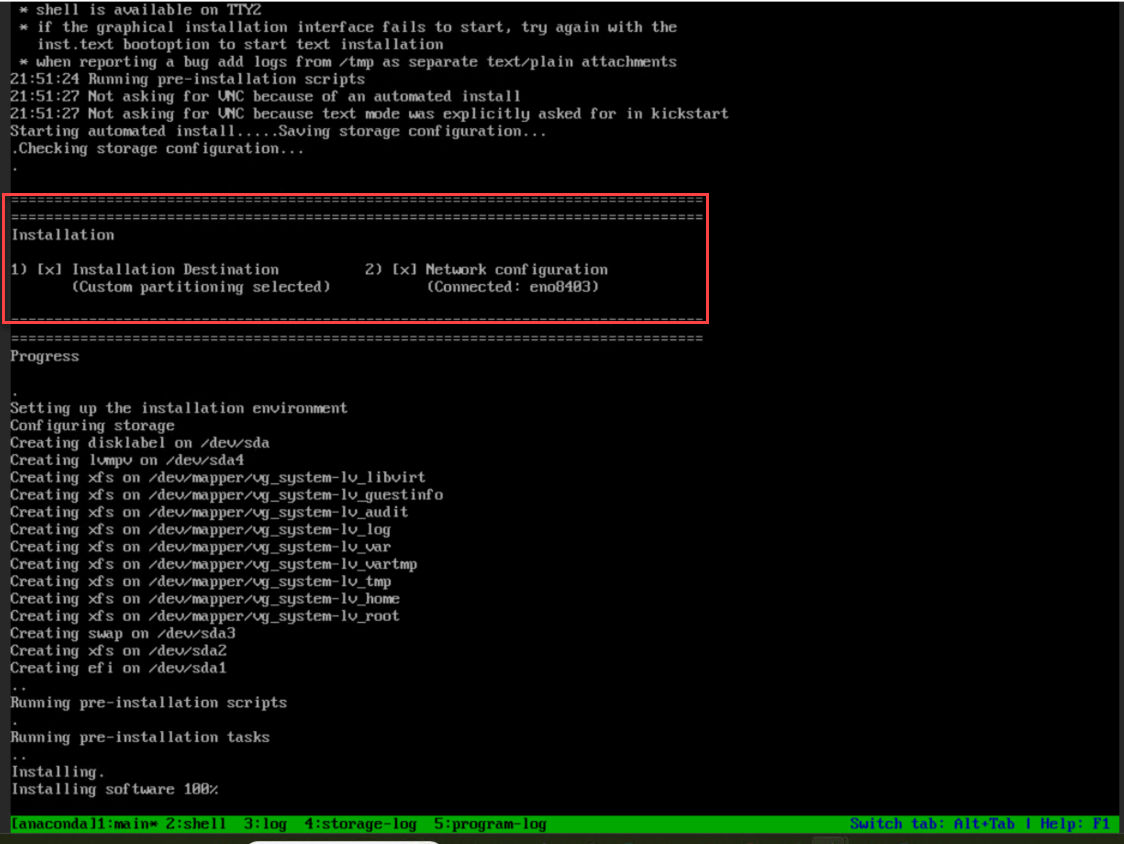
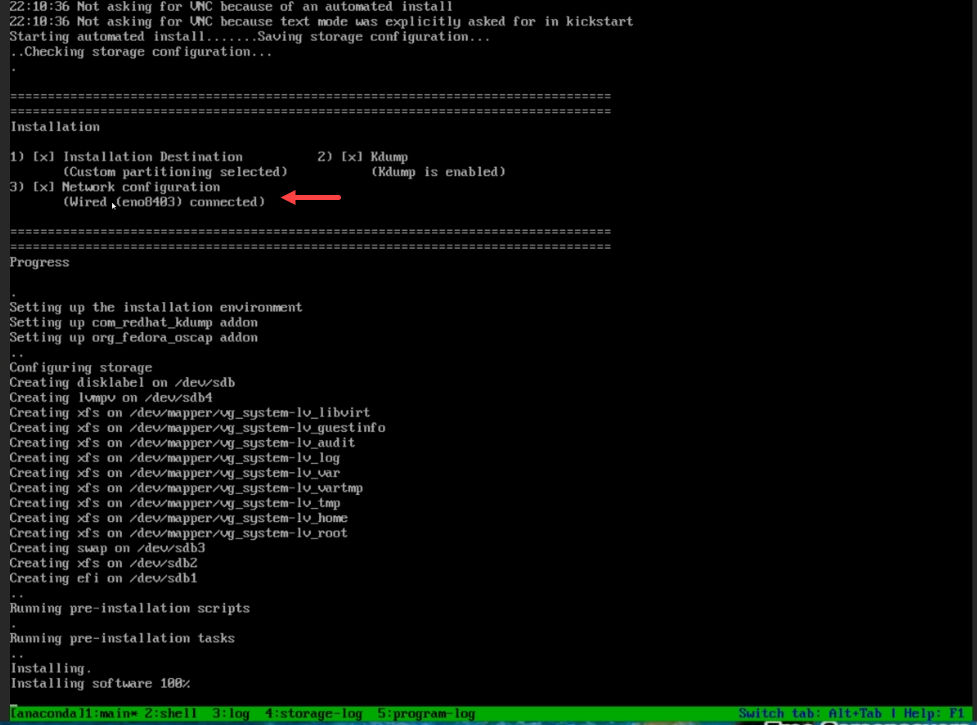
- When the screen below appears, the boxes shown below (1-2) should be automatically selected with an X. Box 3 ONLY appears and is checked if the services port is wired to a computer. If the boxes (1-2) were automatically selected with an X, the system will continue to install.
ADDITIONAL INFORMATION:Note:The example below corresponds to the ASP R7 software installation using the encrypted ISO image.
 Note:The example below corresponds to the ASP R7 software installation using the non-encrypted ISO image.
 Note:The example below corresponds to the ASP R7 software installation with services port wired to a computer.
- Once software is installed, the system will reboot. When the system has first time booted, a login prompt should be displayed at the console. Do not login immediately; within a minute the server will reboot a second time for additional background configuration of the system. .
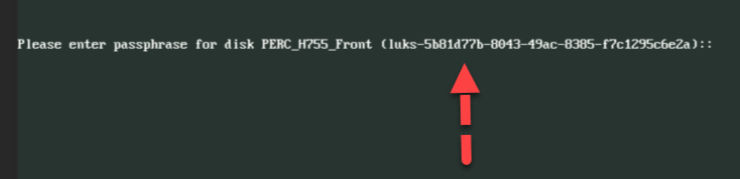
ADDITIONAL INFORMATION:Caution:Do not attempt to log in at this time.During a brief period a passphrase prompt during the OS boot up will be displayed - DO NOT do anything. After a few seconds, disks will auto-unlock on its own.
- When the system has booted a second time, a login prompt will be displayed at the console. Login using credentials: custadm/ACP130_pw
- Follow the steps at Configuring KVM on Red Hat Enterprise Linux 9.6 Network Settings.
Next steps
After the software is loaded on the server, do the following:
-
If required, configure iDRAC.
-
For initial configuration steps, refer ASP 130 Series iDRAC 9 Best Practices.