AVAYA DOCUMENTATION CENTER
Find answers to your technical questions and learn how to use our products
Installing and Administering Avaya Room System C100 Series
Wall-mounting Avaya Room System C170
About this task
You can mount Avaya Room System C170 to a wall using the wall-mounting bracket and screws provided in the package. You must choose a smooth, level, drywall surface to install the codec. For more information about the environmental requirements for your device, see Safety precautions.
When wall-mounting Avaya Room System C170, place it so that you can either directly point at it with the remote control or at a vertical or horizontal angle of up to 15°. The remote control range is within 15 meters, but you can use a third-party IR repeater to increase the range.
The codec package includes:
Mounting bracket
Cross recessed, pan head with tail machine teeth screw, UNC 1/4''-20*8
Cross recessed, pan head with dielectric flat tail machine screws, PWM3*6
Before you begin
Ensure that you obtain four wall anchors corresponding to the type of wall-mounting surface and four M5 screws.
Procedure
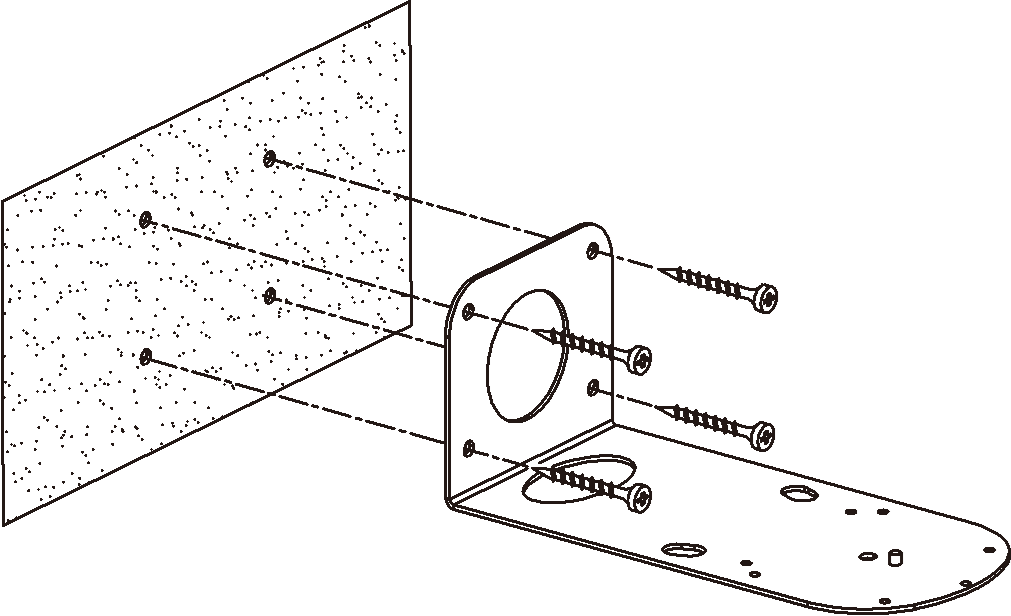
- Install the mounting bracket and fix it with M5 screws.
The following image shows a high-level view of attaching the mounting bracket to the wall:
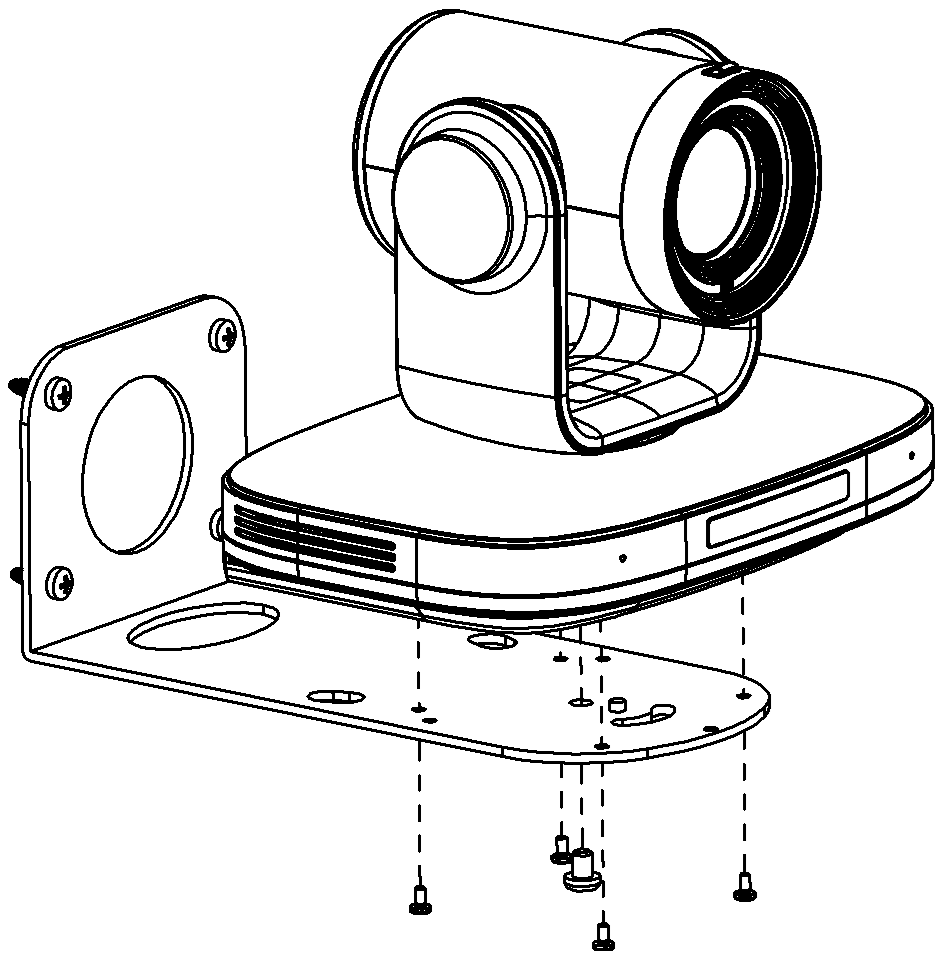
- Install the codec on the mounting bracket and secure it with PWM3 screws and a UNC 1/4''-20 screw.
The following image shows a high-level view of attaching the codec to the bracket:
Result
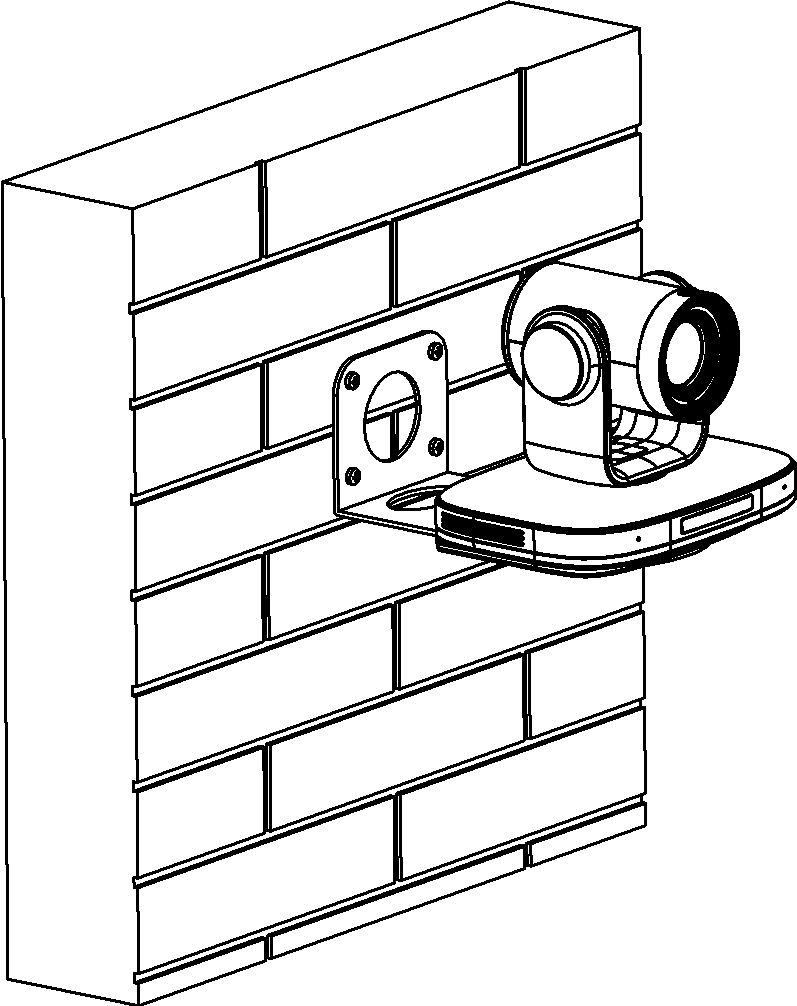
The following image shows an example of a wall-mounted Avaya Room System C170: