Modifying an existing complex table

Last Updated : Jun 15, 2021 |

About this task

Procedure

  1. To add a new row to the table:
    1. Put the cursor in any column of the row where you want to add a new row.
    2. Press Enter and select row.
    3. Insert the text in the cells of the new row.
  2. To modify the width of a column:
    1. In the table/tgroup element, expand colspecs, and select the colspec element of the appropriate row.
    2. Change the colwidth attribute in the form percentage followed by asterisk.

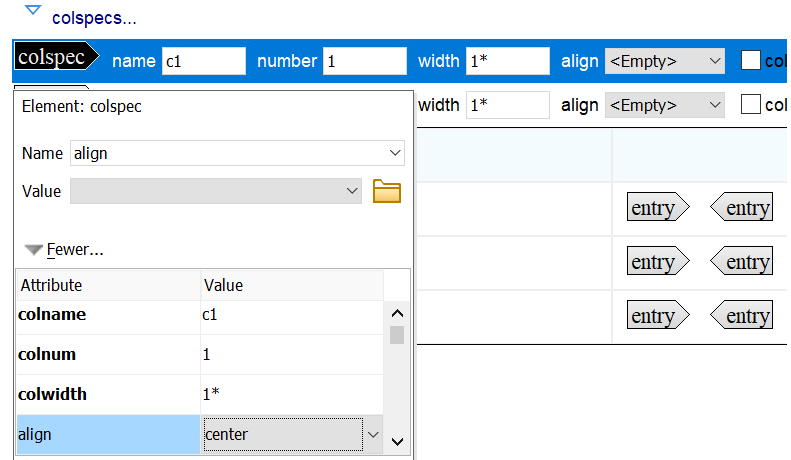
    For example, for a two-column table where you want the first column to have a proportional width of 30% and the second column to have a width of 70% of the table width, enter a colwidth of 30* for the first column and then modify the attributes of the second column to set the colwidth to 70*.

    You can also modify a column's width of simple table or complex table by positioning the cursor over the column separator until the cursor changes, and then dragging the cursor to adjust the width of the column. You cannot use this method to modify the column widths of part tables.

    Important:

    Do not use fixed width for tables that use the full page. Using fixed width can cause the table to run off the page. Ensure that you use relative widths using percentage.

  3. To merge any cells, select the cells you want to merge, right-click and select Join.
  4. To center a column or a cell:
    1. Do the following:
      • To center a column, double-click or select the colspec element from table/tgroup.

      • To center a cell, double-click or select the cell.

      The editor displays the Attributes window.

    2. In the Attributes window, select center in the align field.


    3. Click OK.
  5. If you have any empty table rows, do the following so that the rows will be the same height as rows with content:
    1. In the editor, go to Tools > Preferences..
    2. On the Preferences dialog box, click Save.
    3. Under Write Non-ASCII Characters As, select Numeric Character References.
    4. Click OK.
    5. Put your cursor in a cell in the empty row and select Insert > Symbol.
    6. Select the Character Entities tab and select nbsp.
    7. Click OK.