

AVAYA DOCUMENTATION CENTER
Find answers to your technical questions and learn how to use our products
Avaya Aura Presence Services Snap-in Reference
Modifying default certificate to Subject Alternative Name certificate
When Presence Services is installed, Avaya Breeze® platform generates a default certificate. The owner is machine hostname. When Presence Services federates with remote XMPP server, Presence Services uses presence domain which is different from the hostname in most of the cases. To pass certificate validation on remote machine, the presence domain is added to default certificate. This setting is achieved by using Subject Alternative Name.
- Log on to the System Manager web console from where Presence Services is installed.
- Click .
- Click Manage Elements.
- Select the Avaya Breeze® platform instance.
- Click .
- Select Websphere, and click Replace.
- Select the DNS Name check box, and enter the presence domain.
ADDITIONAL INFORMATION:
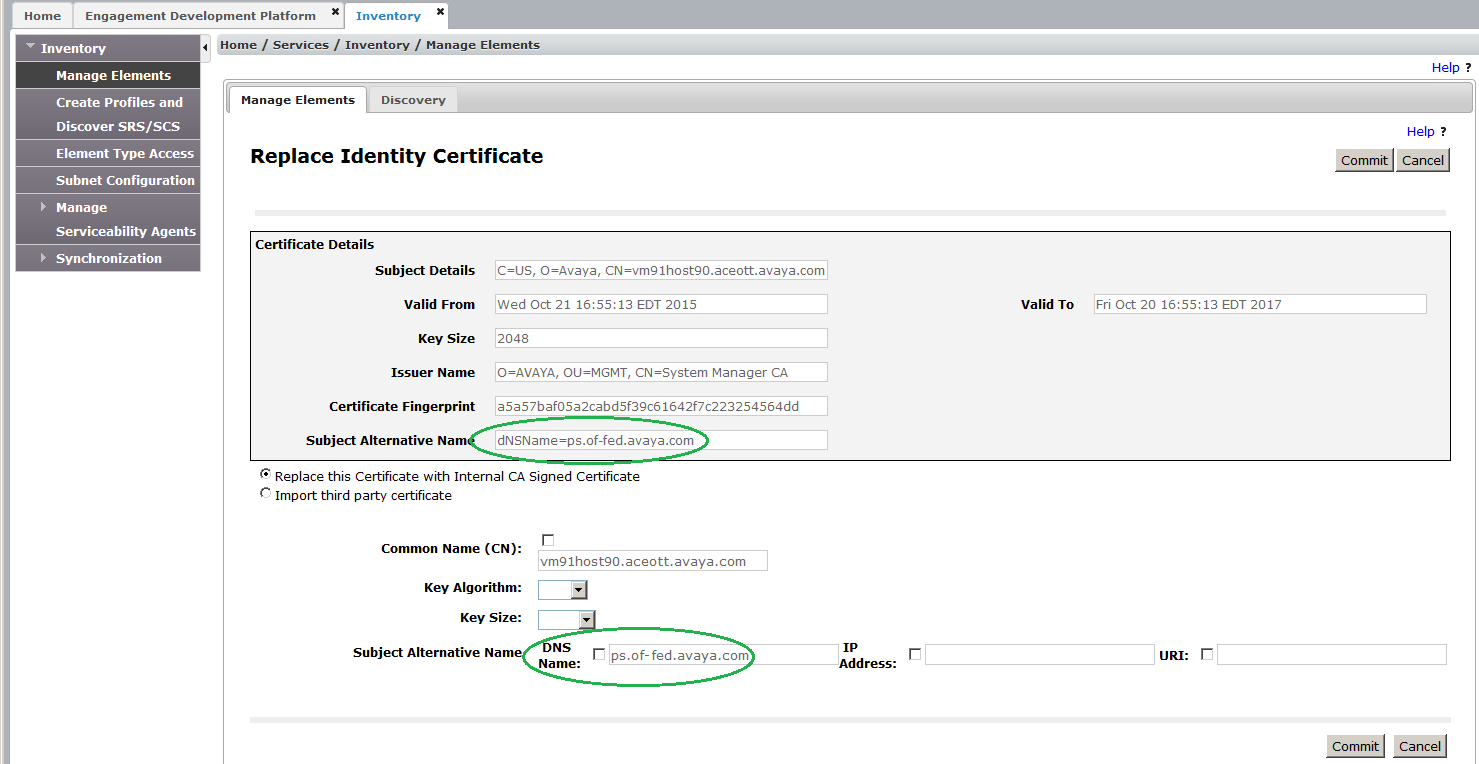
- Click Commit.
- Restart the cluster for the changes to take effect.
- To view the certificate, do the following:
- On the System Manager web console, navigate to .
- Click Manage Elements.
- On the Manage Elements tab, select the check box corresponding to the Avaya Breeze® platform server where you have saved the modified certificate.
- Click .
- On the Manage Trusted Certificates page, select the check box corresponding to the certificate.
ADDITIONAL INFORMATION:Presence Services displays the certificate details in the Certificate Details area.