AVAYA DOCUMENTATION CENTER
Find answers to your technical questions and learn how to use our products
Avaya Aura Presence Services Snap-in Reference
Configuring the DNS server used by the Avaya Session Border Controller for Enterprise
- Log in to the Avaya Session Border Controller for Enterprise server as an administrator.
- Click System Management.
- In the Device tab, click the Edit link for the Avaya Session Border Controller for Enterprise device.
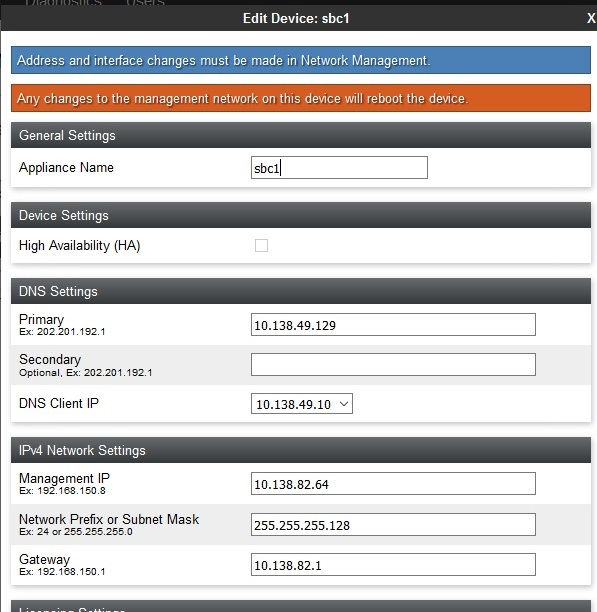
- Configure the DNS settings. In the DNS settings pane:
- Enter the Primary and Secondary IP addresses of the DNS servers.
In the following example, the primary address is the IP address of the Microsoft DNS server in the Microsoft domain.
- Select the appropriate Client IP that connects to the DNS servers.
- Enter the Primary and Secondary IP addresses of the DNS servers.
- Configure the IPv4 network settings. In the IPv4 Network Settings pane:
- Enter the management IP address of the Avaya Session Border Controller for Enterprise.
- Enter the subnet of the network system.
- Enter the IP address of the gateway.
- Using System Management, select Restart Application to restart the Avaya Session Border Controller for Enterprise.