

AVAYA DOCUMENTATION CENTER
Find answers to your technical questions and learn how to use our products
Avaya Aura Presence Services Snap-in Reference
Setting up Engagement Designer with Presence Services
Use this procedure to set up Engagement Designer 3.3 with Presence Services.
Before you begin
Ensure that you have the following:
-
System Manager with a core platform cluster and a general purpose cluster.
-
Core platform cluster running Presence Services.
-
General purpose cluster running Engagement Designer 3.3 and Presence Services Connector.
- Configure the Presence Services connector to point to the Presence Services installation. You must use the Avaya Breeze® platform Management Module IP address, and not the Avaya Breeze® platform Security Module IP address.
- Add Presence Services tasks to the Engagement Designer by doing the following:
- On the System Manager web console, navigate to , and then click Cluster Administration. Ensure that you have logged into System Manager by using the FQDN, and not by using the IP address.
- In the Service URL column of the General Purpose cluster profile, click Designer Console URL. The Engagement Designer admin console is launched.
- Click Bundles on the Engagement Designer admin console.
- On the Bundles page, click Upload to upload the Presence Services Tasks svar file.
- Click Deploy.
- To design a work flow, click the Engagement Designer link.
ADDITIONAL INFORMATION:In the Designer page, you must see the icons as shown in the image.
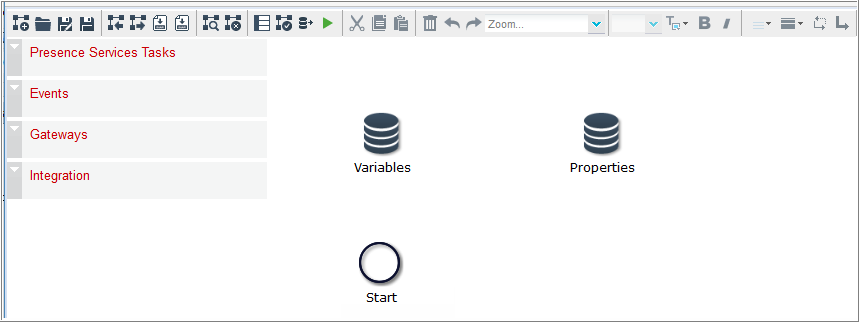
- Drag and drop Presence Services Tasks into the designer.
- Click Save and click Start to run the configuration.
- You must connect each component. Do the following:
- Hover over the Start component. When you hover over, you will see the Arrow icon.
- Click the Arrow icon and move your mouse over to connect to the “New Presence” task.
- Move your mouse to connect the Presence task to the End task.
ADDITIONAL INFORMATION:The configuration must appear as shown in the following image: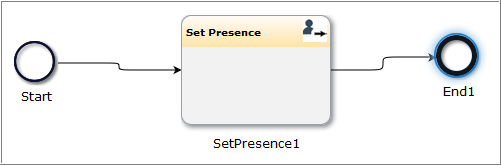
- Click on the Set Presence task. The properties pane appears.
- Enter the values, and then click Apply .
- Click Close.
- To run the Presence task, click the debug tool that is available on the top of the page.
ADDITIONAL INFORMATION:You will be guided through a set of steps.