Adding a custom role

Last Updated : Apr 27, 2014 |

Procedure

  1. On the System Manager web console, click Users > Groups & Roles.
  2. In the navigation pane, click Roles.
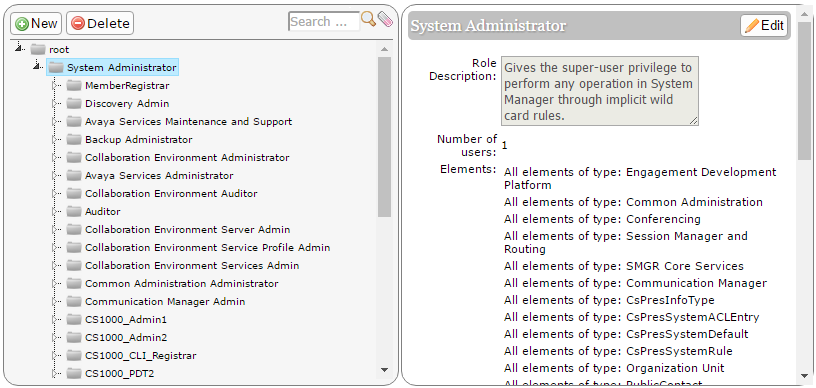
  3. On the Roles page, select a role, and perform one of the following:
    • Click New.

    • Right-click and select New.

    The role that you select becomes the parent of the role that you create. The permissions available to the new role are limited to the permissions of the parent role.


    Roles organization

    On the Add New Role page, the system displays the parent role in the Parent Role Name field.

  4. Type the relevant information in Role Name and Role Description fields.
  5. Click Commit and Continue.

    The system displays the Role Details page.

  6. On the Element/Service Permissions tab, click Add mapping to define permissions for a role.

    You can also click Copy All From to copy all the permissions on all types of elements or services from an existing role. For instructions, see Copying permission mapping for a role.

  7. Select a group from the Group Name field.

    Ensure that you create a group before you select the group. For instructions, see Creating groups. For instructions to assign resources to a group, see Assigning resources to a group.

  8. Optional If you leave the Group Name field blank, in the Element or Resource Type field, click an element or All.
  9. Click Next.

    The title of the Permission Mapping page displays the element type that you selected.

  10. On the Permission Mapping page, change the permissions that are available for this role as appropriate.

    The system displays the permissions that are available for the parent of the role that you created. The system also displays unassigned permissions in a read-only format. Only an administrator can deny, change, or view the permissions for the role.

  11. Click Commit.

    The system displays the Role Details page and the selected permissions.

  12. Click Commit.