Creating custom PPM mapping profiles

Last Updated : Nov 24, 2022 |

About this task

Use this procedure to create custom PPM mapping profiles for the following server types:

  • Presence

  • Session Manager

  • Branch Session Manager

For example, you must create a mapping profile for each group of remote workers who use the same pair of Session Manager systems as the primary Session Manager and the secondary Session Manager.

With custom PPM mapping profiles, you can administer server IP addresses, FQDNs, and ports that are not available with the standard set of pre-defined server properties. For example, if you have a geo-redundant deployment and the server that you want to connect to is not in the local network, you can use the custom options to link the servers.

Note:
  • When PPM Mapping profile configured with custom option, Avaya SBC expects exact configured Session Manager FQDN from Session Manager in PPM responses to rewrite with the configured mapping of Avaya SBC IP.

  • When PPM Mapping profile configured without custom option, Avaya SBC maps the resolved IP of FQDN in server configuration with the PPM response to rewrite with configured mapping of Avaya SBC IP.

    Use IP addresses instead of FQDN if custom PPM profile is required.

When creating PPM mapping profiles, consider the following:

  • Within a mapping profile, you can create multiple profile entries.

  • You can administer both standard and custom PPM profile entries in the same mapping profile.

  • If you need to convert a profile entry from standard to custom or custom to standard, record the current settings of the profile entry, delete the profile entry, and readminister the profile entry using the standard or custom options.

Procedure

  1. Log in to the EMS web interface with administrator credentials.
  2. From the Device menu, click the SBC name to administer.
  3. Navigate to DMZ Services > PPM Mapping.
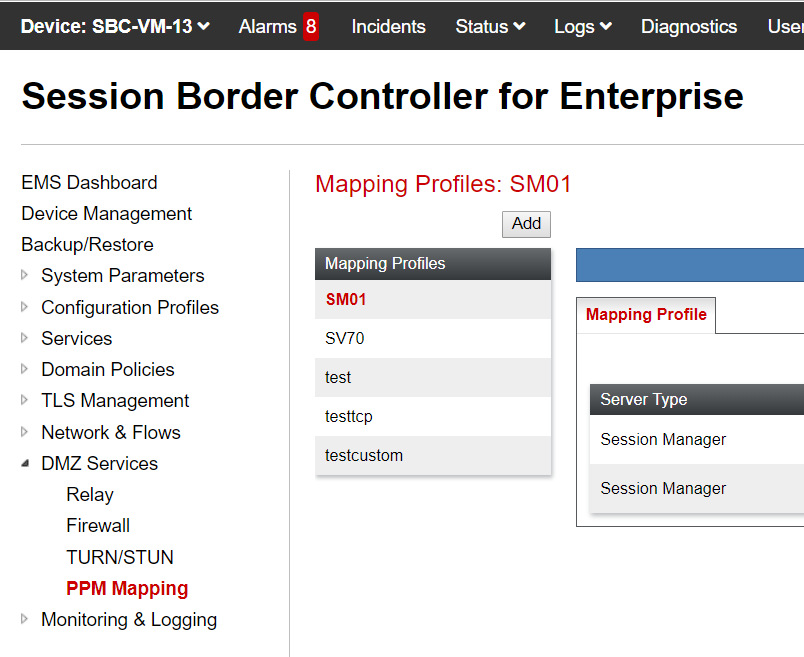
  4. Click the Add button that is above the Mapping Profiles list.

    The system displays a screen similar to the following example:
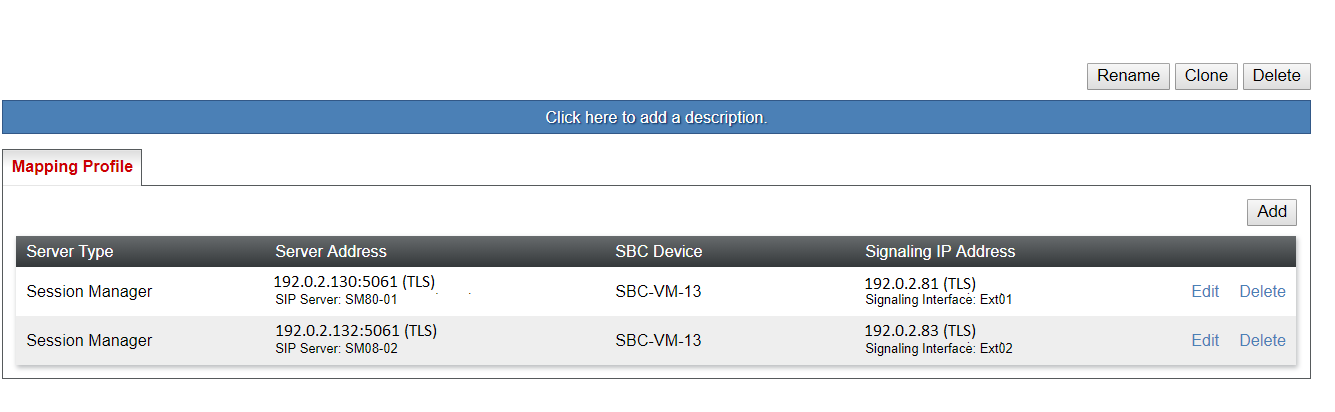


  5. In the Profile Name field, type the profile name.
  6. Click Next.
  7. In the Server Type field, click one of the following options:
    • Presence

    • Session Manager

    • Branch Session Manager

  8. Select the Custom check box. For the Session Manager or Branch Session Manager server types, you can click either check box.

    The Mapping Profile window changes to show different options.

    For Presence, the system displays options for Server Address and Mapped IP.

    For Session Manager or Branch Session Manager, the system displays options for SIP Server Profile, Server Address/Port, Server Transport, Mapped IP/Port, and Mapped Transport.

    Important:

    You must use the FQDN of the server in the Server Address option for Presence, Session Manager, and Branch Session Manager servers.

  9. Enter the required information for each option.
  10. Click Finish.

    The system adds the new mapping profile in the Mapping Profiles list and displays the settings for the profile entry that you created in the Mapping Profile tab.


  11. After adding a new mapping profile, you can do any of the following operations for a mapping profile:
    • (Optional) Click Click here to add a description to add a description of the mapping profile. After you add a description, click Finish. To change the description, click the displayed description.

    • Click Rename to change the name of the mapping profile.

    • Click Clone to duplicate the selected mapping profile under a new name. All profile entries assigned to the original mapping profile are copied over to the new mapping profile with the same options. You can then change those options as needed.

    • Click Delete to delete the mapping profile and all of its profile entries.

  12. For a mapping profile, you can do any of the following operations for the profile entries under the Mapping Profile tab:
    • Click the Add button to create a new profile entry within the selected mapping profile. The options for a new profile entry are the same as when you created a mapping profile the first time. When you add multiple profile entries to a mapping profile, the entries can be either standard or custom profiles.

    • Click Edit to change the options within a profile entry.

    • Click Delete to delete the individual profile entry within the selected mapping profile.