AVAYA DOCUMENTATION CENTER
Find answers to your technical questions and learn how to use our products
Administering Avaya Cloud Office Service Web
Configuring the Auto-Receptionist
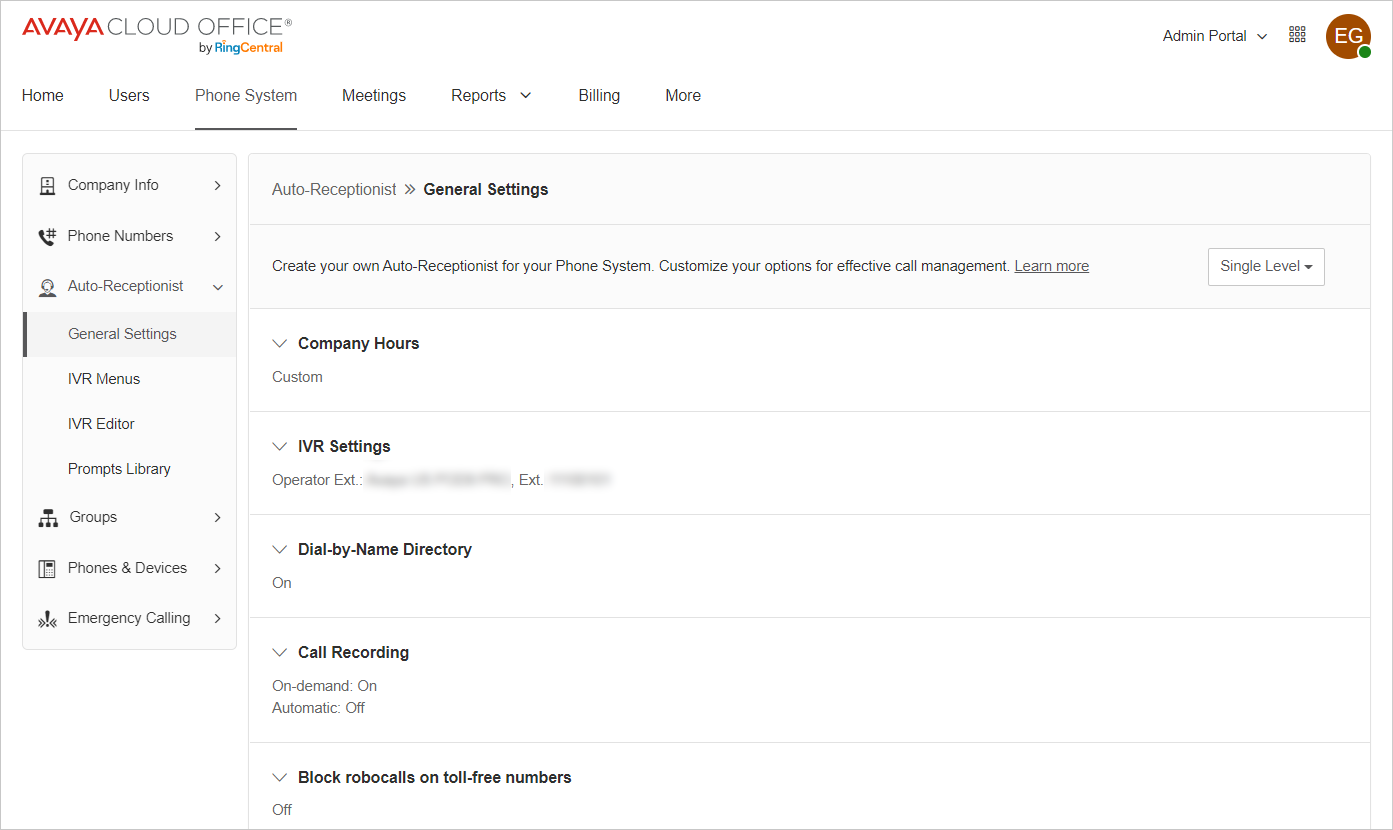
As an administrator, you can set up the Avaya Cloud Office™ Auto-Receptionist for your phone system to handle incoming calls. The Auto-Receptionist includes the IVR menu that callers hear when dialing the main company number and the automated system that connects callers to the exact internal user extension they need. This functionality enables calls to be answered automatically with a default or a custom recording.
To automatically answer incoming calls with the Auto-Receptionist, you must configure the company general settings. You can configure the following settings:
Company Hours: To set up custom company business hours.
IVR Settings: To set up basic Auto-Receptionist settings, such as company greeting, custom answering rules, operator extension, and zero dialing.
Dial-by-Name Directory: To set up extensions in the dial-by-name directory.
Call Recording: To configure automatic call recording for incoming calls.
Block robocalls on toll-free numbers: To set up robocalls blocking.
Regional Settings: To configure your regional date and time settings.
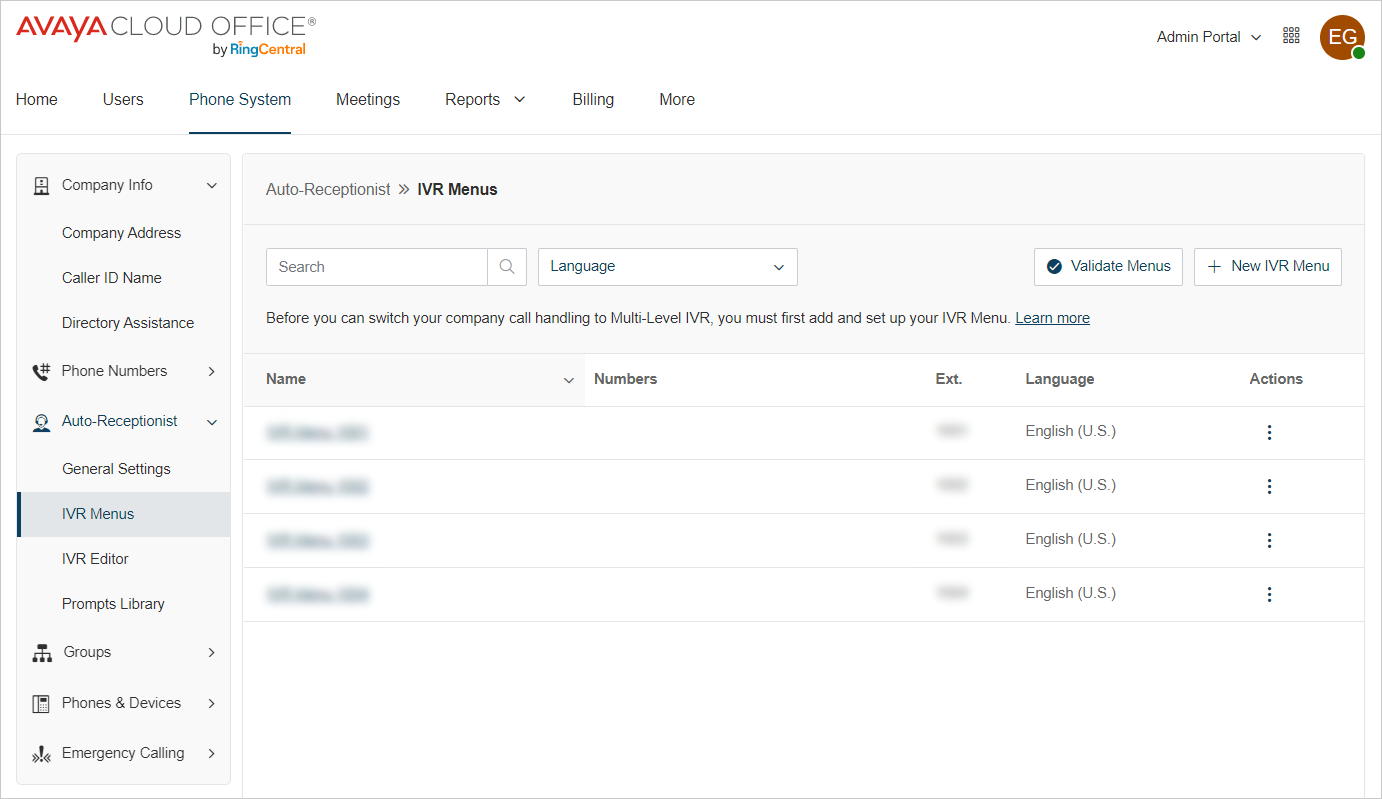
You can create an IVR menu to assign extensions to the key presses and set up a prompt for callers. With extensions assigned to key presses, the Auto-Receptionist transfers incoming calls to an extension when a caller presses the key connected to this extension.
Creating an IVR menu
About this task
Create an IVR menu and assign extensions to the key presses to distribute incoming calls according to the defined keys. After you assign the key presses, you must also add a prompt with the options of key presses for callers.
With extensions assigned to key presses, the Auto-Receptionist transfers incoming calls to an extension when a caller presses the key connected to this extension.
Procedure
- To see misconfigurations, on the IVR Menus screen, click Validate Menus.
Assigning a new phone number to an IVR menu
About this task
When configuring an Interactive Voice Response (IVR) menu for incoming call routing, note that it is initially assigned only an internal extension by default. To enable callers to access the IVR, you need to assign it a phone number—this can be a new local, toll-free, or vanity number, or one already available in your inventory.
Procedure
- Log in to Admin Portal.
- Click .
- Click the name of the IVR menu where you want to add a direct number.
- In the Direct Number section, click Add.
- On the Add Direct Number window, click Location, then select the country of the registry for the direct number.
- Click the Number Type dropdown, then select either Local Number, Toll-Free Number, or Vanity.
- Local Number
- Enter the relevant information into the State/Province and Area Code dropdowns.
- Check the boxes next to the numbers you want to add, then click Add Numbers.
- Toll-Free Number
- Select the area code prefix you want to use.
- Check the boxes next to the numbers you want to add, then click Add Numbers.
- Vanity Number
- Click the 8** dropdown to select your number’s prefix.
- Enter a combination of numbers and letters into the next two fields, then click Search to verify the number is available. You can use the asterisk (*) key as a wildcard when searching for numbers.
- Complete the CAPTCHA.
- Select the number to confirm, then click Add Numbers.
- Click Next.
- Confirm your choices:
For Toll-Free and Vanity numbers, click OK in the popup.
For local numbers, check the box next to the acknowledgment statement, then click Next.
- Click Done.
Next Steps
To confirm that your new direct numbers have been added to your IVR menu:
On the IVR Menus page, check the Numbers column for the new numbers.
On the Extension Info page, check for the number under Direct Number.
Selecting an existing phone number for an IVR menu
About this task
If you already have a phone number in your inventory, you can assign it by selecting it from the number inventory.
Procedure
- Click
 corresponding to the existing number that you want to assign and click Assign to.
Setting up Company hours greeting
About this task
The company greeting plays a default or a custom message for all callers.
After setting up the company greeting, incoming calls are routed to a fixed menu that provides options to dial an extension, access the dial-by-name directory, or connect to the operator.
Procedure
Setting up After hours greeting
About this task
The company greeting plays a default or a custom message for all callers.
Procedure
Configuring custom answering rules
About this task
You can create custom answering rules to enable special call routing during holidays, specific times of the day, or for designated callers.
Procedure
Setting up company operator
About this task
The company operator decides who receives calls when a caller presses 0 during your company greeting or a coworker's voicemail message.
Procedure
Setting up zero dialing
About this task
Set up the Zero Dialing option to define how the Auto-Receptionist handles callers who dial the 0 key while listening to a user or group extension greeting.
Procedure
Creating a multilevel IVR menu
About this task
A multilevel IVR system is a layered, interactive voice response technology that manages inbound calls and routes based on a series of predefined rules and settings.
Procedure
Configuring a multilevel IVR menu
About this task
The multilevel IVR menu efficiently route calls by presenting callers with a structured series of options and sub-menus, and directing complex issues to the correct extensions more accurately than a single-level menu.
Procedure
- Log in to the Avaya Cloud Office™ account.
- Go to .
- Click IVR Menu Test created.
- In the Extension Info tab, enter Extension Number.
- Select Language and Site from the drop-down options.
- In the Direct Number tab, click Add and add contact numbers based on location and number type.
- Click Assign later or Assign now to assign the number to the campaign registry and enable SMS service for the number.
- Click Delete IVR Menu to delete the IVR menu created.
Configuring the IVR prompts
About this task
This procedure outlines the steps to configure the IVR prompts.
Procedure
- Click IVR from the IVR Menus list to set up your IVR prompts.
- Click Prompt.
- To create your custom company greetings, select one of the following:
- Audio: Click to add a prompt to the prompts library. The prompt is a pre-recorded custom company greeting in .mp4 or .wav format that you can import to the system. It can also be a real-time recording through your phone or computer audio.
- Text-to speech: Click to type in your custom company greeting that the customers will hear when they call your company number through text-to-speech. Use the words hash, pound or star instead of # or *, if needed.
- Click Save.
Configuring the Key Presses
About this task
This procedure outlines the steps to configure the IVR key presses and add the rules that direct calls to their specified destinations.
Procedure
Configuring the Dial-by-Name Directory
About this task
The dial-by-name directory enables callers search and connect to the person they want to speak with. By default, callers can access all extensions, but you can set up your dial-by-name directory to exclude specific extensions from searches.
Procedure
- Click .
- Click the Enable the dial-by-name directory toggle to turn on the dial-by-name directory feature.
- To set up dial-by name-directory, adjust the following settings as required:
- Click Save.
Organizing the Auto - Receptionist
About this task
The purpose of organizing the auto - receptionist is to automate the management of incoming calls by improving their efficiency with a structured experience.
Procedure
- Log in to the Avaya Cloud Office™ account.
- Go to .
- Click Main Site.
- To customize options for call management, select from the following:
- Schedule
- Call Handling
- Call Recording
- AI Assistant
- Block Robocalls on toll-free numbers
- Regional Settings
Configuring Schedule
About this task
Configuring an auto-receptionist schedule directs businesses to automate call routing based on hours of operation. It ensures that the callers reach correct desination, even outside of the standard hours of work.
Procedure
- Log in to the Avaya Cloud Office™ account.
- Go to .
- Click Main Site.
- Click Schedule.
- To create a schedule for your business opening hours, select one of the following:
- 24 hours, 7 days a week: Select a 24/7 schedule to apply to your calls.
- Specific schedule: Select the days and operational hours in a week.
- Click Save.
Configuring Call Handling
About this task
Call handling settings updated during and after work hours enable the user to set custom call handling rules for the delegated line.
Procedure
- Log in to Admin Portal.
- Click .
- Select a delegated line and click the Call handling dropdown.
- Go to the Work hours tab.
- Click Edit schedule to select the work hours and time zone.
- Click Save.
- In the Incoming calls section, select the duration to ring for the owner and the delegate devices.
- Select the settings to ring the owner device and delegate devices simultaneously or with a delay.
- In the Missed calls section, select the settings to handle the calls when all lines are busy or the caller reaches the maximum waiting time.
- Click Set voicemail greeting for work hours to create a greeting for the callers to play during the selected schedule.
- Click Edit schedule to select the schedule and time zone.
- In the Voicemail greeting (work hours) section, click Edit to set the greeting to play.
- Click the After hours tab to check the existing schedule.
- Click Edit Schedule to select the schedule and time zone.
- Click Settings to edit the notification settings and toggle on the Voicemail to text section.
- Select the check box to avoid ringing the delegate devices as the owner is set to Do Not Disturb.
- Click Save.
Configuring Business hours
About this task
This procedure outlines the steps to configure the call handling settings during business hours. It includes creating a custom call routing for the incoming calls and company greetings.
Procedure
- Log in to the Avaya Cloud Office™ account.
- Go to .
- Click Main Site.
- Click Call Handling.
- To create a schedule for your Business hours, click Edit Schedule.
- Select one of the following options:
- 24 hours, 7days a week: Select a 24/7 schedule to apply to your calls.
- Specific schedule: Select the days and operational hours in a week.
- Click Save.
- From the Incoming calls will be routed to section, select one of the following options to route the incoming calls to the set destination:
Company greeting
IVR menu
A specific user
Multiple users - call queue
Voicemail
Announcement
Shared line
Limited extension
Site
- In the Company greeting section, click Edit.
- In the Set Greeting section, select Default or Custom from the dropdown list.
- In the View In section, select the language to view the information.
- In If Caller Enters no Action, select from the following options:
Connect to operator
Disconnect
- Click Done.
Configuring Closed hours
About this task
This procedure outlines the steps to configure the call handling settings during closed hours. It includes creating the custom call routing for the incoming calls and company greetings.
Procedure
- Log in to the Avaya Cloud Office™ account.
- Go to .
- Click Main Site.
- Click Call Handling.
- To create a schedule for your Closed hours, click Edit Schedule.
- Select one of the following options:
- 24 hours, 7days a week: Select a 24/7 schedule to apply to your calls.
- Specific schedule: Select the days and operational hours in a week.
- Click Save.
- From the Incoming calls will be routed to section, select one of the following options to route the incoming calls to the set destination:
Company greeting
IVR menu
A specific user
Multiple users - call queue
Voicemail
Announcement
Delegated ine
Shared line
Limited extension
Site
- In the Company greeting section, click Edit.
- In the Set Greeting section, select Default or Custom from the dropdown list.
- In the View In section, select the language to view the information.
- In the If Caller Enters no Action section, select from the following options:
Connect to operator
Disconnect
- Click Done.
Configuring Custom rules
About this task
This procedure outlines the steps to configure the multi-condition advanced call handling rules for the custom answering process. It includes creating the custom call answering rules for the caller ID, called number, and the scheduled hours in the week or on holidays.
Procedure
- Log in to the Avaya Cloud Office™ account.
- Go to .
- Click Main Site.
- Click Call Handling.
- To configure Custom Rules, click Edit Custom Rule.
- Click Add Rule to add the multi-condition advanced call handling rules.
- In the Conditions tab, select the Caller ID check box to add a phone number or a contact name.
- Select the Called Number check box to add a number from the extension database.
- Select the Date and/or time check box to select the schedule, day, and hours of operation.
- Select from the following options:
Weekly Schedule
Specific Date Range
Use Work or After Hours Schedule
- Select the days of the week and the schedule for the operation.
- Click Apply to and select from the following options:
All weekdays
Every day
- Click Next.
- In the Call Handling section, select one of the following options to match the incoming calls to the set rule:
Company greeting
IVR menu
A specific user
Multiple users - call queue
Voicemail
Announcement
Delegated line
Shared line
Limited extension
Site
- In the Company greeting section, click Edit.
- In Set Greeting, select Default or Custom from the dropdown list.
- In the View In section, select the language to view the information.
- In If Caller Enters no Action, select from the following options:
Connect to operator
Disconnect
- Click Done.
- Click Next.
- In the Summary section, click Edit to change previous settings.
- Click Save.
Configuring Settings
About this task
This procedure outlines the steps to configure the settings for the custom answering process. It includes creating the custom call answering rules for the caller ID, called number, and the scheduled hours in the week or on holidays.
Procedure
- Log in to the Avaya Cloud Office™ account.
- Go to .
- Click .
- Click Settings.
- In the Default IVR Settings section, select from the following general navigation keys to set the menu with customized options for the keys and call routing to the extension or disconnecting the call:
Repeat menu greeting
Return to root menu
Return to previous menu
- If the caller enters no action after the prompt is played three times, then select from the following options:
Disconnect the call
Connect to extension
- In the Zero Dialing section, define the action when a caller presses 0 while listening to a user or group extension greeting:
Connect to company greeting
Follow incoming call routing selection
Connect to extension
Do nothing
- In the Call / Fax / SMS Recipients section, for an operator, click Select Extension to receive calls when a caller presses 0 during the playing of the company greeting or an extension voicemail message.
- Click Done.
- For Fax / SMS recipient, click Select Extension to select the user.
- Click Done.
- Click Save.
Setting up on-demand call recording
About this task
You can set up on-demand call recording so users in your phone system can record calls from their devices. On-demand call recordings are saved for 90 days.
When on-demand call recording is turned on, users can record phone calls at any time with the press of a button. A notification will play to callers when the recording starts and when it stops.
Call recording regulations vary by geographic region. If your account includes multiple sites, you can update call recording settings for each site individually.
Procedure
Setting up automatic call recording
About this task
You can set up Automatic Call Recording (ACR), when you want to automatically record all calls to a specific user or group extension. Recordings are saved in your Call Log.
When ACR is turned on, recording will start at the beginning of each call and stops after the call ends. ACR feature is turned off by default.
Procedure
Blocking robocalls on toll-free numbers
About this task
Robocalls are automated phone calls that deliver pre-recorded messages using auto-dialing systems. These calls can disrupt workflows, overload voicemail systems, and have a huge impact on the productivity of a business.
As an administrator, you can enable the blocking of robocalls for the sites of your company.
Procedure
Setting up regional settings
About this task
As an administrator, you can configure the time zone and time format for your company sites. The time format option can be set to 12 hour or 24 hour format. You can also configure the home country code, user language, greetings language, and regional format in this feature.
Procedure
12 h (AM/PM)
24 h
Voice Prompts Library
Prompt recordings provide callers with keypress instructions during calls. These prompts can be pre-uploaded and stored in the Prompts Library, and later used through the IVR tool.
When creating a new IVR menu in your phone system, it is important to add a prompt that guides callers on which keys to press. You can manage this within the Prompts library by doing the following:
Import prompts
Record prompts
Assigning a prompt to an IVR menu
View prompts
Download an IVR menu prompt
Delete an IVR menu prompt
Viewing Prompts in the Prompts Library
About this task
When creating a new IVR menu in your phone system, it is essential to include prompts that guide callers on which keys to press. These prompts can be uploaded, recorded, or assigned, and are managed within the Prompts Library.
After you upload or record prompts for your IVR menu, you can access and manage them within the Prompts Library.
If you have not uploaded or recorded any prompts yet, the Prompts Library will display the following message: No prompts found. You can import prompts from a local computer or record prompts using a phone or computer.
Procedure
Importing Prompts to the Prompts Library
About this task
You can import the prompt assigned to your IVR menu. Importing prompts enables quick configuration without requiring to create or upload new audio files.
Procedure
Recording Voice Prompts from the Prompts Library
About this task
You can record the prompt assigned to your IVR menu.
Procedure
Assigning a prompt to an IVR menu
About this task
After creating a prompt, you can assign it to an IVR menu for use in your call flow.
Procedure
- Click .
- Click the name of the IVR menu where you want to assign a prompt.
- In the left column, click Prompt.
- Select an option in the Prompt Mode section, which includes the following:
Audio
Text to speech
- Select the Audio option to use an existing audio prompt.
- Select the Text to speech option to use typed text and generate an automated voice prompt.
- Type your prompt message in the Text box field to generate a speech-based audio prompt.
- Click Save.
Downloading an IVR menu prompt
About this task
You can download existing IVR menu prompts from Prompts Library for reuse or customization.
Procedure
Deleting an IVR menu prompt
About this task
You can delete existing IVR menu prompts from Prompts Library.
Procedure
IVR Visual Editor
As an administrator, you have the option in Avaya Cloud Office™ to create and modify multilevel IVR menus through the Visual IVR Editor. The visual IVR editor is an easy-to-use graphical interface that enables administrators to add IVR menus and assign them to extensions. It also provides administrators the option to edit and update an existing IVR menu.
After saving, Avaya Cloud Office™ validates the IVR menu and notifies if there are any errors. You can also record menu prompts directly within the editor or import pre-recorded prompts.
Note:
Only account administrators or users with administrative privileges can access the visual IVR editor.
Insert ing title
About this task
Before you begin
Procedure
Example
Next Steps
Viewing the visual editor help
About this task
You can access visual editor help from the Visual IVR Editor window.
Procedure
- Log in to Admin Portal.
- Click .
- In the Visual IVR Editor section, click Launch Visual IVR Editor.
- Click the i icon at the top-right to learn more and access the introduction.
- Click Take a Tour for a step-by-step interactive tutorial.
- Click Learn More to read more information about the Visual IVR Editor.
Creating an IVR Menu in the Visual Editor
About this task
You can create and modify IVR menus using the Visual IVR Editor.
Procedure
Insert ing title
About this task
Before you begin
Procedure
Example
Next Steps
Insert ing title
About this task
Before you begin
Procedure
Example
Next Steps
Editing the IVR menu settings
About this task
This procedure outlines the steps to customize the menus for better organization and functionality.
Procedure
- Click
 in the primary IVR menu and select Settings.
Extension Info
Prompt
Key Presses
Extension Number: Enter the number to route calls to the IVR menu.
Menu Name: Enter the name and number to identify an IVR menu.
Language: Select the preferred language from the dropdown list to use for the IVR menu text-to-speech greeting.
Site: Select a site from the dropdown list to assign the IVR menu.
Audio: Click to assign one of the pre-recorded prompts imported from your computer to your Avaya Cloud Office account.
Text to speech: Click to define your greeting by typing it in the box provided.
Use default settings: Click to select the pre-assigned settings.
Specify: Click to modify the settings.
Disconnect the call
Connect to extension
Duplicating an IVR menu
About this task
This procedure outlines the steps to duplicate an IVR menu and place it under other menus to manage larger IVR menu trees across various departments with similar menu options.
Procedure
- Click in the sub-menu and select Duplicate.
Create Linked Copy
Create Unlinked Copy
- Click
 on the sub-menu to unlink a copy of a sub-menu.
Deleting an IVR Menu
About this task
This procedure outlines the steps for deleting the existing IVR menu.
Procedure
- Log in to the Avaya Cloud Office™ account.
- Go to .
- Below the Visual IVR Editor, click Launch Visual IVR Editor.
- Click the Open Existing Menu icon at the top left corner of the Visual IVR Editor interface. This will present the list of existing menus.
- Click the IVR Menu to edit. The preview of the IVR menu is displayed in the right pane.
- Click Open.
- Click the Clear Workspace icon to delete.
- Click Yes in the confirmation window to delete the IVR workspace.
Exporting IVR XML file
About this task
An IVR XML file defines the call flow and interactions for an Interactive Voice Response system. This file acts a script that an IVR platfrom interprets to play audio prompts, recognize user input, and route calls. This procedure outlines the steps to export the IVR XML file.
Procedure
- Log in to the Avaya Cloud Office™ account.
- Go to .
- In the XML Editor section, click Export IVR XML File.
- Edit the downloaded XML file to change IVR menu names, update extension numbers, and add more menu destinations and functions.
- Save the file after making necessary changes.
Importing XML File
About this task
This procedure outlines the steps to import an XML file.
Procedure
- Log in to the Avaya Cloud Office™ account.
- Go to .
- Edit the downloaded sample export IVR XML file to create your IVR menus and save.
- Ensure the XML file adheres to the correct format to prevent errors.
- In the XML Editor section, click Import XML file to upload the XML file.
- Select the XML file and click Open.
- The IVR Import Issues window displays the detected configuration issues.
- Click Abort Import to resolve the error messages.
- Click Accept and Continue to accept the issues and resolve them later.
IVR XML Editor
XML Editor
The XML Editor helps you create and manage IVR menus on the Avaya Cloud Office™ account for quick deployment or bulk changes.
Download Sample IVR XML Files
Download the following sample IVR XML Files:
Single Level IVR: Creates one IVR menu.
Multi-level IVR: Creates an IVR menu tree that uses multiple sub-menus to offer a more complex list of options.
You can export and import IVR XML files. Any change to the IVR menu overwrites the imported XML file. After exporting the IVR XML file, save a new XML file with the changes made.