AVAYA DOCUMENTATION CENTER
Find answers to your technical questions and learn how to use our products
Administering Avaya Cloud Office Service Web
Managing templates from Admin Portal
As an administrator, you can use templates to simultaneously apply the same settings to multiple users or extensions. Templates provide consistency across the solution in your company and are easy to update to meet your business needs. From Admin Portal, you can create the user settings or call handling rules template types. You can also copy existing templates to create new templates with the same settings. Avaya Cloud Office™ provides you with the following templates:
User Settings: To apply the same settings to multiple users.
Call Handling: To apply the same call handling settings for users who work the same business hours.
Key Templates: To define phone key layouts applied to multiple user devices.
Call Queue Settings: To apply the same settings to multiple call queues.
Limited Extension: To apply the same settings to multiple limited extensions.
Applying templates can take a couple of minutes. After the process is complete, Avaya Cloud Office™ sends you a notification email.
Adding a permission role template
About this task
Create a permission role template to apply the same permission role to multiple users simultaneously. For example, you can use a permission role template to change the permission level of multiple users from Standard International to a higher role.
Procedure
Adding a user groups template
About this task
Create a user groups template to assign multiple users to the same groups simultaneously. You can assign users to one or multiple user groups. When you create a template for multiple groups and apply it to users, these users become members of multiple user groups.
Procedure
Adding a business hours template
About this task
Create a template to apply the same call handling settings for users who work the same business hours. After you apply a business hours template to users, Avaya Cloud Office™ handles incoming calls to these users based on the schedule and call handling option configured in the template. The call handling options you can select from are as follows:
Ring my devices
Send to voicemail
Play an announcement
Forward to extension
Forward to external number
Procedure
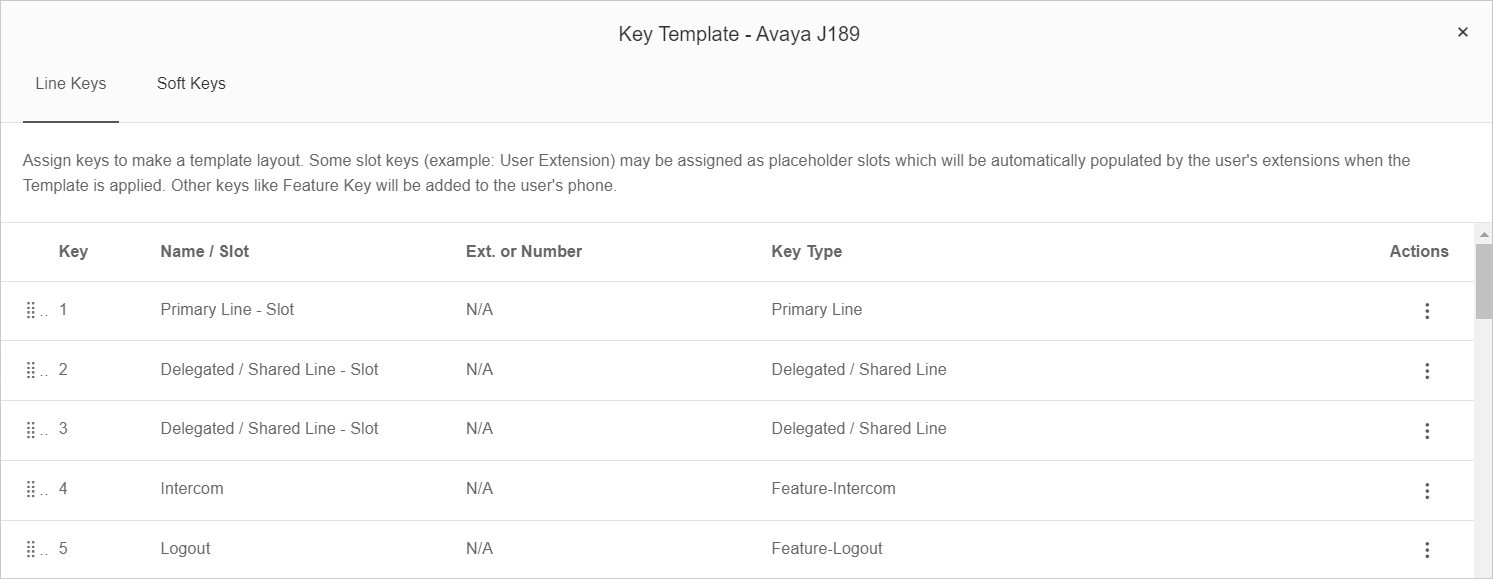
Adding a key template
About this task
Create a key template to define phone line and soft key layouts applied to multiple user devices. You can assign the following line keys:
Primary line slot
Delegated or shared line slot
Extension slot
Speed dial
Feature
Avaya Cloud Office™ assigns the slot line keys as placeholder slots that extensions automatically populate when the template is applied. For soft keys, you can assign speed dials and features.
After you create and apply a key template, Avaya Cloud Office™ reboots the user devices to implement the template. If a user has an active call, the device reboots after the call is complete.
Procedure
- To assign a line key, on the Line Keys tab, in the key row, click
 and do one of the following:
Click Assign Primary Line - Slot.
Click Assign Delegated / Shared Line - Slot.
Click Assign Extension - Slot.
Click Assign Speed Dial, enter the name and number and click Assign.
Click Assign Feature, select the required feature and click Assign.
- To assign a soft key, on the Soft Keys tab, in the key row, click and do one of the following:
Click Assign Speed Dial, enter the name and number and click Assign.
Click Assign Feature, select the required feature and click Assign.
- Click Done.
Configuring a template with emergency response location settings
About this task
Configure an emergency response location template that you can apply to multiple users. With an emergency response location template, you can override user settings and set an emergency response location for unconfigured devices.
Procedure
- On the main page, click .
- Click Add User Settings Template.
- In the New Template Name field, type a name for the template.
- Click the newly created template.
- Click Devices.
- Under the Emergency Response Location section, click Edit Location.
- On the Emergency Response Location window, you can do one of the following:
Select an organization-designated emergency location from the list.
Add a new emergency location.
- Click Done.
- Under the Emergency Response Location section, select the Override user settings check box.
- Scroll down and click Save.
Applying a template with emergency response location settings to users
About this task
Apply a template with emergency response location settings to change the response location for multiple users.
Before you begin
Ensure that you create a template with location settings for emergency response.
Procedure
- On the main page, click .
- In the list, select the check boxes of the users to apply templates.
- On the taskbar, click Apply Template.
- From the list, select the emergency location template.
- Click Apply Template.
- Click Continue.
- In the dialog box, click Continue.
- Optional To notify the affected users by email, select the Notify active users of this change by email check box.
- Optional To send a copy of the notification email to additional recipients, type the email addresses in the field.
- Click Apply Template.
Adding a limited extension template
About this task
Create a limited extension template to simultaneously apply the same settings on multiple limited extensions. You can apply a limited extension template only to the enabled limited extensions.
Procedure
Copying a template
About this task
Copy an existing template to create another template with the same settings.
Procedure
- Next to the template to copy, click .
Applying a template to users
About this task
Apply an existing template to multiple users to assign the same settings to these users. You can apply a template to users that are not members of a call queue group. When you apply a template to users, you can notify the users by sending an automatic email to these users.
The process of applying a template takes several minutes. After the process is complete, Avaya Cloud Office™ sends you an email.
Procedure
- Next to the template to apply, click .
Deleting a template
About this task
Delete a template to permanently remove this template from Avaya Cloud Office™.
Procedure
- Next to the template to delete, click .