Adding a new enterprise LDAP server

Last Updated : Jun 10, 2026 |

About this task

Use this procedure to add a new LDAP server to Avaya Aura® Device Services. After you have added a server, you cannot modify the server URL or remove the LDAP data source.

Before you begin

If you are planning to use multiple authentication domains, configure the UID mapping attributes as specified in Configuring the UID mapping attributes when using multiple authentication domains.

Procedure

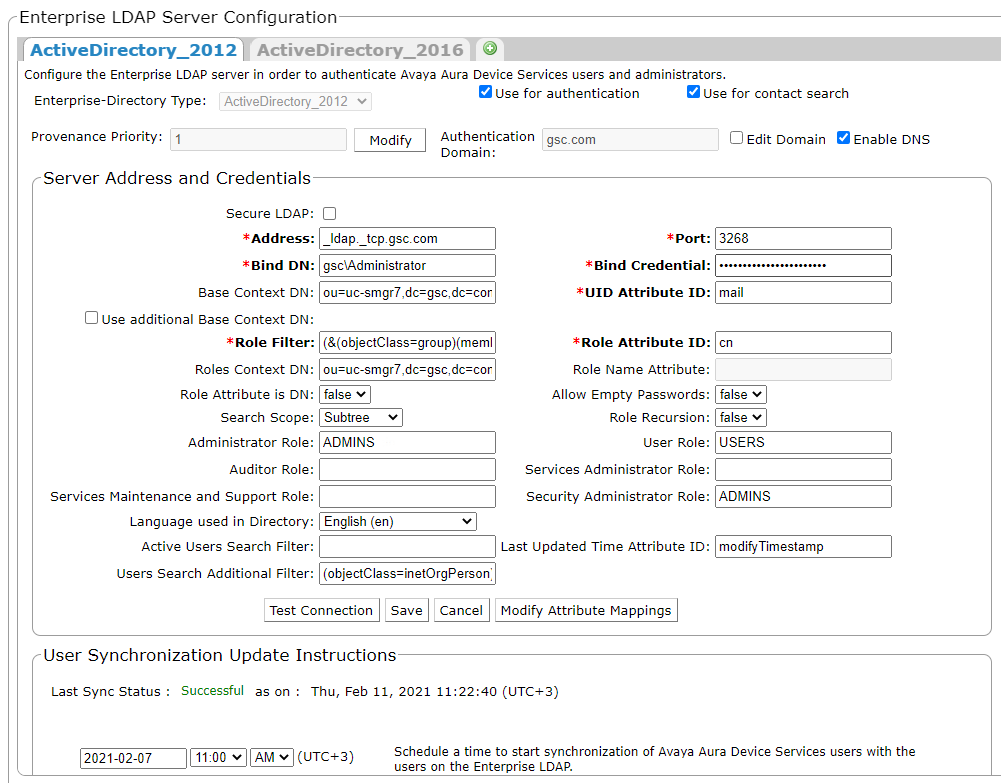
  1. On the Avaya Aura® Device Services web administration portal, navigate to Server Connections > LDAP Configuration > Enterprise Directory.

    Avaya Aura® Device Services displays the Enterprise LDAP Server Configuration page.

    A screen shot of the Enterprise LDAP Server Configuration page with configured LDAP server settings.
  2. Click the plus (+) icon.

    Avaya Aura® Device Services displays the New Directory tab.

  3. In the Enterprise-Directory Type field, click the LDAP server directory that you want to add.
  4. In the Provenance Priority field, type the priority of the enterprise LDAP server directory.
  5. Specify the method Avaya Aura® Device Services uses to discover the LDAP server:
    • To discover the LDAP server using DNS SRV entries, select the Use DNS check box and in Address specify the name of a domain for which you want to discover LDAP servers.

    • To discover the LDAP server using the server IP address or FQDN, clear the Use DNS check box and specify the IP address or FQDN in the Address field.

    For more information about these attributes, see Enterprise LDAP Server Configuration field descriptions. For more information about LDAP server discovery using DNS SRV records, see LDAP server discovery using DNS SRV records.

  6. In the Server Address and Credentials section, specify the parameters of the enterprise LDAP server directory.

    For more information about attributes, see Enterprise LDAP Server Configuration field descriptions.

  7. If you want to use the new server for authentication and authorization, do the following:
    1. Select the Use for Authentication check box.
    2. Configure role-related attributes, such as Role Filter, Role Attribute ID, and Role Context DN.
  8. If you want to use the new server for contact search, select the Use for contact search check box.
  9. Click Save.

Next Steps

For each LDAP server configured on Avaya Aura® Device Services, set up a provenance priority order.