Configuring exchange server

Last Updated : Jul 15, 2021 |

About this task

On the exchange server an access group is created. Any email users requiring Exchange integration can then added to that group and their email address set against their user configuration in the IP Office. A service account is also created for the IP Office voicemail server.

Note:

In a multi-domain Exchange setup (Exchange and AD are part of a sub-domain) or Exchange with a changed default accepted domain (Exchange email domain name is different from the AD domain), additional configuration is required.

Procedure

  1. Create an access group for Voicemail Pro:
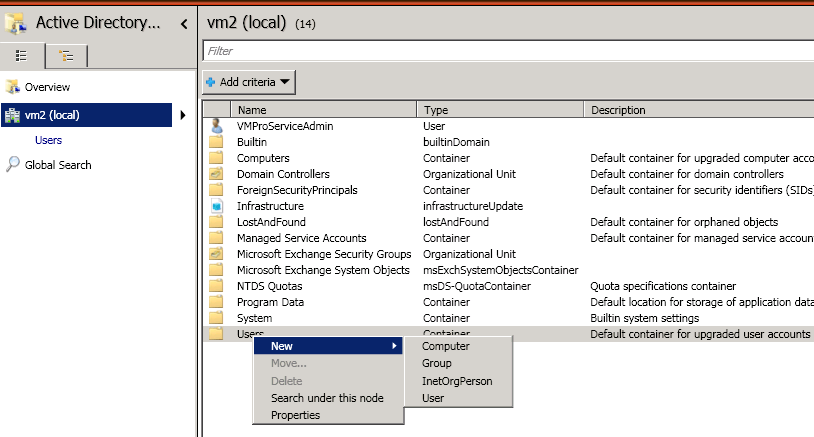
    1. Open the Active Directory Administrative Center. In the console, select the domain. Right-click on Users and select New and then Group.
    2. For our example we have used the Group Name as vmpro. Set the Group Scope to Universal and Group type to Distribution. Click OK.
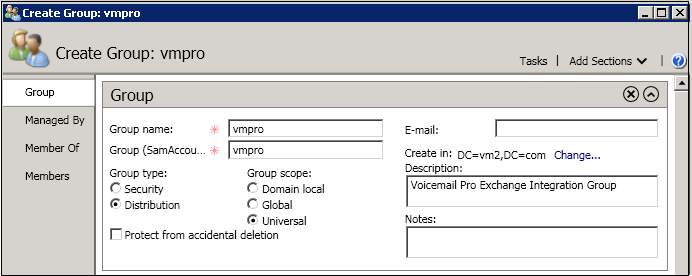
  2. Create an Exchange service account:

    In the Exchange Management Console, create a Service Account. For our example we created one called VMProServiceAdmin. This becomes the user identity that the voicemail server needs to use to forward users messages to the Exchange server.

  3. Assign application impersonation rights to the group:

    Open Exchange Management Shell and execute following commands. In these and the following command, where applicable replace the domain name, group name and exchange service name in the commands with used in the previous steps.

    1. Create a management scope called vmpro-scope with a filter for the group created above using the following command:[PS] C:\Windows\system32>New-ManagementScope -Name:vmproscope -RecipientRestrictionFilter {MemberofGroup -eq "CN=vmpro, CN=Users,DC=vm2,DC=com"}
    2. Assign the impersonation permissions to the VMProServiceAdmin user using the following command:[PS] C:\Windows\system32>New-ManagementRoleAssignment -Name:VMProImpersonationRole -Role:ApplicationImpersonation -User:VMProServiceAdmin@vm2.com -CustomRecipientWriteScope:vmpro-scope
  4. Exchange Web Service Configuration:

    Configure the exchange web service external URI using the following commands:

    1. Use the following command to get the Exchange server's identity: [PS] C:\Windows\system32>Get-WebServicesVirtualDirectory | fl Identity Identity : WIN-UM2UN5GIKMG\EWS (Default Web Site)
    2. Use the following command to set the external URL for the identity: [PS] C:\Windows\system32>Set-WebServicesVirtualDirectory -Identity "WIN-UM2UN5GIKMG\EWS (Default Web Site)" -ExternalUrl https://win-um2un5gikmg.vm2.com/EWS/Exchange.asmx
    3. The final properties of virtual directory should show correct URL. Check this using the following command: Get-WebServicesVirtualDirectory | fl
  5. Autodiscovery Service configuration:
    1. Use the following command to set the URL for EWS auto-discover. [PS] C:\Windows\system32>Set-ClientAccessServer -Identity "WIN-UM2UN5GIKMG" -AutoDiscoverServiceInternalUri https://win-um2un5gikmg.vm2.com/autodiscover/autodiscover.svc
    2. The final properties of virtual directory should show correct URL. Test with following command: Get-ClientAccessServer | fl AutoDiscoverServiceInternalUri
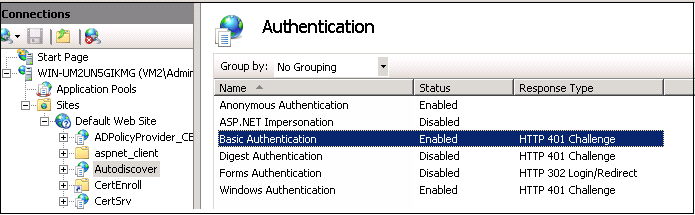
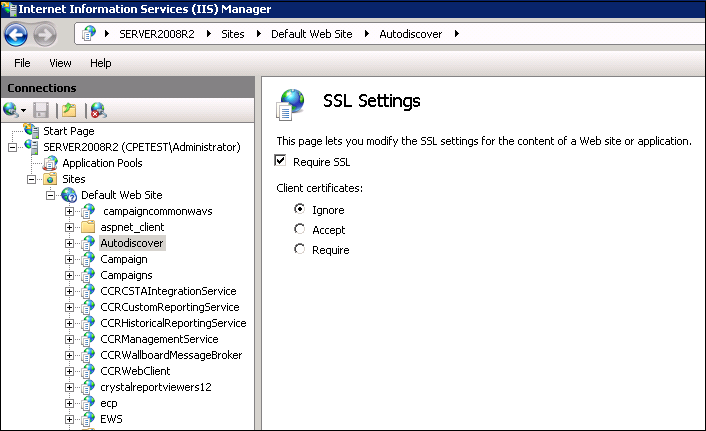
  6. Configure the IIS options for EWS and Autodiscovery:

    Using the IIS management console.

    1. Expand the Default Web Site settings and select EWS. Enable Basic Authentication.
    2. Select Autodiscover. Enable Basic Authentication.
    3. Check that SSL is enabled for EWS and Autodiscover.