

AVAYA DOCUMENTATION CENTER
Find answers to your technical questions and learn how to use our products
Administering IP Office Voicemail Pro
Queue ETA Action
The Queue ETA action plays the estimated time to answer (ETA) in minutes to a caller in the queue of calls for a hunt group. It is not used for calls queued for a user.
The ETA is supplied by the IP Office when it requests a queue or still queued announcement message to be played to a caller. It is calculated based on the queued time in the previous hour of the last 5 queued and answered calls. It is always rounded up to the nearest minute. For an example, see Customizing Queuing .
A simply announcement is used that does not include queue position and estimated time to answer. However if required the Queued and Still Queued call flow start points can be added and customized using actions including this one.
When the system presents calls to a hunt group on the IP Office, IP Office uses the call priorities followed by the call waiting times to order the calls in the queue. By default, internal callers are assigned Low priority while the priority of external callers is set by the IP Office Incoming Call Route used to route the call (default also Low).
Do not mix calls of different priorities if you are using Voicemail Pro to announce the queue estimate time to answer (ETA) and the queue position to callers, since those values will no longer be accurate when a higher priority call is placed into the queue. Note that in such a situation, Voicemail Pro will not increase a value already announced to a caller.
The IP Office Manager option Synchronize calls to announcements should not be used with call flows that include this action.
Procedure
- Click the
 Queue Actions icon.
 - Select
 Queue ETA.
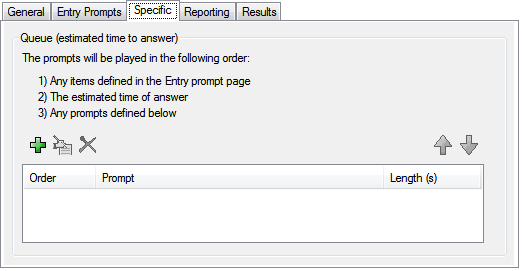
 - Select the Specific tab. Set the options as required.
Result
This action has the following result which can be connected to a further action:
Next: Route the call to a following action in the call flow. This connection can be followed even after the caller has hung up if the Start action option Complete Sequence has been selected.