

AVAYA DOCUMENTATION CENTER
Find answers to your technical questions and learn how to use our products
Avaya Device Adapter Snap-in Reference
Starting Nortel Migration Tool and assigning a station type to the CS 1000 endpoints
- Start the Nortel Migration Tool (NMT) by selecting from the menu.
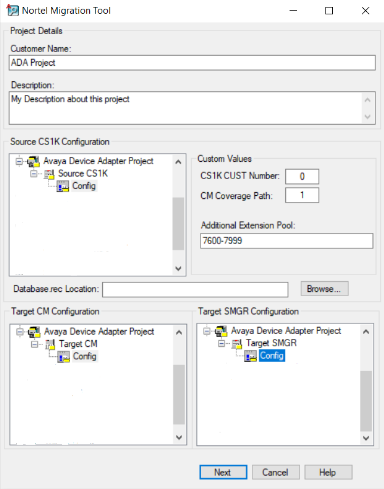
- Enter the following information to begin the migration:
ADDITIONAL INFORMATION:
-
Customer name.
-
Customer description.
-
Source CS 1000 CUST number.
-
Additional extension pool — a range of numbers used to create stations with a unique primary extension.
-
Source CS 1000 deployment.
-
Target System Manager and Communication Manager deployment.
-
Select FKL Integration.
-
Click Browse, navigate and select the Database.rec file.
 Note:For more information, see Feature Key Label (FKL) migration for UNIStim endpoints.
 -
- Click Next.
- A progress window is displayed. Note any errors or warnings displayed during the migration process.
ADDITIONAL INFORMATION:
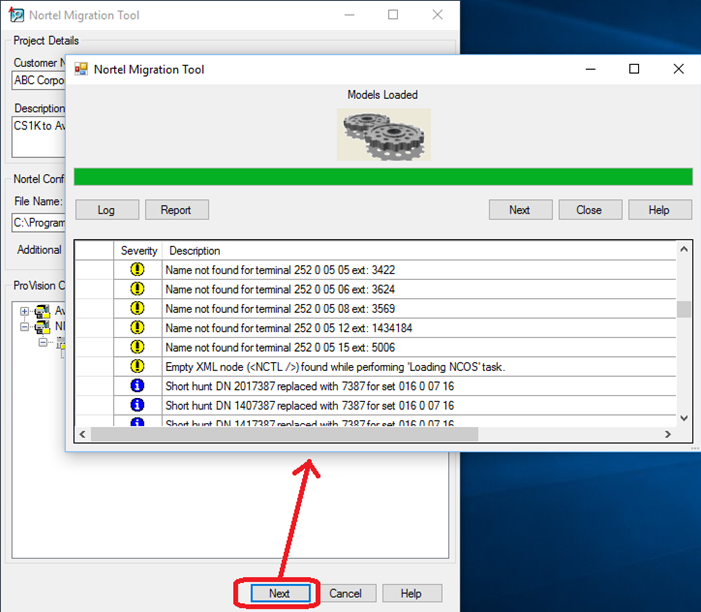
- Click Next.
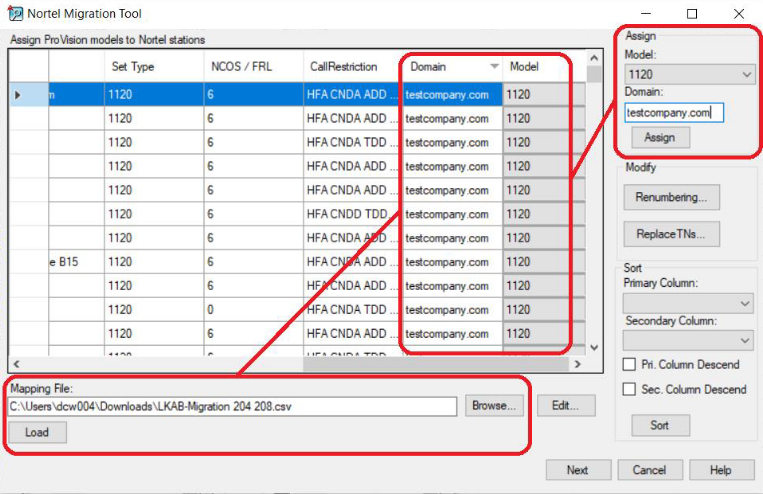
- Assign each migrated CS 1000 set a Communication Manager station type and SIP domain.
ADDITIONAL INFORMATION:Note:
-
Assign XPORT9408 to all virtual stations.
-
Station types are populated from the target project Communication Manager Model window. The SIP domain is provided by the customer.
-
- For each Call Center (CC) endpoint, apply the required model.
ADDITIONAL INFORMATION:Note:You can apply the default CS1K-IPCC model or create custom models. The field values defined in custom models, for example, buttons override the field values generated by NMT.
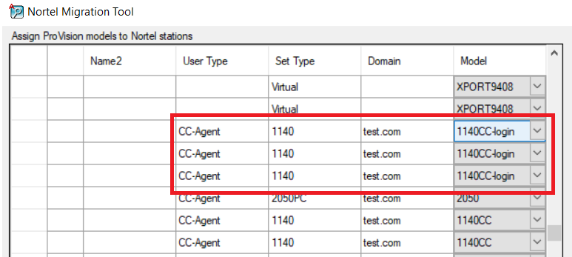 CC endpoints are identified as CC-Agent or CC-Supervisor.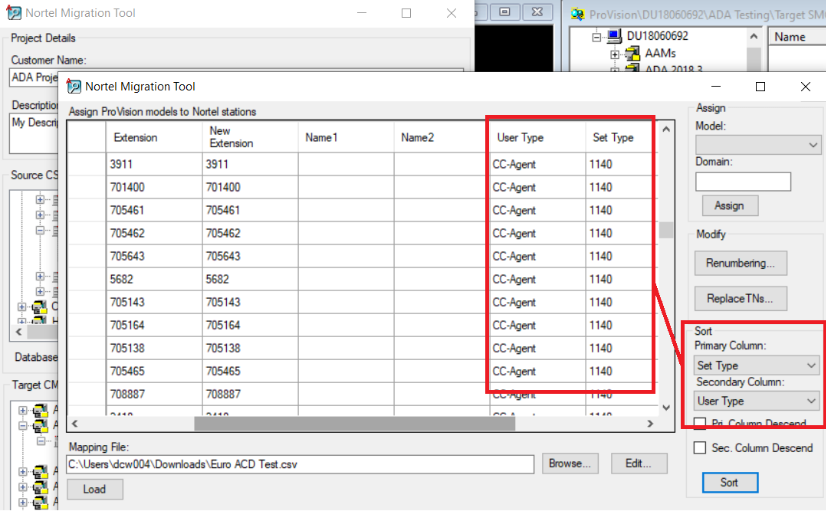
- Create a TN mapping file.
ADDITIONAL INFORMATION:For more information about the TN mapping file, see TN mapping file requirements.
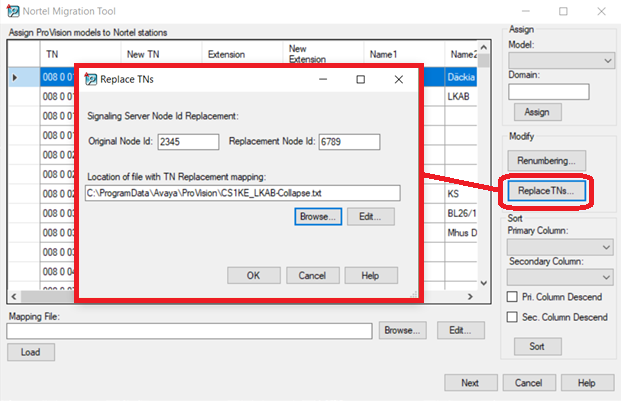
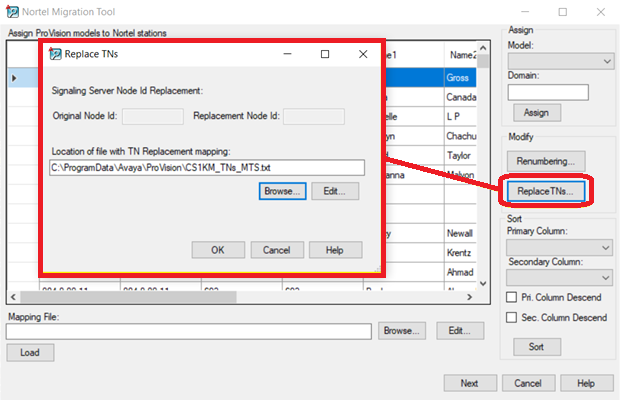
- Click Replace TNs.
- In the Replace TNs dialog box, click Browse.
- Select the TN mapping file.
- For CS 1000E, type the old and new node IDs in Original Node Id and Replacement Node Id fields.
ADDITIONAL INFORMATION:You can use the original node ID as the replacement node ID if it is not already assigned on the Avaya Breeze® platform cluster.For CS 1000M, the Original Node Id and Replacement Node Id fields are disabled, as CS 1000M is a TDM system which is directly wired and does not have node IDs.ADDITIONAL INFORMATION:
- Click OK.
- Click Next.
STEP RESULT:When the migration is complete, a final progress window is displayed.
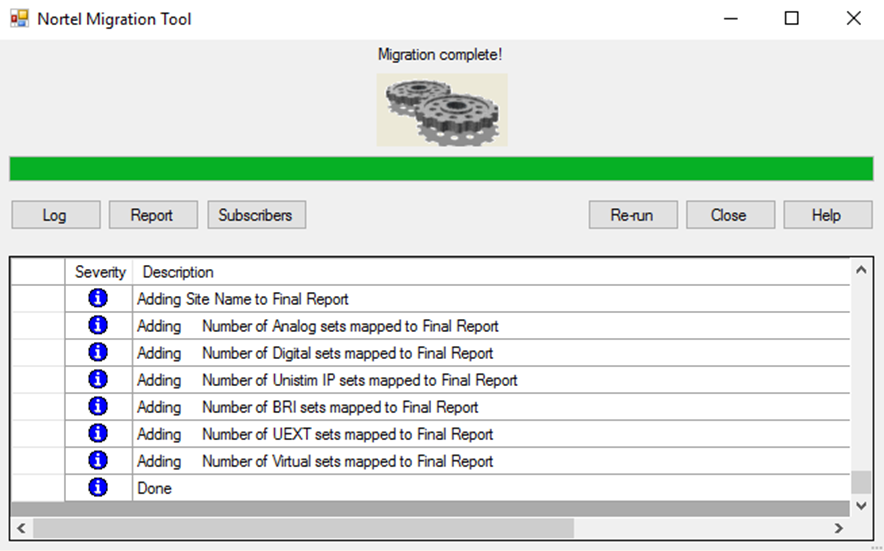
- To view logs, a final report, and all station-related data processed during migration, click the following :
-
Log
-
Reports
-
Subscribers
ADDITIONAL INFORMATION:NMT generates an .xlsx file that contains log entries, reports, or subscriber information.For CC endpoint migrations, log entries provide additional details for each CC station added. -
- Click Close.
Next steps
Re-configure the TN data on endpoints.
For more information, see Re-configuring TN data on endpoints.